EasyManua.ls Logo

Lux Products P711V User Manual

Default Icon
27 pages
To Next Page IconTo Next Page
Page #1 background imageLoading...
Page #1 background image
CAUTIONS AND WARNINGS . . . . . . . . . . 2
SYSTEM COMPATIBILITY . . . . . . . . . . . . 3
FEATURES . . . . . . . . . . . . . . . . . . . . . . . 4
TOOLS YOU MAY NEED . . . . . . . . . . . . . . 4
MOUNTING LOCATION . . . . . . . . . . . . . . 5
REMOVE OLD THERMOSTAT . . . . . . . . . . 5
INSTALL THERMOSTAT BASE . . . . . . . . . 6
WIRING INFORMATION . . . . . . . . . . . . . . 7
WIRING DIAGRAMS . . . . . . . . . . . . . . . . 9
COMPLETE THE INSTALL . . . . . . . . . . . 15
FRONT PANEL ITEMS . . . . . . . . . . . . . . 17
SYSTEM CONFIGURATION AND SETUP
OPTIONS . . . . . . . . . . . . . . . . . . . . . . . 18
OPERATING INSTRUCTIONS . . . . . . . . . 20
TEMPERATURE PROGRAMS . . . . . . . . . 22
ADVANCED FEATURES . . . . . . . . . . . . . 24
BATTERY REPLACEMENT . . . . . . . . . . . 25
TECHNICAL ASSISTANCE . . . . . . . . . . . 25
LIMITED WARRANTY . . . . . . . . . . . . . . 26
MERCURY NOTICE . . . . . . . . . . . . . . . . 26
WARNING: Use Energizer
®
or DURACELL
®
Alkaline Batteries Only.
Energizer
®
is a registered trademark of Eveready Battery Company, Inc.
DURACELL
®
is a registered trademark of The Procter & Gamble Company
© 2015 LUX PRODUCTS CORPORATION. ALL RIGHTS RESERVED
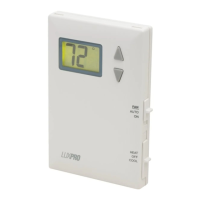
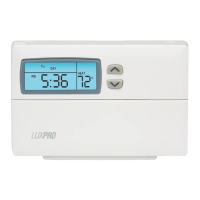
7-DAY or 5/2-DAY PROGRAMMABLE,
OR NON-PROGRAMMABLE VERTICAL THERMOSTAT
I NS TA L L AT I O N A N D O P E R AT I N G I N S T R U C T I O N S
IMPORTANT!
Please read all of these instructions carefully before beginning
installation.
Label every wire terminal designation on your existing thermostat wiring
before removing your old thermostat.
Ignore the color of the wires since they may not comply with any
standard. Please connect wires using the terminal letter designations.
Thank you for your confidence in our product. To obtain the best results from
your investment, please read and follow the installation procedures carefully, and
one step at a time. This will save you time and minimize the chance of damaging
either the thermostat or possibly your heating and cooling system. These
instructions may contain information beyond that which may be required for your
particular installation.
52207
P 7 1 1 V
Question and Answer IconNeed help?

Do you have a question about the Lux Products P711V and is the answer not in the manual?

Lux Products P711V Specifications

General IconGeneral
BrandLux Products
ModelP711V
CategoryThermostat
LanguageEnglish

Summary

CAUTIONS AND WARNINGS

General Safety Advice

Covers battery requirements, electrical ratings, component wear, and handling precautions.

System Operation Checks

Advises regular checks of HVAC system and thermostat operation, and resident awareness of malfunctions.

Environmental and Handling Precautions

Warns about electrical interference, static electricity, and the sensitivity of the device to drops.

SYSTEM COMPATIBILITY

Compatible HVAC Systems

Lists compatible single-stage heating/cooling, heat pump, hydronic, and millivolt systems.

Incompatible HVAC Systems

Lists incompatible 120/240 VAC, multi-stage heat pump, and 3-wire hydronic systems.

FEATURES

Core Thermostat Capabilities

Lists 7-day/5/2-day programming, lighted display, keypad lockout, manual hold, and override features.

TOOLS YOU MAY NEED

Essential Installation Tools

Lists necessary tools like screwdrivers, wire stripper, wire cutter, and drill bits for installation.

MOUNTING LOCATION

Optimal Placement Guidelines

Recommends mounting on an inside wall, 5 ft above floor, avoiding poor circulation or direct heat sources.

Wiring Code Compliance

Stresses that all wiring must conform to local codes and ordinances for safe installation.

REMOVE OLD THERMOSTAT

Pre-Removal Safety and Preparation

Turn off power, label wires, and carefully remove wires from the old unit to prevent shorts.

Physical Unit Removal

Instructions on loosening mounting screws and carefully removing the old thermostat from the wall.

INSTALL THERMOSTAT BASE

Wire Preparation and Wall Sealing

Strip wires to 3/8 inch, clean corrosion, and seal wall opening with insulation to prevent drafts.

Base Plate Mounting

Guide on releasing housing, routing wires, aligning, and securing the base plate to the wall.

WIRING INFORMATION

Wire Connection Best Practices

Ensure bare wire ends are fully inserted into the terminal block before tightening screws for secure connections.

Model Interoperability Warning

Warns against interchanging base plates/front halves of similar models due to potential wiring differences.

WIRING DIAGRAM NOTES

Understanding Wiring Diagrams

Explains dashed wires, terminal letter conventions, and the importance of matching diagrams to system type.

WIRING DIAGRAMS

Diagram #1: Conventional Heat Only

Wiring diagram for conventional, non-heat pump, 1-stage, heat only systems.

Diagram #2: Conventional Cool Only

Wiring diagram for conventional, non-heat pump, 1-stage, cool only systems.

Diagram #3: Conventional Heat & Cool

Wiring diagram for conventional, non-heat pump, 1-stage, heat and cool systems.

Diagram #4: Conventional Two Transformers

Wiring diagram for conventional, non-heat pump, 1-heat/1-cool with two transformers.

Diagram #5: Heat Pump Systems

Wiring diagram for heat pump systems with no auxiliary/emergency heat.

COMPLETE THE INSTALL

Battery Installation and Jumper Settings

Instructions for battery installation and setting the Gas/Electric jumper for fan control.

FRONT PANEL ITEMS

Control Interface Overview

Explains the functions of System Mode, Fan Mode switches, and SET, NEXT, HOLD, UP/DOWN buttons.

SYSTEM CONFIGURATION AND SETUP OPTIONS

Setup Menu Navigation and Basic Settings

Steps to access setup, change temperature scale, programming style, and period quantity.

Temperature Limit Configuration

Settings for maximum heat and minimum cool temperature limits to restrict user adjustments.

System Type and Performance Tuning

Select system type, adjust delay time, temperature swing, and calibrate temperature sensor.

OPERATING INSTRUCTIONS

Setting Day, Time, and Basic Operation

Steps to set day/time, select HEAT/COOL modes, and adjust temperature manually.

Program Schedule Defaults

Default temperature settings for 2-period and 4-period configurations provided by the thermostat.

Display Backlight and Temperature Overrides

How the display backlight functions and how to temporarily override programmed temperatures.

Temperature Hold Functionality

How to activate and cancel a permanent temperature hold for continuous comfort.

Static Discharge Precaution

Precaution to touch grounded object to prevent static discharge damage to the unit.

TEMPERATURE PROGRAMS

Understanding Program Periods and Styles

Explains program periods (MORN, DAY, EVE, NITE) and setup for 5/2-day and 7-day styles.

Program Copy Feature

Instructions on how to efficiently copy program settings from one day to another for easier programming.

ADVANCED FEATURES

Keypad Lockout and Software Reset

How to lock/unlock the keypad and perform a software reset to factory defaults.

Compressor Protection Bypass

How to temporarily disable compressor protection delays for system diagnostics and testing.

BATTERY REPLACEMENT

Battery Maintenance Procedures

Instructions for replacing the two AA batteries, emphasizing brand and polarity.

TECHNICAL ASSISTANCE

Support Contact and Online Resources

Provides phone number and website for technical assistance, troubleshooting guides, and FAQs.

LIMITED WARRANTY

Warranty Terms and Return Policy

Outlines the 3-year limited warranty, exclusions, and the process for returning defective units.

MERCURY WARNING AND RECYCLING NOTICE

Mercury Thermostat Recycling Information

Information and resources for recycling old mercury-containing thermostats due to hazardous material regulations.

Related product manuals