1.
FEATURES
. . . . . . . . . . . . . . . . . . . . . . . . . . . . . . . . . . . . . . . . . . . . . . . . . . 2
2.
COMPATIBILITY
. . . . . . . . . . . . . . . . . . . . . . . . . . . . . . . . . . . . . . . . . . . . . 2
3.
INSTALLATION
. . . . . . . . . . . . . . . . . . . . . . . . . . . . . . . . . . . . . . . . . . . . . . 2
3.1.
TOOLS REQUIRED
. . . . . . . . . . . . . . . . . . . . . . . . . . . . . . . . . . . . . . . . . 2
3.2.
LOCATION
. . . . . . . . . . . . . . . . . . . . . . . . . . . . . . . . . . . . . . . . . . . . . . . . . 2
3.3.
REMOVING THE OLD THERMOSTAT
. . . . . . . . . . . . . . . . . . . . . . . . 3
3.4.
MOUNTING THE TX9000TS
. . . . . . . . . . . . . . . . . . . . . . . . . . . . . . . . . 3
3.5.
CONNECTING THE WIRES
. . . . . . . . . . . . . . . . . . . . . . . . . . . . . . . . . . 3
3.6.
WIRING DIAGRAMS
. . . . . . . . . . . . . . . . . . . . . . . . . . . . . . . . . . . . . . . . 9-11
3.7.
COMPLETING YOUR INSTALLATION
. . . . . . . . . . . . . . . . . . . . . . . . 3
4.
OPERATING INSTRUCTIONS
. . . . . . . . . . . . . . . . . . . . . . . . . . . . . . . . . . 4
4.1.
SYSTEM MODE SWITCH
. . . . . . . . . . . . . . . . . . . . . . . . . . . . . . . . . . . 4
4.2.
FAN MODE SWITCH
. . . . . . . . . . . . . . . . . . . . . . . . . . . . . . . . . . . . . . . 4
4.3.
UP/DOWN ARROW CHANGE KEYS
. . . . . . . . . . . . . . . . . . . . . . . . . . 4
4.3.1. TEMPERATURE ADJUSTMENT . . . . . . . . . . . . . . . . . . . . . . . . . . . . . . . . . . 4
4.3.2. CHANGING OTHER SETTINGS . . . . . . . . . . . . . . . . . . . . . . . . . . . . . . . . . . . 4
4.4.
NAVIGATION KEYS
. . . . . . . . . . . . . . . . . . . . . . . . . . . . . . . . . . . . . . . . . 4
4.5.
DISPLAY ILLUMINATION
. . . . . . . . . . . . . . . . . . . . . . . . . . . . . . . . . . . 4
4.6.
AUDIBLE BEEP
. . . . . . . . . . . . . . . . . . . . . . . . . . . . . . . . . . . . . . . . . . . . . 4
4.7.
ICONS
. . . . . . . . . . . . . . . . . . . . . . . . . . . . . . . . . . . . . . . . . . . . . . . . . . . . . 4
4.7.1. FLAME ICON . . . . . . . . . . . . . . . . . . . . . . . . . . . . . . . . . . . . . . . . . . . . . . . . 4
4.7.2. SNOWFLAKE ICON . . . . . . . . . . . . . . . . . . . . . . . . . . . . . . . . . . . . . . . . . . . . 4
4.7.3. LOW BATTERY ICON . . . . . . . . . . . . . . . . . . . . . . . . . . . . . . . . . . . . . . . . . . 4
4.8.
HARDWARE RESET
. . . . . . . . . . . . . . . . . . . . . . . . . . . . . . . . . . . . . . . . 4
4.9.
SOFTWARE RESET
. . . . . . . . . . . . . . . . . . . . . . . . . . . . . . . . . . . . . . . . . 5
4.10.
SETTING THE TIME AND DAY
. . . . . . . . . . . . . . . . . . . . . . . . . . . . . . . 5
4.11.
TEMPORARY TEMPERATURE OVERRIDE
. . . . . . . . . . . . . . . . . . . . 5
4.12.
TEMPERATURE HOLD
. . . . . . . . . . . . . . . . . . . . . . . . . . . . . . . . . . . . . . 5
5.
PROGRAMMING
. . . . . . . . . . . . . . . . . . . . . . . . . . . . . . . . . . . . . . . . . . . . 5
5.1.
DEFAULT ENERGY STAR
®
TEMPERATURE PROGRAMS
. . . . . . 5
5.2.
PROGRAMMING THE UNIT
. . . . . . . . . . . . . . . . . . . . . . . . . . . . . . . . . 5
5.2.1.
COPY
. . . . . . . . . . . . . . . . . . . . . . . . . . . . . . . . . . . . . . . . . . . . . . . . . . . . . . 6
6.
ADVANCED FEATURES
. . . . . . . . . . . . . . . . . . . . . . . . . . . . . . . . . . . . . . . 6
6.1.
FILTER USAGE MONITOR
. . . . . . . . . . . . . . . . . . . . . . . . . . . . . . . . . . 6
6.2.
SWING SETTING
. . . . . . . . . . . . . . . . . . . . . . . . . . . . . . . . . . . . . . . . . . . 6
6.3.
TEMPERATURE CALIBRATION
. . . . . . . . . . . . . . . . . . . . . . . . . . . . . . 7
6.4.
ENERGY USAGE MONITOR
. . . . . . . . . . . . . . . . . . . . . . . . . . . . . . . . . 7
6.5.
PROGRAM LOCK
. . . . . . . . . . . . . . . . . . . . . . . . . . . . . . . . . . . . . . . . . . . 7
6.5.1. TO SET CODE . . . . . . . . . . . . . . . . . . . . . . . . . . . . . . . . . . . . . . . . . . . . . . . . 7
6.5.2 TO LOCK SETTINGS . . . . . . . . . . . . . . . . . . . . . . . . . . . . . . . . . . . . . . . . . . . 7
6.5.3. TO UNLOCK SETTINGS. . . . . . . . . . . . . . . . . . . . . . . . . . . . . . . . . . . . . . . . . 7
7.
SETUP OPTIONS
. . . . . . . . . . . . . . . . . . . . . . . . . . . . . . . . . . . . . . . . . . . . 7
7.1.
THE DISPLAY FORMAT 12/24 SWITCH #1
. . . . . . . . . . . . . . . . . . . 7
7.2.
SMART RECOVERY SWITCH #2
. . . . . . . . . . . . . . . . . . . . . . . . . . . . 7
7.3.
TEMPERATURE DISPLAY FORMAT F°/C° SWITCH #3
. . . . . . . . 8
7.4.
5 MIN/2 MIN MINIMUM RUN TIME SWITCH #4
. . . . . . . . . . . . . 8
7.5.
REPOSITIONING SWITCHES
. . . . . . . . . . . . . . . . . . . . . . . . . . . . . . . . 8
7.6.
GAS/ELECTRIC JUMPER
. . . . . . . . . . . . . . . . . . . . . . . . . . . . . . . . . . . 8
8.
BATTERIES AND MAINTENANCE
. . . . . . . . . . . . . . . . . . . . . . . . . . . . . . 8
9.
TECHNICAL ASSISTANCE
. . . . . . . . . . . . . . . . . . . . . . . . . . . . . . . . . . . . 8
10.
WARRANTY
. . . . . . . . . . . . . . . . . . . . . . . . . . . . . . . . . . . . . . . . . . . . . . . . 8
SMART TEMP
®
ELECTRONIC THERMOSTAT
INSTALLATION AND OPERATING INSTRUCTIONS
Mt. Laurel, New Jersey 08054, USA
●
www.luxproducts.com
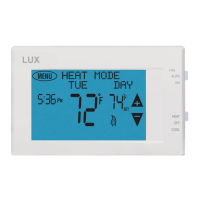
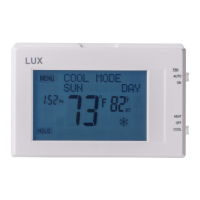
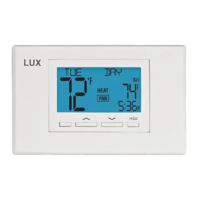
TX9000TS SERIES
52019
Choose Heat or CoolSet Day & Time
Installs Easily
Easy as
1–2–3
• Please read all instructions carefully before beginning
installation. Save them for future reference.
• Before removing any wiring from your existing thermostat,
its wires must be labeled with their terminal designations.
• Ignore the color of the wires since they may not comply
with any standard.
IMPORTANT!
Thank you for your confidence in our product. To obtain the best
results from your investment, please read these instructions
thoroughly and acquaint yourself with your purchase before
installing your new thermostat. Then follow the installation
procedures, one step at a time. This will save you time and
minimize the chance of damaging the thermostat and the systems
it controls.
These instructions may contain information beyond that required
for your particular installation. Please save for future reference.
WARNING: Use Energizer
®
or DURACELL
®
Alkaline Batteries Only.
Energizer
®
is a registered trademark of Eveready Battery Company, Inc.
DURACELL
®
is a registered trademark of The Gillette Company, Inc.
© COPYRIGHT 2006 LUX PRODUCTS CORPORATION. ALL RIGHTS RESERVED