Step 8: Connecting LUX/GEO
You will need an iOS or Android device to set up your
GEO
. If you have a dierent
device, visit
LUXGEO.com. Set-up follows a series of screen prompts – have your GEO
and mobile device ready.
8a. Getting ready to connect
You’ve downloaded the LUX
Products App, created a
user account and now,
from your GEO, select
“yes” for WiFi setup
GEO will begin scanning –
but you can move on to 8b.
Step 7: If you have not yet downloaded your LUX Products App, do so now
Step 5: Power on
For methods #1 with C-wire and #2 with LUX
Power Bridge: secure GEO front onto base
For method #4 Battery Power: insert 2-AA
Lithium batteries & secure GEO front onto
base
For method #3 USB power:
place a flathead screwdriver
against port cover from inside
GEO along bottom side – twist
& push out. Plug in Micro USB
and insert into base.
Once GEO front has been
secured to base (line up and
firmly push), return power to
system.
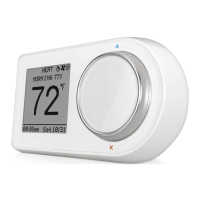
Step 6: Configure system settings
GEO will guide you through setup
Rotate the control wheel to navigate
through options and values. To make a
selection, press ; to go back, press .
GEO will prompt you to select:
1. Whether heating and/or cooling are
connected.
2. System type (only applies if you have heat).
Note if you wired per section 4.1a or 4.3a you
have a furnace. If you wired per section
4.1b or 4.3b you have a heat pump.
If furnace fan is not operating properly after
installation, change from furnace:gas to
furnace:electric in the settings menu.
3. The number of stages for heat/cool you have.
Most common is 1 heat/1 cool. Not sure? refer
to our online glossary to learn more.
4. If you have set more than 1 stage of heat or cool,
the OFFSET setting adjusts the stage-2 cut in.
 Loading...