3
Controls and Connectors
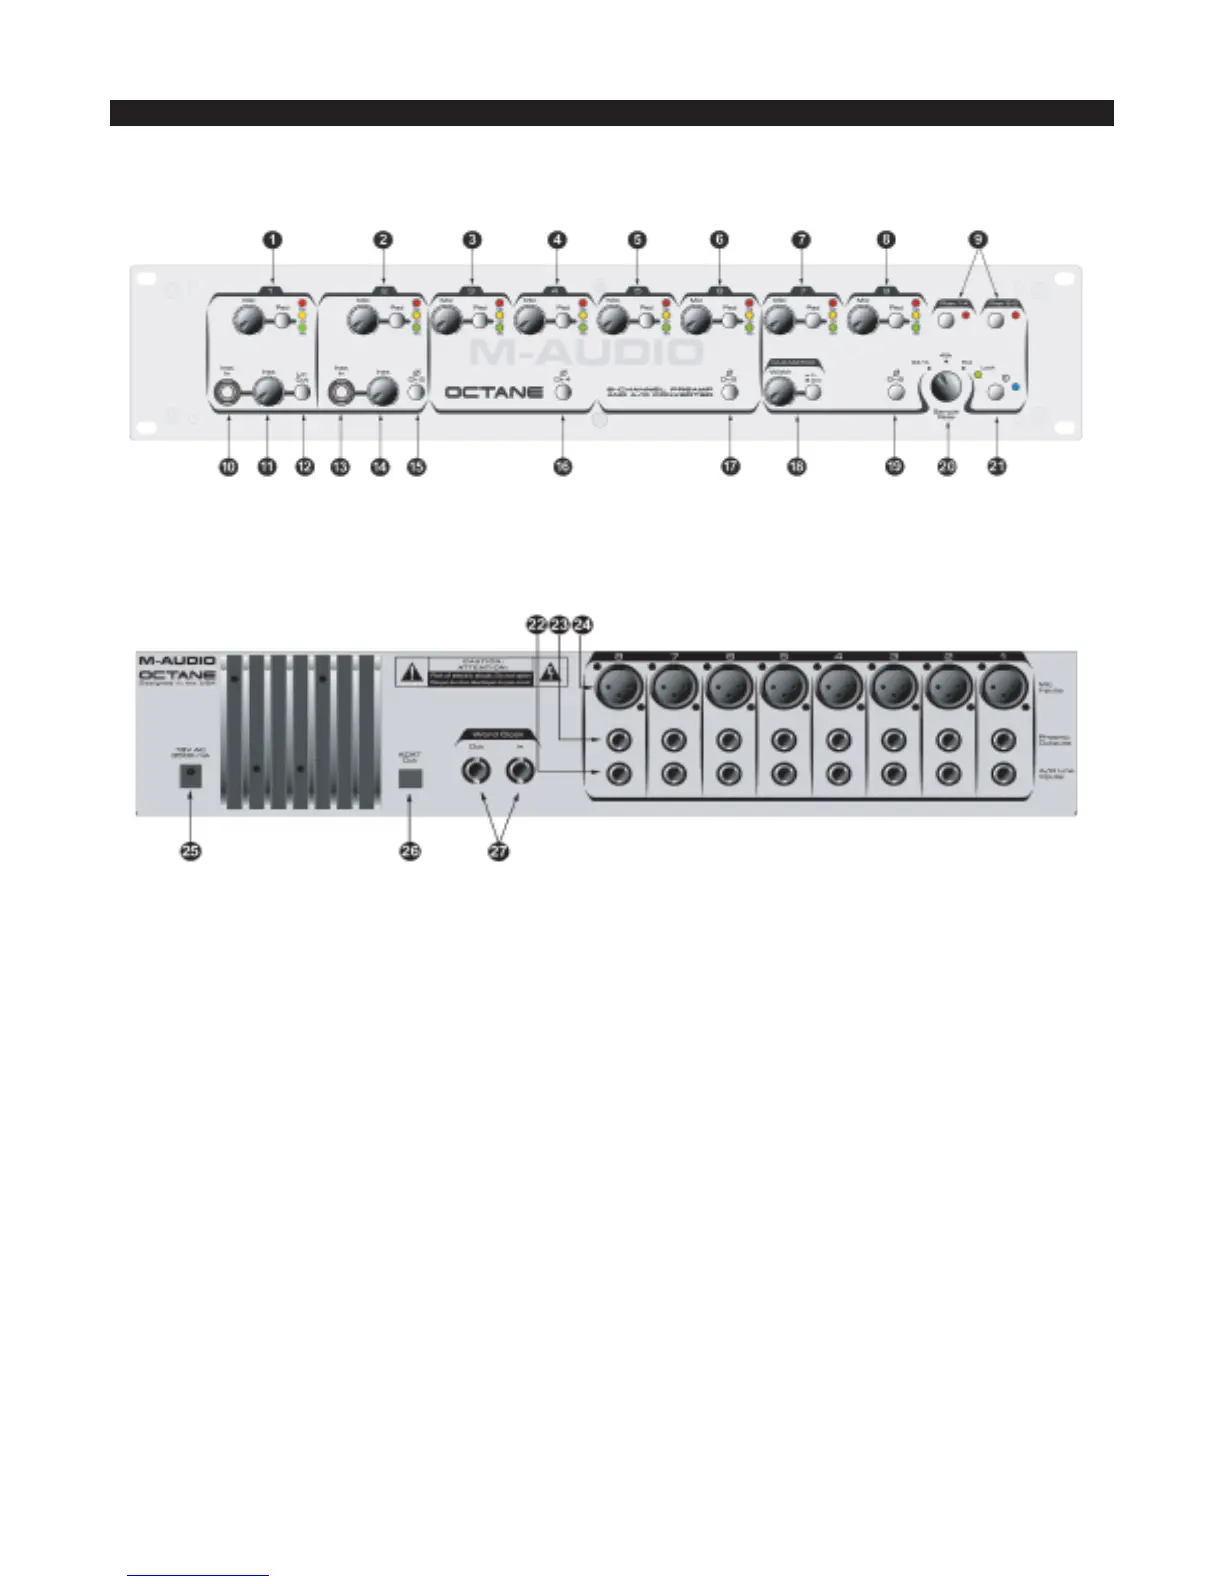
Front Panel Diagram
Rear Panel Diagram
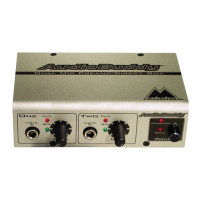
Front Panel Descriptions
1. Channel 1 Level Controls –
Mic Level – Controls the input level of the channel’s mic preamp. Turn fully counter-clockwise for minimum gain, fully clockwise for
maximum gain.
Pad – Pressing and locking this switch to the IN position inserts a 20dB pad into the signal path. Use the pad when your input level is
too hot, as indicated by the Red Clip LED.
LED Level Meter – Three segment input level meter:
Green – Indicates input level of -20dB
Yellow – Indicates input level of -10dB
Red – Input level of 0dB indicates clipping. Triggers at -3dB.
A word about metering: Different hardware devices and software applications employ different metering schemes. For example, the
ADAT and some DAW programs will show level on their input meters at as low as -40dB, whereas Octane’s meters register at -20dB. It
is entirely possible that your DAW or other recording device will display a reading at very low audio levels, even when Octane’s meters
do not show a level.
In digital recording, particularly with 24-bit digital technology, it is important to achieve as hot a signal as possible without exceeding
0dB. The higher an input level you record with, the better the resolution of your digital recording. Do not go over 0dB, however, or your
signal will be distorted.
 Loading...