NOTE
REMARQUE
NOTA
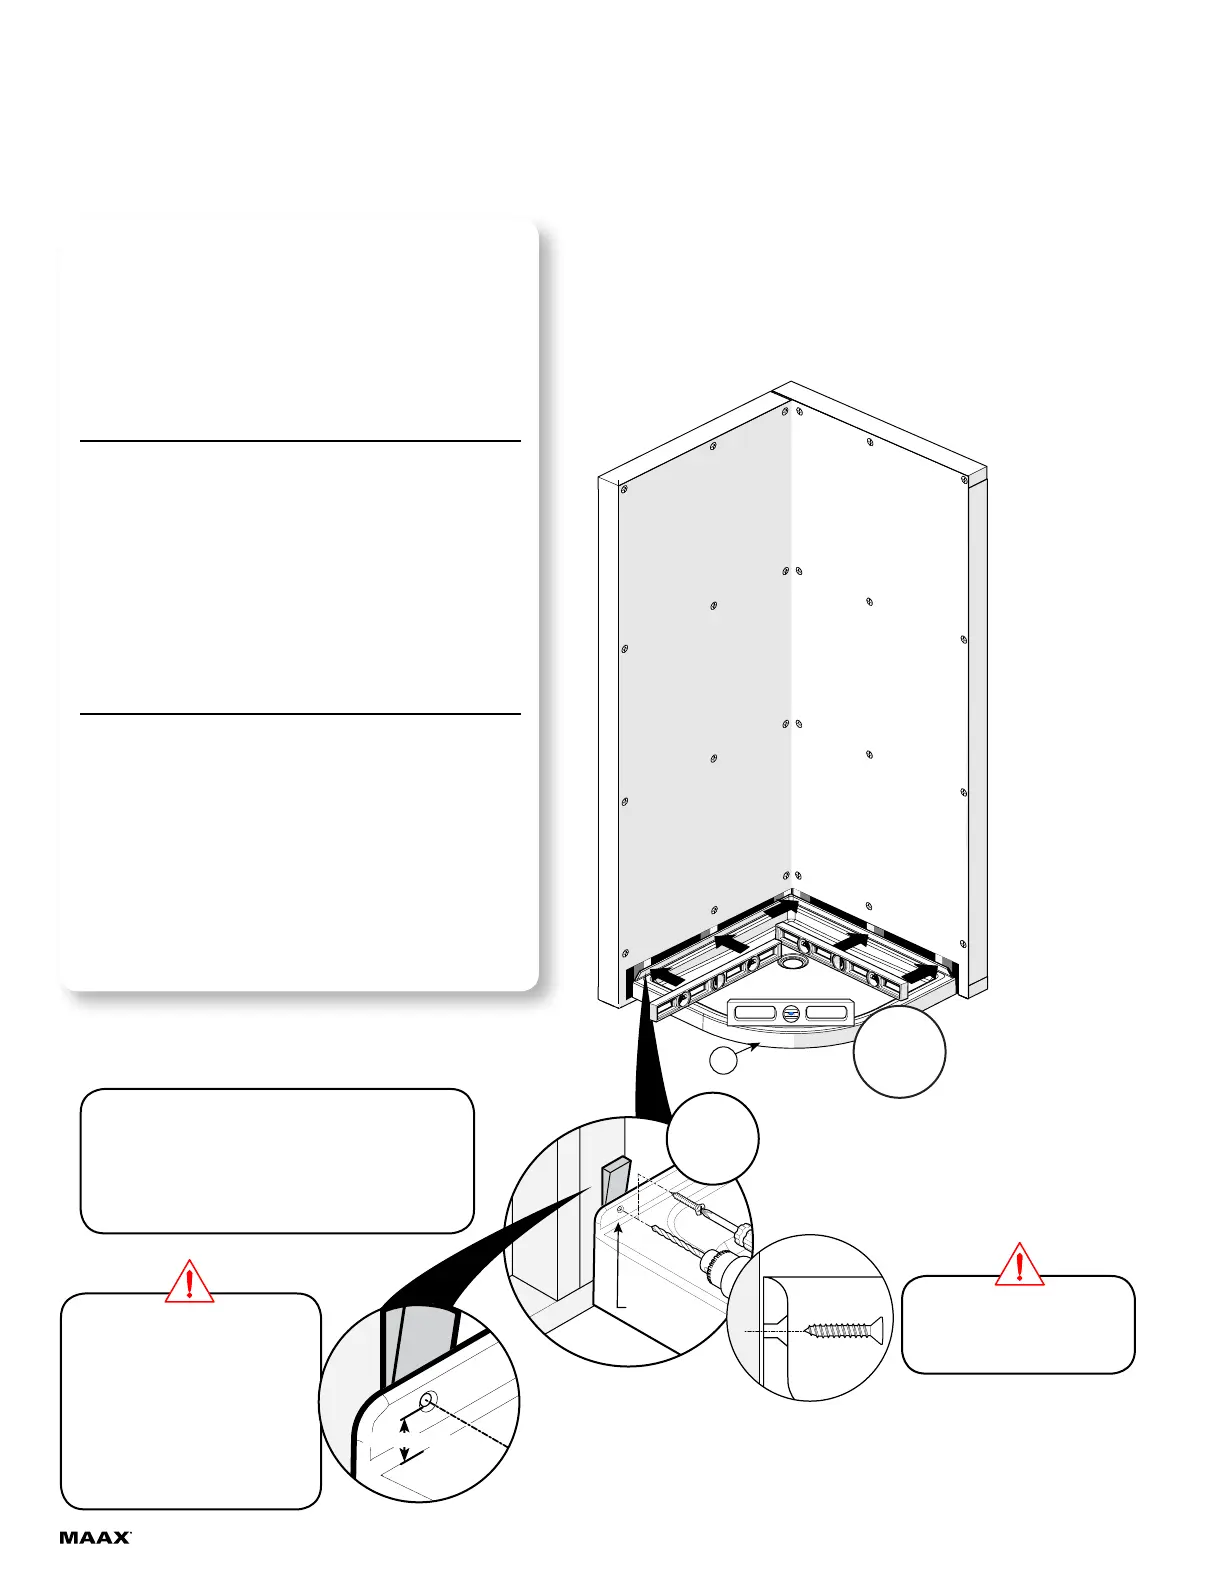
Use shims behind the fastening ange as required.
Utilizar cuñas de madera detrás de la brida de jación
si es necesario.
Ø3/16"
Hand tighten only!
Apretar solamente con la mano
#8 x 1 1/4"
Flat Head Screw (recommended)
Tornillo de cabeza plana (recomandado)
1
Complete drain assembly (refer to step 2, ASSEMBLY AND
INSTALLATION of the instructions enclosed in the drain
packaging).
Install the base (1) directly against the studs and conrm
that the drain pipe is centered in the drain head and the
base is leveled in all directions. Please refer to drain
guide for drain installation.
With a 3/16" bit, drill holes in the base flange then secure
the base to the wall studs with #8 x 1¼ " screws. Install wall
finish according to construction standards.
Termine de ensamblar el drenaje (refiérase al Paso 2,
ENSAMBLADO E INSTALACIÓN de las instrucciones
incluidas en el embalaje del desagüe).
Instale la base (1) directamente contra las jambas y
asegúrese de que el tubo de desagüe está centrado
respecto del colector de desagüe y que la base esta
nivelada en todas la direcciones. Consulte la guía del
drenaje para la instalación del desagüe.
Con una broca de 3/16" de diámetro, haga perforaciones
en el reborde de jación de la base. Atornille la base
a las soportes con los tornillos de #8 x 1¼". Instalar
los materiales de acabado mural según las normas de
construcción.
2
STEP
ÉTAPE
ETAPA
The bottom of any hole in the ange
cannot be not less than 8mm (0.3
inches) above the deck or threshold
La parte inferior de cualquier agujero
en la brida no debe ser inferior a 8
mm (0.3 pulgadas) por encima de la
cubierta o el umbral
8 mm min.
 Loading...