Owner’s Manual
5
Owner’s Manual
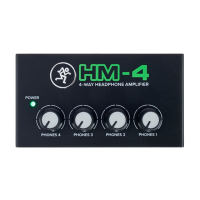
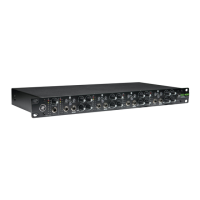
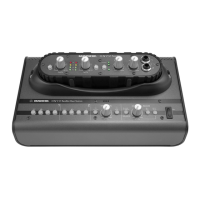
HM-4 4-Way Headphone Amplifier: Front and Rear Panel Features
1. Power Connector and LED
This connection is where to connect the supplied AC
adapter to provide power to the HM-4. Connect the AC
adapter to the HM-4 first, then plug the other end into
a suitable and properly rated AC outlet. The HM-4 will
turn on automatically when connected and the power
LED will illuminate.
HM-4s feature varying power connectors
based on country. Therefore, your power
connector may (or may not) look dierent
than the one displayed in the illustration to the right.
Only use the factory-authorized power
supply that came with the HM-4.
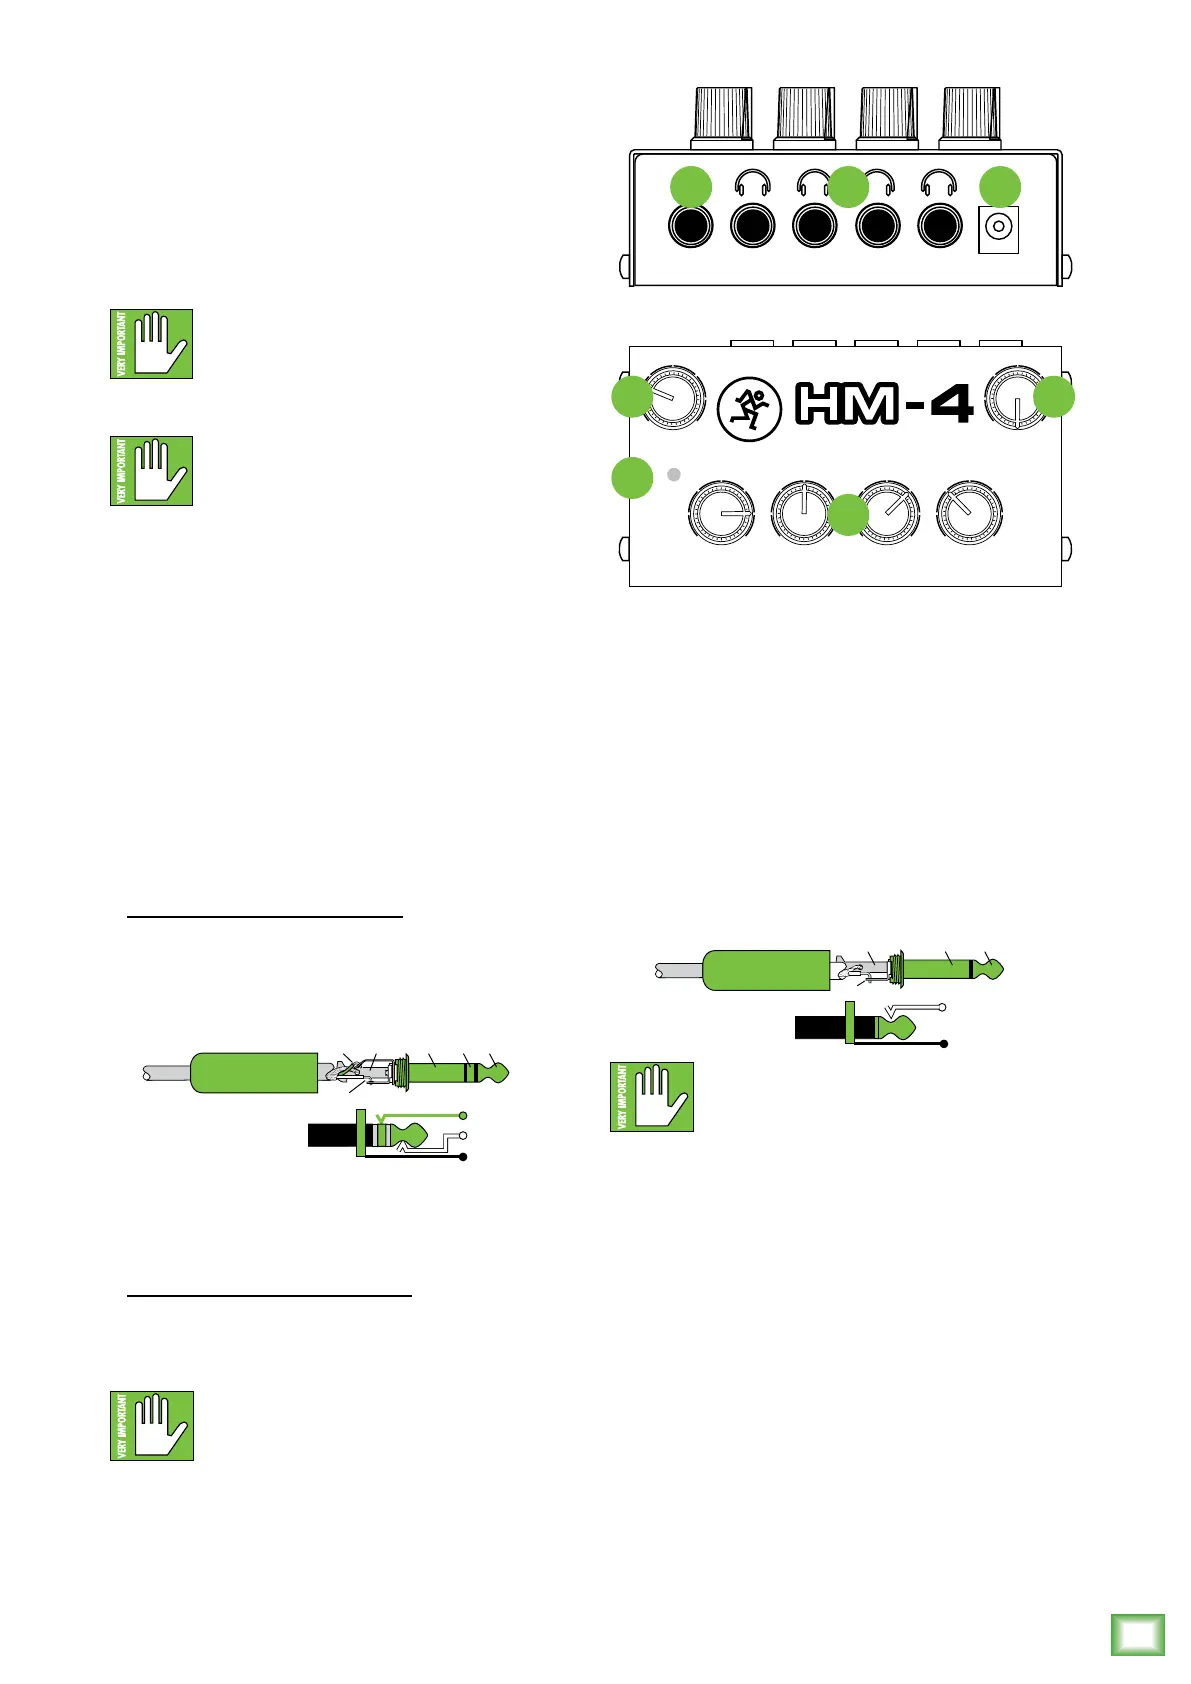
2. 1/4" Line Input
This input may accept 1/4" line-level signals driven
by balanced or unbalanced sources.
To connect balanced lines to these inputs, use
a 1/4" Tip-Ring-Sleeve (TRS) plug. “TRS” stands for
Tip-Ring-Sleeve, the three connection points available
on a stereo 1/4" or balanced phone jack or plug. TRS
jacks and plugs are used for balanced signals and are
wired as follows:
1/4" TRS Balanced Mono Wiring:
Sleeve = Shield
Tip = Hot (+)
Ring = Cold (–)
To connect unbalanced lines to these inputs, use
a 1/4" mono (TS) phone plug, wired as follows:
1/4" TS Unbalanced Mono Wiring:
Sleeve = Shield
Tip = Hot (+)
NEVER connect the output of an amplifier
directly to the HM-4’s input jack. This
could damage the input circuitry!
SLEEVE
TIP
SLEEVE
TIP
RING
RING
TIP
SLEEVERING
3. 1/4" Headphone Output Jacks
These 1/4" TRS connectors supply the output for
up to four pairs of stereo headphones. The volume
is controlled with the phones level knobs on the top
panel.
The phones output follows standard conventions:
Tip = Lef channel
Ring = Right channel
Sleeve = Common ground
WARNING: The headphone amp is loud,
and can cause permanent hearing damage.
Even intermediate levels may be painfully
loud with some headphones. BE CAREFUL! Always
turn the phones level controls all the way down before
connecting headphones or doing anything new that
may aect the headphone volume. Then turn it up
slowly as you listen carefully.
4. Phones Level Knobs
These knobs are used to adjust the volumes at the
phones output from minimum to maximum gain.
5. Season and Time Knobs
These knobs are used to adjust the season and time.
Unfortunately, since this is an analog device, you will
have to set these accordingly. We are currently working
on a digital version which will represent the season and
time accurately and automatically. Stay tuned!
SLEEVE
TIP
TIP
SLEEVE
TIP
SLEEVE
INPUT 1 2 3 4
+12V DC
HM-4 Rear Panel
132
POWER
PHONES 1 PHONES 2 PHONES 3 PHONES 4
SEASON
SPRING
SUMMER FALL
WINTER
12
6
39
TIME
4
–
WAY HEADPHONE AMPLIFIER
HM-4 Top Panel
5 5
1
4