Pedal Drive Assembly Instructions (Continued)
Step 3:
Installing The Pedal Onto Drive
Locate the bag containing the pedals and remove
the two screws.
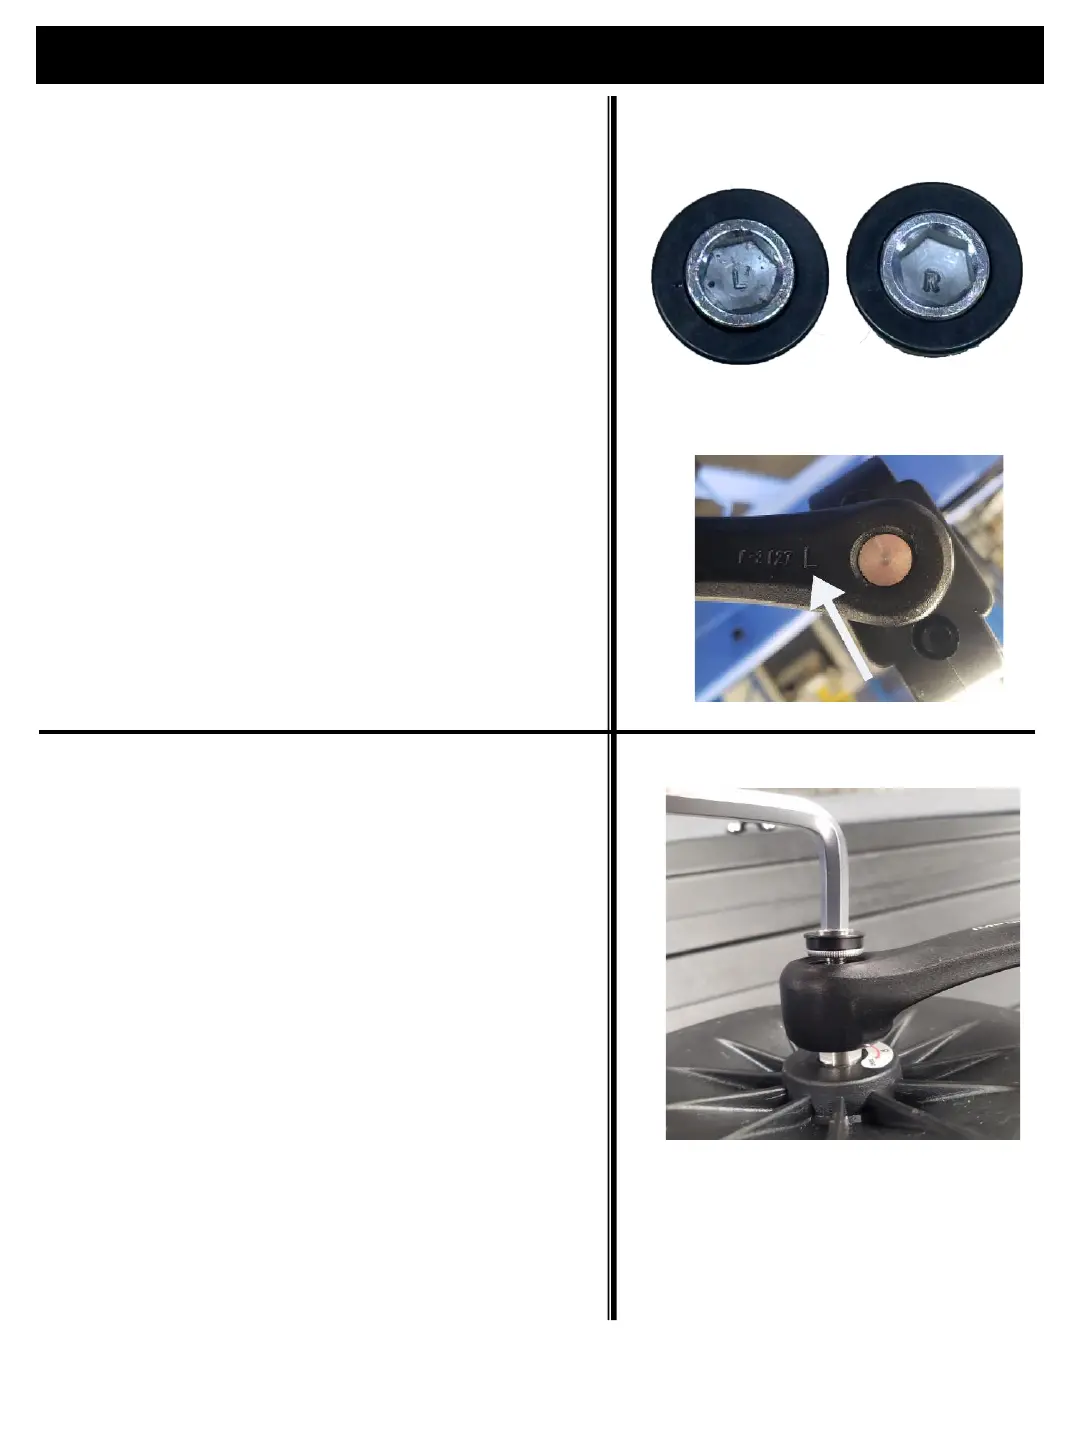
Identify the Left and Right pedal crank screws
which are marked with “L” and “R” on the socket of
each screw (see Figure 2)
Identify the Left and Right pedals which are
marked with “L” and “R” on the pedal crank shaft
(see Figure 3)
Step 4:
Place the right pedal crank arm on the right
spindle.
Using the 8M Allen Wrench, tighten the “R” screw
by turning clockwise until the screw stops.
NOTE: the left screw is reverse threaded and
must tightened by turning counterclockwise
Place the left pedal crank arm on the left spindle.
Using the 8mm Allen Wrench, tighten the “L” screw
by turning counterclockwise until the screw stops
Page 18 of 29
Figure 2
Figure 3