8 - Automatic cycle in MAGIC VAC
®
canisters
Use this cycle to perform vacuum packing in MAGIC VAC
®
Canisters, in canisters sealed with
MAGIC VAC
®
Universal Lids, in bottles using the MAGIC VAC
®
Bottle Cap or in glass jars equipped
with Lid and Ring using the MAGIC VAC
®
Lid Attachment.
ATTENTION: Only use MAGIC VAC
®
canisters since they are resistant to the vacuum created by
the MAXIMA 2, while other types of canisters could implode due to the vacuum created by the
machine and cause injury.
MAGIC VAC
®
Universal Lids, available in two diameters - 100 mm and 125 mm - are to be used with
food storage jars, casseroles and tempered glass bowls. MAGIC VAC
®
Universal Lids work exactly
like the MAGIC VAC
®
Executive Canister Lids.
ATTENTION: With MAGIC VAC
®
Universal Lids, do not use plastic or glass canisters that are not
made for vacuum packing since they could implode due to the vacuum created by the machine
and cause injury.
33
Cycle B) For maximum air extraction even for complex food such as an entire cleaned chicken,
a slice of Emmenthal cheese or a fish. Proceed as follows:
a) Insert the food in the MAGIC VAC
®
Bag (see point 4), and eliminate any liquids or food residues
from the inside of the end of the bag that must be sealed.
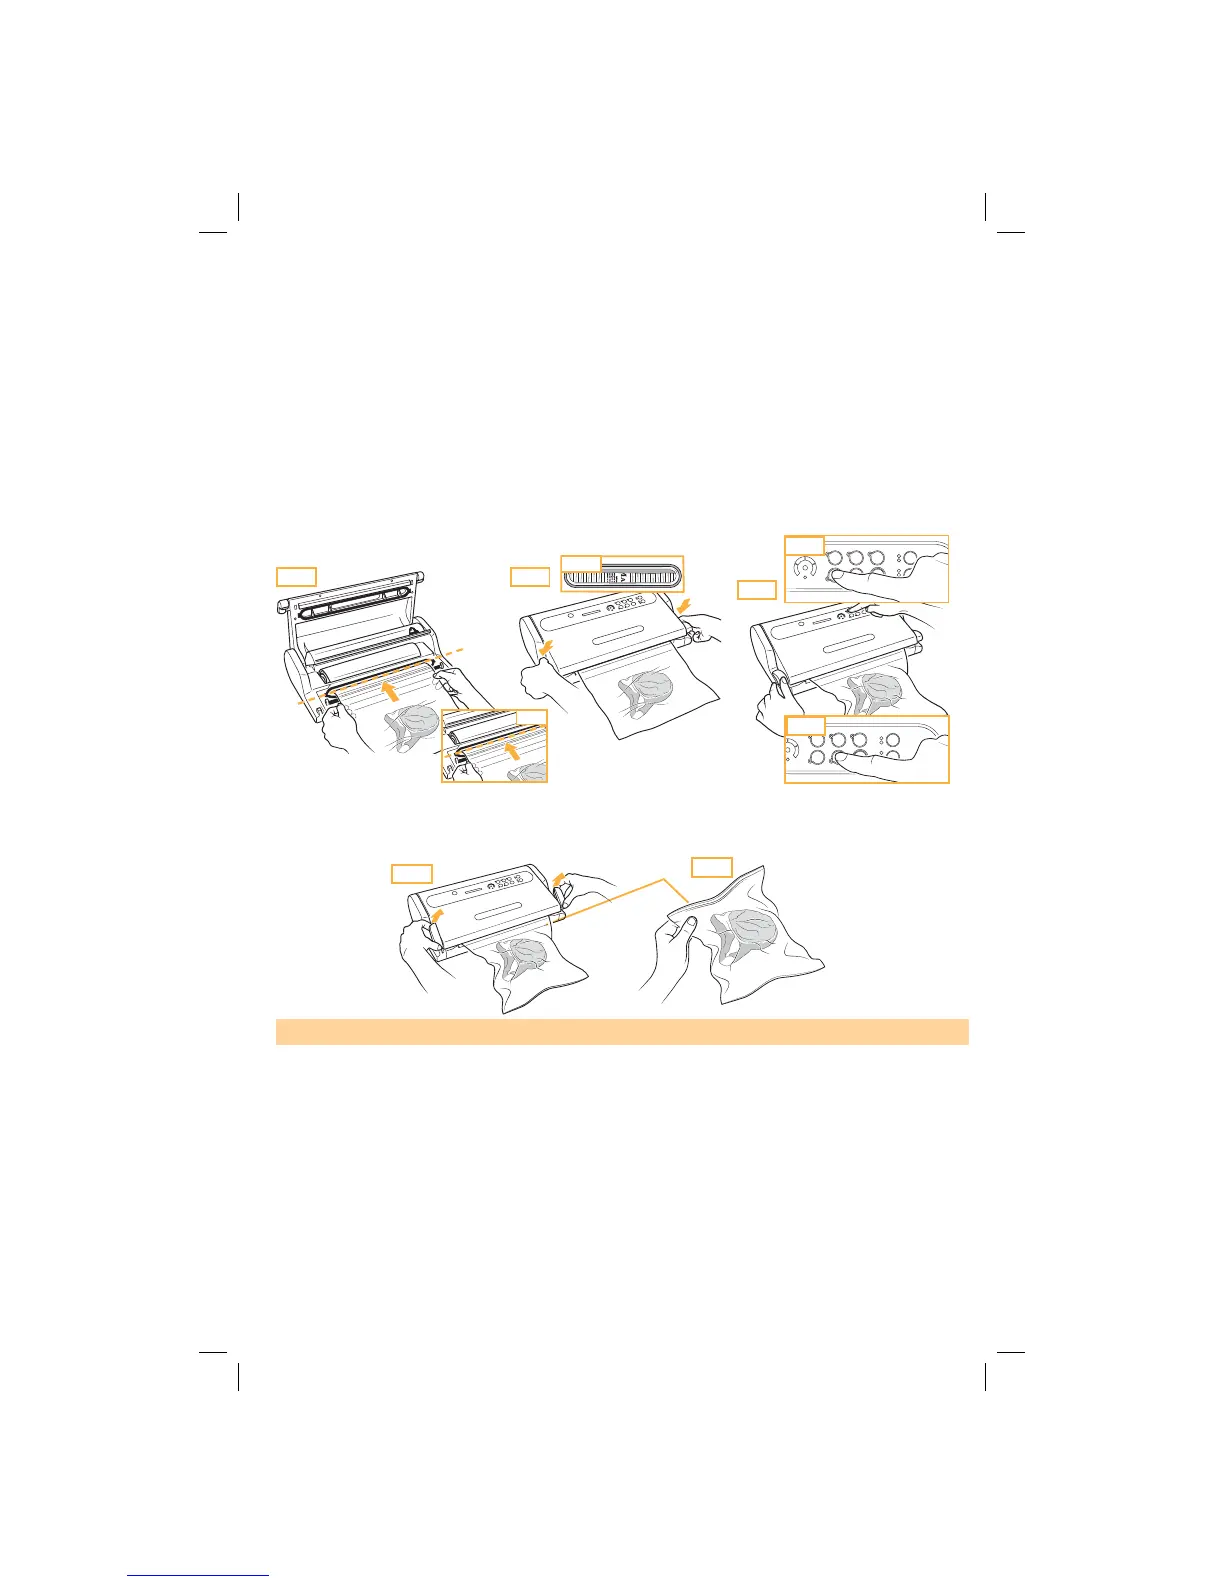
b) Lay the bag with its contents in front of the machine, placing the open end inside the Vacuum
Chamber (8) (fig. L and L1).
c) Close the machine by rotating the Handles (1) to the START position (fig. M) and, looking
through the Lit WINDOW (3), make sure the open end of the bag is inside the vacuum chamber
(8) (fig. M1).
d) Press the “vacuum” button (2G) to start the manual vacuum cycle (fig. P).
e) Wait 30 seconds to 1 minute after the last blue LED sector on the Progress Display (2C) is lit
and then activate sealing by pressing the “seal” button (2H) (fig. P1).
f) Wait for the LED seal light (2B) in the centre of the Progress Display (2C) to stop flashing.
g) Unlock the Cover (5) by rotating one of the two Handles (1) (fig. O) and remove the bag.
h) Check the seal obtained which should look like a regular horizontal line, smooth and without
wrinkles (fig. O1).
fig. L fig. M
fig. N
fig. P1
fig. P
fig. M1
fig. O
fig. O1
fig. L1