This document is an owner's manual for the Magnavox 3-Piece CD Shelf System with Bluetooth® Wireless Technology, model MM444BT.
Function Description
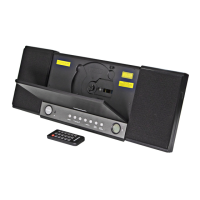
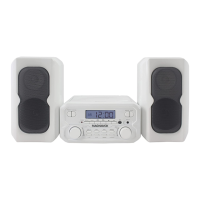
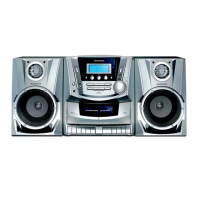
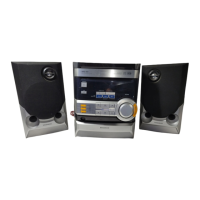
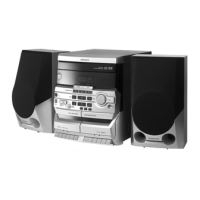
The Magnavox MM444BT is a compact audio system designed to play CDs, receive FM radio, and stream audio wirelessly via Bluetooth. It is a 3-piece system, implying a main unit and two separate speakers. The system can be used as a standalone unit on a flat surface or wall-mounted.
Important Safety Instructions
The manual emphasizes several safety precautions:
- Electrical Safety: Warns against electric shock and fire hazards. Users should not open the product, expose it to rain or moisture, or use unrecommended accessories. The lightning flash symbol indicates dangerous voltage, and the exclamation point highlights important operating and maintenance instructions.
- FCC Compliance: The device complies with FCC rules for Class B digital devices. Users are advised to reorient/relocate the receiving antenna, increase separation between equipment and receiver, connect to a different circuit, or consult a technician if interference occurs. Unauthorized modifications can void the user's authority to operate the device.
- Laser Safety: The product complies with IEC 60825-1 (2007-03) and 21 CFR 1040.10 and 1040.11, with deviations as per Laser Notice No. 50.
- Radiation Exposure: The equipment complies with FCC radiation exposure limits for an uncontrolled environment and should be installed and operated with a minimum distance of 20cm between the radiator and the user's body.
- General Precautions:
- Read all instructions carefully before operation.
- Keep instructions for future reference.
- Heed all warnings and follow all instructions.
- Do not use near water or moisture (e.g., bathtub, sink, wet basement, swimming pool).
- Clean only with a dry cloth; unplug before cleaning.
- Do not block ventilation openings; install according to manufacturer's instructions. Avoid placing on soft surfaces (bed, sofa, rug) or near heat sources (radiators, stoves, amplifiers).
- Do not defeat the safety purpose of polarized or grounding-type plugs.
- Protect the power cord from being walked on or pinched.
- Use only manufacturer-specified attachments/accessories.
- Use with specified cart, stand, tripod, bracket, or table, and exercise caution when moving to avoid tip-over.
- Unplug during lightning storms or when unused for long periods.
- Refer all servicing to qualified personnel, especially if damaged (power cord, liquid spill, dropped, exposed to rain/moisture, abnormal operation).
- Operate only from the specified power source type.
- Avoid locating outdoor antenna systems near overhead power lines.
- Overloading: Do not overload wall outlets or extension cords.
- Object and Liquid Entry: Do not push objects into openings or spill liquids on the product.
- Outdoor Antenna Grounding: If an outdoor antenna is connected, ensure it is properly grounded according to Section 810 of the National Electric Code ANSI/NFPA 70 to protect against voltage surges and static charges.
- Service & Replacement Parts: Do not attempt to service the product yourself. Use only manufacturer-specified replacement parts.
- Safety Check: After service or repairs, have a safety check performed.
- Mounting: Mount to a wall or ceiling only as recommended by the manufacturer.
- CATV System Installer: Reminds installers of Article 820-40 of the NEC regarding proper grounding of CATV systems.
Important Technical Specifications
- Power Source: DC 5V, 1A (center positive)
- Clock Back Up: 2 x 1.5V "AA" batteries (included)
- AC/DC Adaptor Input: AC 100-240V~50/60Hz 0.4A
- AC/DC Adaptor Output: DC 5V, 1A (center positive)
- Radio Band Coverage: FM 87.5 - 108 MHz
- Audio Power: 1.8W per Channel
- Impedance of Speakers: 8 Ohm; 3W x 2
- Bluetooth Version: 5.0
- Bluetooth Operation Distance: ≥32 Feet in open area
- Accessories Included: 1 x Instruction booklet, 1 x AC/DC Adaptor, 1 x Remote Control (uses 1 x CR2025 Button Cell).
Usage Features
Controls and Connections:
- Front Panel: CD Door, Open/Close button, Source button, Power/Standby button, Volume controls, Play/Pause button, Tuning controls, Stop button, LCD Display, Remote sensor.
- Side Panel: AUX-IN socket, Headphone socket, Left speaker socket, Right speaker socket, DC 5V Power socket.
- Back Panel: Hanging points, Back-up batteries compartment, Stand, FM Antenna.
Remote Control Buttons:
- POWER: Switches ON/OFF (Standby mode).
- SOURCE: Selects between Radio, CD, and AUX-IN.
- DISPLAY: Views time.
- CLOCK: Sets time.
- SLEEP: Sets sleep timer (90-80-70-60-50-40-30-20-10 off minutes).
- REPEAT: Repeats songs (CD mode).
- MEM- / MEM+: Scrolls through saved tracks/radio stations.
- ALARM: Sets alarm.
- RANDOM: Plays random tracks (CD mode).
- PROG/MEM: Opens Program or Memory functions.
- ◄◄ / ►►I: Skips to previous/next audio track (CD mode).
- ►II: Starts/pauses audio tracks (CD mode).
- VOL- / VOL+: Adjusts volume.
- MUTE: Mutes/unmutes sound.
Initial Setup:
- Remote Control Battery: Pre-installed lithium CR2025 battery. Remove protective tab to activate. To replace, push switch, slide out tray, replace battery (CR2025, correct polarity), and slide tray back.
- Back-up Batteries: Two AA batteries (included) prevent loss of saved information during power cuts. Push catch, lift cover, slot batteries (correct polarity), and replace cover.
- Connecting Power: Slot power adaptor jack into the unit's power socket, then plug into a wall socket. Unit enters standby mode.
- Setting up FM Aerial: Unwind the coiled FM aerial at the back. Adjust position for strongest signal. Keep aerial away from young children.
- Connecting Speakers: Align connection tabs on speakers with slots on the main unit. Slot left speaker cable into left socket, right speaker cable into right socket. Unwind speaker cables.
- Setting the Clock: In standby mode, press CLOCK on remote. Use ◄◄ / ►►I to set hour, press CLOCK. Use ◄◄ / ►►I to set minutes, press CLOCK to finish.
- Turning ON/OFF: Press POWER button on unit or remote.
Positioning the System:
- Separated Speakers: Speakers can be placed separately.
- Attached Speakers: Speakers can be attached to the sides of the main unit.
- Wall Mounted: The system can be wall-mounted with or without attached speakers.
- Wall Mounting Instructions: Mark position (120mm between mounting points, level). Drill two parallel holes (size depends on fittings). Tighten screws into holes, ensuring 3mm protrudes.
- Using Stands: Stands on the back of speakers and main unit can be pulled out for placement on a flat surface.
Operating Modes:
- Basic Use:
- Adjust Volume: Use VOL+ or VOL- on remote/unit.
- Mute Sound: Use MUTE on remote.
- Sleep Timer: Use SLEEP on remote to select 90-10 minute intervals or off.
- Select Input Source: Use SOURCE on remote/MODE on unit to select CD, FM Radio, or AUX-IN.
- CD Player:
- Select CD mode.
- Press OPEN/CLOSE to open door.
- Place CD on spindle (printed side up). Close door.
- Press Play/Pause to start track one.
- Selecting Track: Use ◄◄ / ►►I on remote/unit.
- Pausing/Playing: Use ►II on remote/unit.
- Stopping Playback: Use ■ on remote/STOP on unit.
- Random Playback: Use RANDOM on remote.
- Repeat: Use REPEAT on remote (once for single song, twice for all tracks, third time off).
- CD Program Feature:
- While CD is playing, press ■ on player.
- Press PROG/MEM on remote.
- Use ◄◄ / ►►I to select desired track, press PROG/MEM to confirm. Repeat for all tracks.
- Press ►II to play programmed tracks.
- FM Radio:
- Select FM radio mode.
- Auto Tune: Press and hold ◄◄ / ►►I on remote or -TUNING + on unit for a few seconds.
- Fine Tune: Press and release ◄◄ / ►►I on remote or -TUNING + on unit.
- FM Program Feature (Saving Stations):
- Press PROG/MEM on remote.
- Use MEM- or MEM+ to select memory number.
- Press PROG/MEM to confirm. Repeat for other stations.
- Recalling Saved Stations: Use MEM- or MEM+ to scroll through saved stations.
- AUX Mode:
- Select AUX mode.
- Connect one end of a 3.5mm audio cable to the external device's AUX-OUT/headphone socket.
- Connect the other end to the AUX-IN socket on the unit.
- Play audio from the external device through the system speakers.
- Bluetooth (BT) Mode:
- First Time Pairing:
- Power on unit, enter BT mode ("bt" will blink).
- Power on external BT device, enter searching mode, start pairing.
- "CM444 BT" will appear on external device. Pairing code "0000" or "1234" may be needed.
- "bt" will stop blinking when paired.
- Play music from paired BT device.
- During Playback: Use ►II on unit/remote to pause/resume. Use TUNE +/- on unit or ◄◄ / ►►I on remote to skip tracks.
- Normal Operation (after pairing):
- Power on external BT device and unit (enter BT mode, "bt" will blink).
- Wait a few seconds for auto-pairing ("bt" will stop blinking).
- Play music from paired BT device.
Maintenance Features
- Caring for Compact Discs:
- Handle by edges; avoid touching shiny, unprinted side.
- Do not attach tape or stickers.
- Clean periodically with a soft, lint-free, dry cloth.
- Do not use detergents or abrasive cleaners. Use a CD cleaning kit if needed.
- If disc skips, it may be dirty or scratched.
- Wipe in straight lines from center to outer edge, not in circular motions.
- Only play discs with the "COMPACT DISC DIGITAL AUDIO" logo.
- Store in cases after use.
- Avoid direct sunlight, high humidity, high temperatures, or dust.
- Do not stick or write on either side of the disc.
- Cleaning the Unit:
- Disconnect from AC power source before cleaning.
- Clean finish with a dust cloth.
- Use mild soap and a damp cloth on the front panel.
- Important Battery Information (Remote Control):
- Remove battery if not used for over a month to prevent leakage.
- If batteries leak, wipe leakage and replace.
- Use only specified batteries.
- Do not heat, disassemble, throw in fire/water.
- Do not carry/store with metallic objects to avoid short circuits, leaks, or explosions.
- Do not recharge non-rechargeable batteries.
This comprehensive overview covers the key aspects of the Magnavox MM444BT CD Shelf System, from its basic functionality and technical specifications to detailed usage instructions and essential maintenance tips.