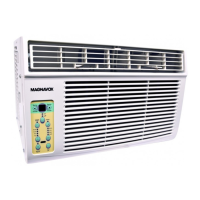
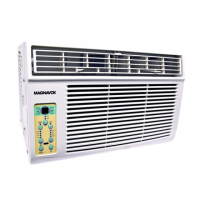
This document is an owner's manual for a Magnavox window/wall-type room air conditioner, covering models MG-06CR, W-08CR, W-10CR, and W-12CR. It provides detailed instructions for safe operation, installation, features, cleaning, maintenance, and troubleshooting.
The air conditioner is designed for cooling operation within specific outdoor and indoor temperature ranges. For cooling, the outdoor temperature should be between 18-43°C (64-109°F), or 18-52°C (64-125°F for special tropical models). The indoor temperature should be between 17-32°C (62-90°F). Performance may be reduced outside these ranges.
Safety Precautions:
The manual emphasizes several safety precautions. A "WARNING" symbol indicates the possibility of death or serious injury, while a "CAUTION" symbol indicates the possibility of injury or damage to property.
Key warnings include:
- Always plug the power plug in properly to avoid electric shock or fire.
- Do not modify the power cord length or share the outlet with other appliances.
- Do not operate or stop the unit by inserting or pulling out the power plug.
- Do not damage or use an unspecified power cord. If the power cord is damaged, it must be replaced by the manufacturer or an authorized service center.
- Do not operate with wet hands or in a damp environment.
- Always ensure effective grounding to prevent electric shock.
- Do not allow water to run into electric parts.
- Always install a circuit breaker and a dedicated power circuit.
- Unplug the unit if strange sounds, smell, or smoke is detected.
- Do not open the unit during operation.
- Keep flammable materials away from the unit.
- Ventilate the room if there is a gas leakage from another appliance before operating the air conditioner.
- Do not disassemble or modify the unit.
Cautions include:
- Do not touch exposed metal parts when the air filter is removed.
- Switch off and turn off the circuit breaker when cleaning the unit.
- Do not clean the air conditioner with water.
- Do not place pets or house plants where they will be exposed to direct airflow.
- Hold the plug by the head when taking it out.
- Ensure the installation bracket is not damaged.
- Do not place heavy objects on the power cord.
- Use caution when unpacking and installing due to sharp edges.
- Ventilate the room well when a stove is being used in the same room to prevent oxygen shortage.
- Do not use the air conditioner for special purposes like preserving precision devices, food, pets, plants, or art objects.
- Turn off the main power switch when not using the unit for a long time.
- Always insert filters securely and clean them once every two weeks.
- Do not drink water drained from the air conditioner.
- If water enters the unit, turn it off, unplug it, switch off the circuit breaker, and contact a qualified service technician.
- Ensure the power requirement is adequate for the model.
- The air conditioner must be properly grounded with a three-prong grounding plug.
- Do not use an extension cord or adapter plug.
- The receptacle must be accessible after installation.
- Do not run the air conditioner without the side protective cover.
Operation of Current Detection Device (for certain units):
The power cord has a current detection function. To test it:
- Plug in the air conditioner.
- Press the TEST button on the plug head; the RESET button will pop out.
- Press the RESET button; it will engage.
- The power supply cord is now supplying electricity.
- Do not use this device to turn the unit on or off.
- Always ensure the RESET button is pushed in for correct operation.
- Replace the power cord if it fails to reset or cannot be reset.
Air Conditioner Features (Electronic Control):
The unit can be controlled via the control panel or remote control.
- ON/OFF Button: Turns the unit on or off.
- Temperature/Time Adjustment: LEFT (<) or RIGHT (>) buttons adjust temperature (62°F/17°C to 86°F/30°C) or timer duration. In Fan Only mode, it displays room temperature.
- Mode Button: Cycles through AUTO, COOL, DRY, and FAN modes.
- AUTO Mode: Automatically selects cooling, heating (not available in cooling-only models), or fan-only operation based on selected temperature and room temperature. Fan speed is automatically controlled.
- COOL Mode: Provides cooling.
- DRY Mode: Operates as a dehumidifier, with fan speed automatically set to LOW. Some cooling may occur.
- FAN Only Mode: Circulates room air or exhausts stale air (on some models). Any fan speed can be chosen.
- Fan Speed Button: Selects AUTO, LOW, MED, or HIGH fan speeds. In HEAT mode (some models) or DRY mode, fan speed may not be adjustable or is automatically set to LOW.
- Energy Saver Feature (COOL mode only): The fan runs for 3 minutes after the compressor shuts off, then cycles on for 2 minutes at 10-minute intervals until the room temperature is above the set temperature.
- Sleep Feature: Increases the set temperature by one degree after 30 minutes, then by another degree after an additional 30 minutes. This new temperature is maintained for 6 hours before returning to the original setting. Can be canceled by pressing the SLEEP button again.
- Timer (Auto Start/Stop):
- Press the TIMER button once for AUTO START, again for AUTO STOP.
- Use UP/DOWN buttons to set timer duration in 30-minute increments (up to 10 hours), then 1-hour increments (up to 24 hours).
- Turning the unit ON or OFF or adjusting the timer to 0.0 cancels the program.
- Check Filter Reset Button: Reminds to clean the air filter after 250 hours of operation. Press to reset after cleaning.
- Clean Air Feature (some models): Energizes the ion generator to remove pollen and impurities from the air.
- Follow Me Feature (some models, remote control only): The remote control acts as a remote thermostat. Point the remote control at the unit and press the Follow Me button. The remote display shows the actual temperature at its location. The remote sends a signal every 3 minutes. If no signal is received for 7 minutes, the mode ends.
- Temperature Display: Shows set temperature in °C or °F. In Fan Only mode, it shows room temperature.
- Error Codes:
- AS: Room temperature sensor error. Unplug and replug. If it repeats, call for service. In Fan Only mode, displays "LO" or "HI".
- ES: Evaporator temperature sensor error. Unplug and replug. If it repeats, call for service.
- HS: Electric heating sensor error. Unplug and replug. If it repeats, call for service.
- Fahrenheit/Celsius Conversion: Press and hold LEFT and RIGHT TEMP/TIMER buttons simultaneously for 3 seconds.
- Cool Circuit Delay: An automatic 3-minute time delay prevents overheating of the compressor and circuit breaker tripping if the unit is turned off and on abruptly. The fan runs during this time.
Air Directional Louvers:
Louvers allow directing airflow UP/DOWN (some models) and Left/Right. Horizontal louvers can be pivoted, and levers moved side-to-side for desired direction.
Installation Instructions:
Designed for standard double-hung windows with opening widths of 23 to 36 inches. A clear vertical opening of 14" (35.6cm) for 5000-8000Btu/h models or 15-1/2" (39.4cm) for 10000-12000Btu/h models is required. The rear of the AC must be outdoors.
- Tools Needed: Phillips screwdriver, drill (for pilot holes).
- Top Rail Attachment (for <10000Btu/h models only): Remove the top rail from packaging, align holes with the unit's top, and secure with 3/8" screws. All four screws must be securely fastened for safety.
- Pitch: Top rail and sliding panels are offset to provide a 5/16" pitch to the rear for condensed water drainage.
- Accordion Panel Installation:
- Place the unit on a flat surface. Ensure left and right window filter panels are on the proper side, with the flange facing into the room.
- Hold the accordion panel, gently pull back the center to free the open end.
- Slide the open end panel into the side cabinet, then slide it down, ensuring enough space for the frame's top and bottom to slip into the cabinet rails.
- Ensure the panel sits securely in the frame channel by making slight adjustments. Slide the top and bottom ends of the frame into the cabinet rails.
- Repeat for the other side.
- Unit Placement: Keep a firm grip, place the unit into the window opening so the bottom frame is against the window sill. Close the window behind the top rail.
- Side Panel Extension: Extend the side panels against the window frame.
- Frame Lock: Place the frame lock between the frame extensions and the window sill. Drive 3/4" (19mm) or 1/2" (13mm) locking screws through the frame lock and into the sill. Drill 1/8" (3mm) pilot holes to prevent sill splitting.
- Window Sash Screws: Drive 1/2" (13mm) locking screws through frame holes into the window sash.
- Sash Lock: Attach a right-angle sash lock with a 3/4" (19mm) or 1/2" (13mm) screw to secure the lower sash.
- Foam Seal: Cut and insert foam seal in the space between upper and lower sashes.
- Storm Window Obstruction: If a storm window blocks the AC unit, add wood as shown in Fig. 13 or remove the storm window. Ensure drain holes/slots are not caulked or painted shut.
- Tilt: After installation, ensure the air conditioner is tilted 3-4 degrees to the outside for water drainage and cooling efficiency.
Removing AC From Window:
- Turn off and disconnect power cord.
- Remove sash seal and unscrew safety lock.
- Remove screws from frame and frame lock.
- Close (slide) side panels into frame.
- Grip the air conditioner firmly, raise the sash, and carefully "rock" the unit backward to drain condensate water. Store parts with the air conditioner.
Cleaning and Maintenance:
- Always unplug the unit before cleaning.
- Air Filter Cleaning: Check at least once a month.
- Push the vent handle to the Closed position.
- Open the front panel.
- Grasp the filter by the center and pull up and out.
- Wash with liquid dishwashing detergent and warm water, rinse thoroughly, shake off excess water, and dry completely. Alternatively, vacuum clean.
- Never use hot water over 40°C (104°F).
- Never operate the unit without the air filter.
- Cabinet Cleaning:
- Dust with an oil-free cloth or wash with a cloth dampened in warm water and mild liquid dishwashing detergent. Rinse and wipe dry.
- Never use harsh cleaners, wax, or polish.
- Wring excess water from the cloth before wiping around controls to prevent damage.
- Winter Storage: If storing for winter, remove carefully, cover with plastic, or return to original carton.
Troubleshooting Tips:
- Air conditioner does not start:
- Power cord disconnected: Plug firmly into outlet.
- Fuse/circuit breaker tripped: Replace fuse or reset breaker.
- Power button OFF: Press to turn ON.
- Current detection device tripped: Press RESET button on plug.
- Air from unit does not feel cool enough:
- Room temperature below 62°F (17°C): Cooling may not start until temperature is higher.
- Temperature sensor touching cold coil: Straighten tube away from coil.
- Temperature set too high: Set lower.
- Compressor shut off by abrupt mode changes: Wait ~3 minutes for compressor to restart in COOL mode.
- Air conditioner cooling, but room still warm and ice forming on coils:
- Outdoor temperature below 62°F (17°C): Set unit to FAN ONLY to defrost.
- Dirty air filter: Clean filter.
- Temperature set too high: Set lower.
- Improperly positioned air directional louvers: Adjust for better distribution.
- Front of unit obstructed: Clear curtains, blinds, or other foreign bodies.
- Cold air escaping: Close open doors, windows, and other openings.
- Warm room, just activated AC: Unit needs time to remove heat and distribute cool air.
- Air conditioner turns on and off rapidly:
- Dirty air filter: Clean filter.
- High outside temperature: Set FAN speed higher to circulate cool air better.
- Noises coming from unit when cooling:
- Operating sound of air movement: Normal. If too loud, set FAN to lower speed.
- Window vibration: Due to incorrect installation. Refer to installation instructions.
- Water dripping INDOORS when unit is on COOL:
- Improper installation: Tilt unit slightly outward to drain water. Refer to installation instructions.
- Water dripping OUTSIDE when unit is cooling:
- Accumulating moisture from dehumidifying: Normal for humid weather.
- Remote control 'FOLLOW ME' mode deactivates prematurely:
- Remote control out of range: Keep within 20-foot radius in front of unit.
- Signal obstructed: Remove obstructions.
- Room is too cold:
- Temperature setting too low: Increase temperature.
Normal Operating Sounds:
- Sound of Rushing Air: Air being moved by the fan.
- Gurgle/Hiss Sound: Refrigerant passing through the evaporator.
- High Pitched Chatter Sound: High-efficiency compressors during the cooling cycle.
- Vibration Sound: Due to poor wall or window construction or incorrect installation.
- Pinging or Switching Sound: Droplets of water hitting the condenser.
The design and specifications are subject to change without prior notice for product improvement.