The document is a workshop manual for the MAGURA Julie hydraulic disc brake system, model year 2005. It provides comprehensive instructions for installation, maintenance, and troubleshooting, emphasizing safety and proper usage.
Function Description:
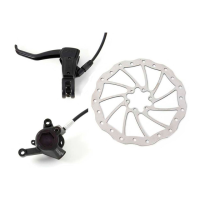
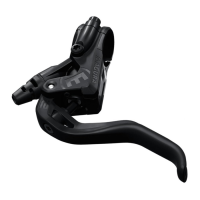
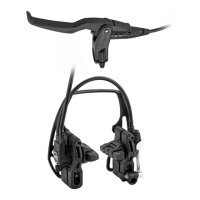
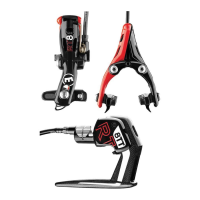
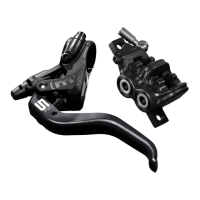
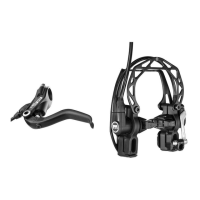
The MAGURA Julie is a fully hydraulic disc brake system designed for bicycles. Its primary function is to provide powerful and reliable braking by transmitting braking force through a mineral oil column. When the lever blade is squeezed, a piston in the brake lever (master cylinder) pushes mineral oil through the brake hose to the brake caliper. This action, in turn, pushes two pistons in the caliper, which have brake pads attached, against the rotor. The friction generated between the pads and the rotor slows down the bicycle, converting kinetic energy into heat. The system is designed for ease of use and minimal maintenance, offering a significant upgrade in braking performance compared to traditional rim brakes. It's particularly noted for its "Made in Germany" quality and robust construction.
Important Technical Specifications:
- Braking Mechanism: Fully hydraulic disc brake system.
- Braking Fluid: Mineral oil (not specified type, but implied to be MAGURA's proprietary fluid).
- Hose Type: Nylon hose, similar to those used on MAGURA rim brakes. It explicitly states NOT to use reinforced hoses from other disc brakes with "Disc Tube" imprint.
- Rotor Diameter: Front 180mm, Rear 160mm (standard sizes provided in the kit).
- Caliper Compatibility: Compatible with frames and forks meeting the International Standard (IS) for disc brake installation. With the Quickmount adaptor dismounted, the front brake is also compatible with Manitou forks with Postmount mounts.
- Tightening Torques:
- Brake lever to handlebar: 4 Nm / 34 in.lbs (using a 5mm Allen key).
- Caliper to fork/frame: 6 Nm / 51 in.lbs (using a 5mm Allen key).
- Rotor to hub: 4 Nm / 34 in.lbs (using Torx T25 bolts, tightened in a crossed pattern).
- Adjustments:
- Reach adjust: Done with a 2mm Allen key. Clockwise moves the lever blade away from the handlebar; counter-clockwise moves it towards the handlebar.
- Weight Considerations: The manual advises using both brakes simultaneously in extreme riding conditions (total weight of bike plus rider over 100kg and/or a gradient of more than 15%).
- Heat Management: Disc brake calipers can generate significant heat. The manual warns about potential negative influence on fork/frame mechanical characteristics due to heat transfer and the risk of total brake system failure if heat transfer is insufficient.
Usage Features:
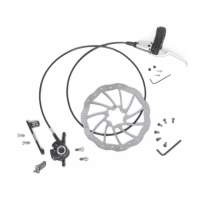
- Initial Setup: Requires careful installation, including mounting the brake lever, caliper, and rotor. Specific tools are listed, some of which are delivered with the brake (Allen key 2mm, transport/mounting device, Torx T25 key, Torx T7 key).
- Running-in Period: New brakes, rotors, or pads must be run in by braking at least 30 times from a speed of 30 km/h to achieve maximum brake power. This should be done in a safe area.
- Lever Feel: The lever blade should provide full braking performance before touching the handlebars. If not, pumping the lever several times is recommended.
- Automatic Pad Wear Adjustment: The system features automatic pad wear adjustment, which may cause slight drag during the break-in period.
- Transport Device: A yellow transport device is supplied to prevent pads from being pushed out too far when the wheel is removed. It must be clipped between the brake pads during transport.
- Hose Shortening: Instructions are provided for shortening the brake hose using a sharp knife (MAGURA cutter recommended) and re-attaching it without losing oil.
- Wheel Installation: The wheel should be installed by positioning the rotor between the brake pads, and the quick release (or thru-axle) should be tightened sufficiently.
- Pressure Point Changes: Changing pressure points during a ride may indicate air in the brake system, requiring bleeding.
- Rotor Rotation Direction: The rotor has a laser arrow indicating the correct rotation direction, which must be observed during installation.
- Spacers: Black 1mm spacers are necessary for Julie rear brakes, and additional 0.2mm spacers might be needed for proper caliper alignment due to frame variations.
Maintenance Features:
- Regular Checks (Before Every Ride):
- Quick release skewers (wheels and seat post) are correctly mounted and closed.
- Brake lever pressure is adequate.
- No leaks in the brake system (check hose connections and reservoir cover).
- Rotors and brake pads are free from oil and lubricants.
- Wheels move freely without drag.
- Tires are in good condition and have sufficient air pressure.
- No rattling noises from bearings or screwed connections.
- Contamination Prevention: Protect rotors and brake pads from oil and lubricants (e.g., chain lube, detergents, soap). Contaminated pads must be replaced, and contaminated rotors should be cleaned with dishwater or alcohol.
- Bleeding and Filling: Detailed instructions are provided for bleeding and filling the system if air is present or after maintenance.
- Pad Replacement: Hints are given for changing brake pads.
- Caliper Alignment: If constant disc brake dragging occurs, it might indicate a misaligned frame, suggesting contact with a dealer for MAGURA Gnann-o-mat disc optimizer service.
- Corrosion Protection: After treating disc brake mounts (e.g., cleaning paint or burrs), they should be protected against corrosion with an appropriate paint.
- Transport: When transporting the bike upside-down, squeeze the lever blade (with wheel or transport device mounted), hold pressure, and fix the blade with a rubber band or cable tie. The brake does not need to be emptied for air transport.
The manual strongly advises that complex operations be performed by a trained technician from a professional bike shop, especially for those who might overestimate their technical skills. It also directs users to the MAGURA website for the latest tips, product information, and downloadable manuals.