How to install the labels?
Step 1: When using a new label, pull the
transparent label lead all the way out to the
horizontal line mark.
GREEN: fully charged/ printing/
paper feeding/standby/ ready
YELLOW: charging
RED: lid open/ labels improperly
installed
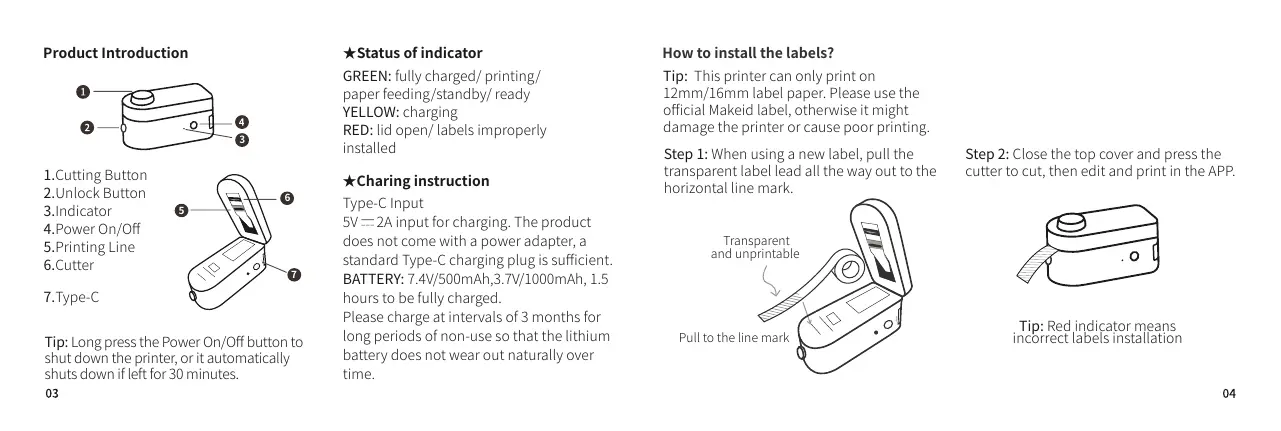
1.Cutting Button
2.Unlock Button
3.Indicator
4.Power On/Off
5.Printing Line
6.Cutter
7.Type-C
3
Tip: Red indicator means
incorrect labels installation
Transparent
and unprintable
Tip: This printer can only print on
12mm/16mm label paper. Please use the
official Makeid label, otherwise it might
damage the printer or cause poor printing.
Step 2: Close the top cover and press the
cutter to cut, then edit and print in the APP.
Type-C Input
5V 2A input for charging. The product
does not come with a power adapter, a
standard Type-C charging plug is sufficient.
BATTERY: 7.4V/500mAh,3.7V/1000mAh, 1.5
hours to be fully charged.
Please charge at intervals of 3 months for
long periods of non-use so that the lithium
battery does not wear out naturally over
time.
Tip: Long press the Power On/Off button to
shut down the printer, or it automatically
shuts down if left for 30 minutes.
( SHARP! Be Careful when Use)