P 2/ 6
[2] DISASSEMBLY/ASSEMBLY
[2] -1. Drill Chuck
[1] NECESSARY REPAIRING TOOLS
CAUTION: Remove the battery and the bit from the machine for safety before
repair/ maintenance in accordance with the instruction manual!
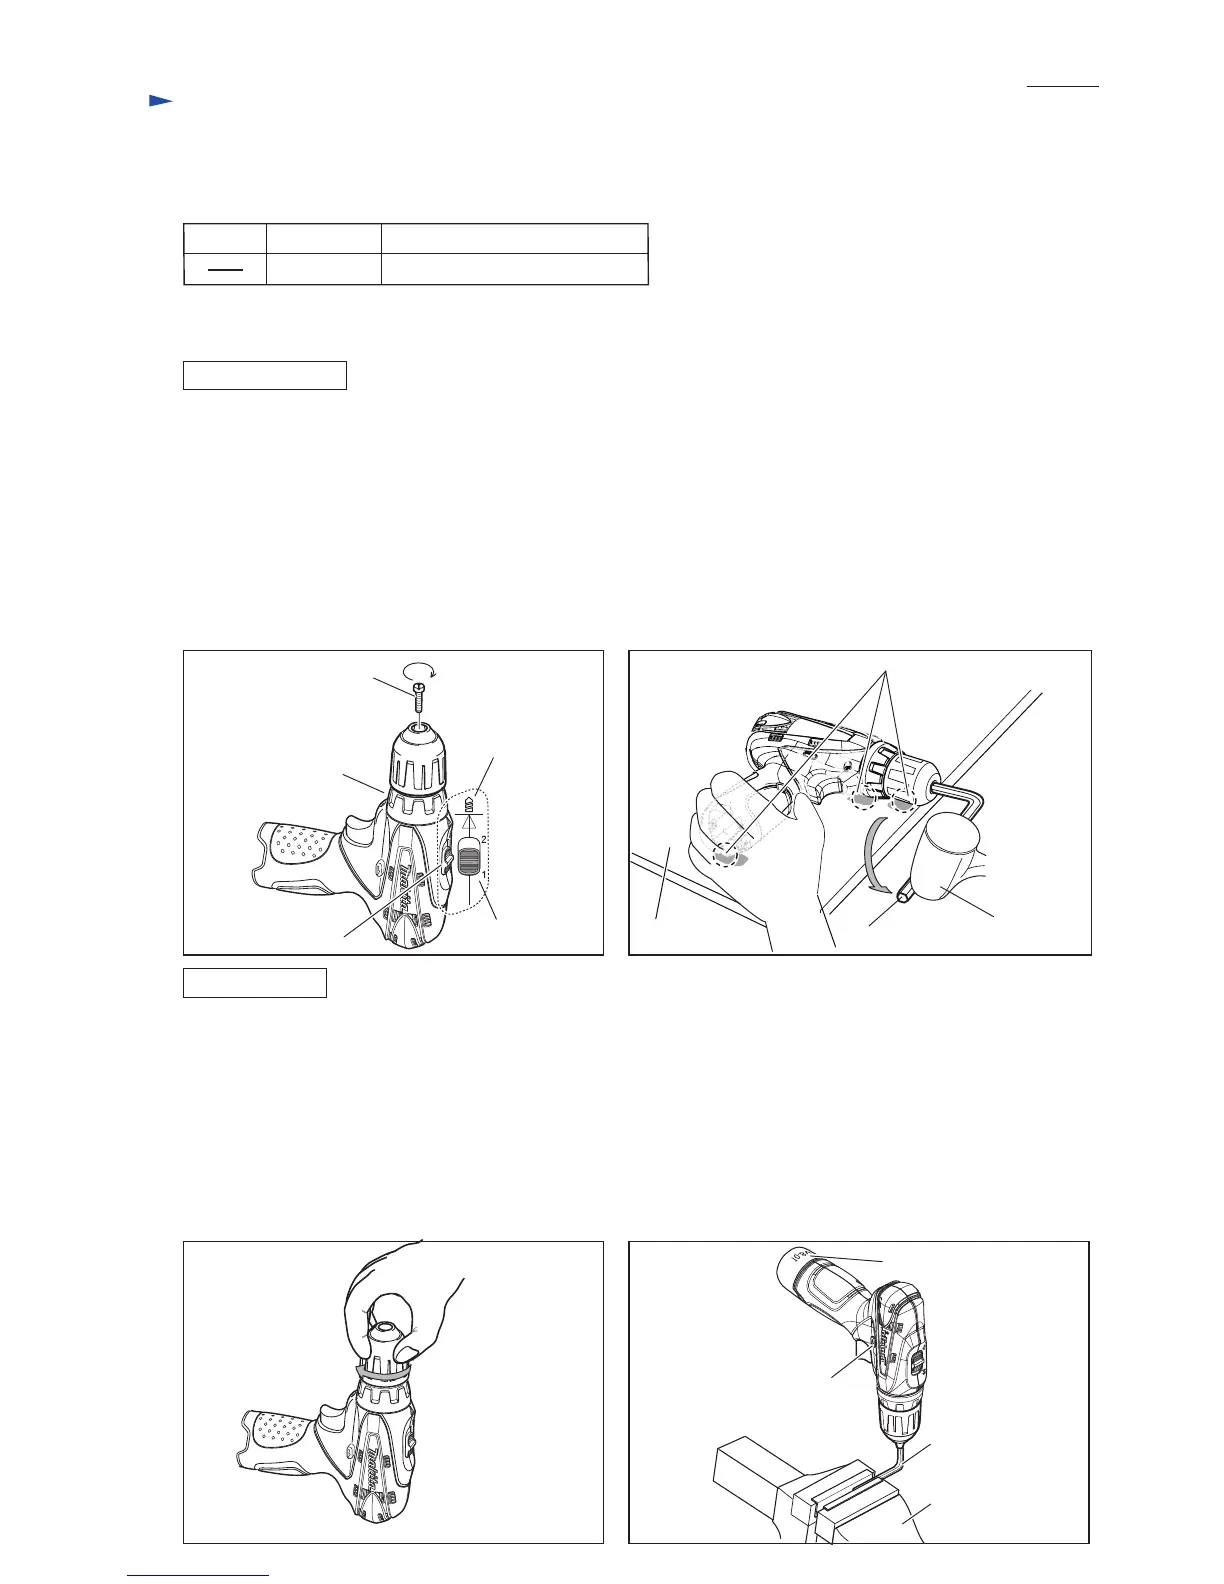
Fig. 1
Repair
DISASSEMBLING
ASSEMBLING
Description
Hex wrench 8 Removing / installing Drill chuck
Code No. Use for
M5x22 Pan head screw
(left handed and thread
locker-coated)
Drill mode
Action mode
change lever
Speed change lever
Press down the three positions
firmly on a worktable.
workbench hex wrench 8 plastic hammerLow speed mode
Fig. 2
Note: It is required to remove Drill chuck when replacing Gear assembly, but you need not when replacing only Housing.
1) Open the jaws of Drill chuck fully. Then remove M5x22 Pan head screw (left-handed and threadlocker coated) by
turning clockwise using impact driver in Forward rotation mode with slotted bit. (Fig. 1)
2) Set Action mode change lever in Drill mode, Speed change lever in Low speed mode. (Fig. 1)
3) Fix the short leg of a hex wrench 8 in Drill chuck so that the long leg of the hex wrench 8 comes to the position that is
easy to strike. (Fig. 2)
4) Hold the machine firmly on a workbench, and strike the long leg of hex wrench 8 to turn Drill chuck counterclockwise.
(Fig. 2)
Note: If it is impossible to remove Drill chuck in the above way, use 1R359 (Chuck removing tool) to remove it. Refer to
Makita repair tool list.
Fig. 3 Fig. 4
1) Turn Drill chuck clockwise until it stops by hand. (Fig. 3)
2) Clamp one leg of hex wrench 8 in vise. And fix the other leg of hex wrench 8 in Drill chuck. (Fig. 4)
3) Set Action mode change lever in Drill mode, Speed change lever in Low speed mode. (Fig. 1)
4) Set F/R change lever to clockwise rotation. Install Battery. (Fig. 4)
5) Pull Switch lever slowly to prevent the machine from having impacts. And fasten Drill chuck until the motor is locked.
Note: 1) Pull Switch lever slowly so that he rotation speed reaches the max level in approx. one second.
2) As soon as the motor is locked, release Switch trigger.
6) Set M5x22 left handed Pan head screw in place after applying ThreeBond 1321B/ 1342 or Loctite 242 to the threads of
the screw.
F/R Change lever
vise
hex wrench 8
Battery
 Loading...