21 ENGLISH
MAINTENANCE
CAUTION: Always be sure that the tool is
switched off and the battery cartridge is removed
before attempting to perform inspection or
maintenance.
CAUTION: Clean out the upper and lower
guards to ensure there is no accumulated saw-
dust which may impede the operation of the lower
guarding system.Adirtyguardingsystemmaylimit
the proper operation which could result in serious
personalinjury.Themosteffectivewaytoaccomplish
this cleaning is with compressed air. If the dust is
being blown out of the guards be sure the proper
eye and breathing protection is used.
NOTICE: Never use gasoline, benzine, thinner,
alcohol or the like. Discoloration, deformation or
cracks may result.
To maintain product SAFETY and RELIABILITY,
repairs,anyothermaintenanceoradjustmentshould
beperformedbyMakitaAuthorizedorFactoryService
Centers,alwaysusingMakitareplacementparts.
Adjusting 0°-cut or 45°-cut accuracy
Thisadjustmenthasbeenmadeatthefactory.Butifitis
off,youcanadjustitasthefollowingprocedure.
1. Loosen the lever and clamping screw on the
front and rear of the tool so that the bevel angle can be
changed. Set the stopper to 0° - 45° bevel angle posi-
tionifyouaregoingtoadjust45°-cutaccuracy.
1
►1. Stopper
2.
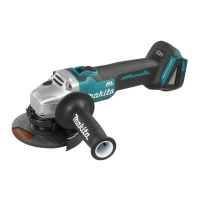
Make the base perpendicular or 45° to the circular saw
bladeusingatriangularrulebyturningtheadjustingscrewwith
ahexwrench.Youcanalsouseasquareruletoadjust0°angle.
11
►1. Triangular rule
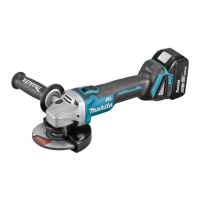
1
2
►1.Adjustingscrewfor0°angle2.Adjustingscrew
for 45° angle
3. Tighten the lever and clamping screw and then
make a test cut to check if desired angle is obtained.
Adjusting the parallelism
Thisadjustmenthasbeenmadeatthefactory.Butifitis
off,youcanadjustitasthefollowingprocedure.
1. Set the tool to the maximum cutting depth.
2. Make sure all levers and screws are tightened.
Slightlyloosenthescrewillustrated.
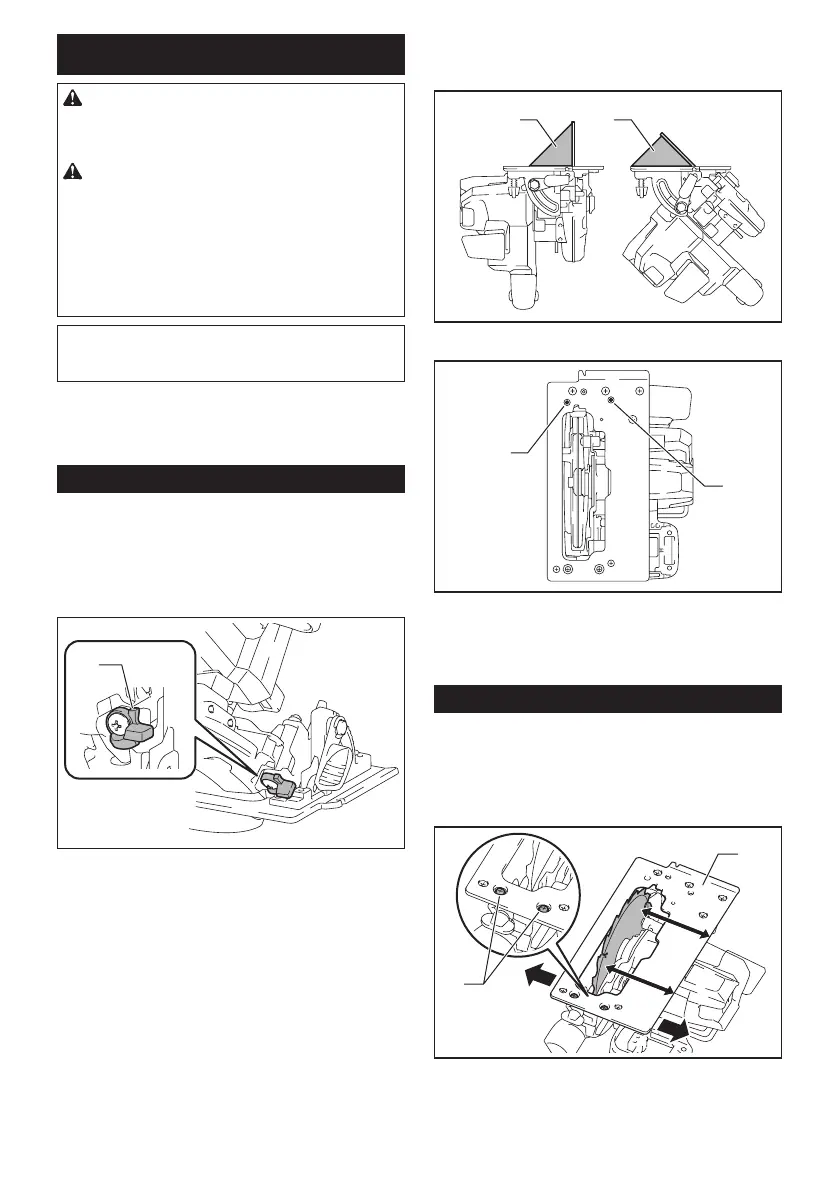
1
2
A
B
►1. Screw 2. Base
3. While opening the lower guard, move the rear of
thebasesothatthedistanceAandBbecomesequal.
 Loading...