EasyManuals Logo

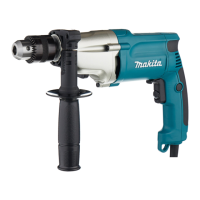
Makita DP4011X User Manual

Makita DP4011X
52 pages
To Next Page IconTo Next Page
To Previous Page IconTo Previous Page
Page #6 background imageLoading...
Page #6 background image
6 ENGLISH
ASSEMBLY
CAUTION: Always be sure that the tool is
󰀨
any work on the tool.
Installing side grip (auxiliary handle)
Fig.4: 1.2. Side grip (auxiliary handle)
3. Teeth 4. Protrusion
Always use the side grip to ensure operating safety.



NOTE:-
tion where the depth gauge strikes against the tool

Installing or removing drill bit
CAUTION: Always be sure that the tool is
󰀨
removing the drill bit.
For model DP4010
Fig.5: 1.


key in each of the three holes and tighten clockwise. Be
sure to tighten all three chuck holes evenly.
-

hand.

original position.
For model DP4011
Fig.6: 1. Sleeve 2. Ring
Hold the ring and turn the sleeve counterclockwise to


sleeve clockwise to tighten the chuck.

counterclockwise.
Depth gauge
Optional accessory
The depth gauge is convenient for drilling holes of
uniform depth. Loosen the side grip and insert the depth

gauge to the desired depth and tighten the side grip

Fig.7: 1. Depth gauge
NOTE:-
tion where the depth gauge strikes against the tool

OPERATION
Holding tool
Fig.8


operations.
Drilling operation
Drilling in wood

with wood drills equipped with a guide screw. The guide

the workpiece.
Drilling in metal

hole, make an indentation with a center-punch and


-

CAUTION: Pressing excessively on the tool
will not speed up the drilling. In fact, this excessive
pressure will only serve to damage the tip of your drill

service life of the tool.
CAUTION: 
when the drill bit begins to break through the
workpiece. There is a tremendous force exerted on

CAUTION: A stuck drill bit can be removed
simply by setting the reversing switch to reverse
rotation in order to back out. However, the tool

CAUTION: Always secure workpieces in a
vise or similar hold-down device.
CAUTION: Avoid drilling in material that you
suspect contains hidden nails or other things that
may cause the drill bit to bind or break.
Questions and Answers:

Question and Answer IconNeed help?

Do you have a question about the Makita DP4011X and is the answer not in the manual?

Makita DP4011X Specifications

General IconGeneral
BrandMakita
ModelDP4011X
CategoryDrill
LanguageEnglish

Related product manuals