6 ENGLISH
To prevent the switch trigger from accidentally pulled,
the lock-o button is provided.
To start the tool, depress the lock-o button from B side
and pull the switch trigger.
Release the switch trigger to stop. After use, always
press in the lock-o button from A side.
Speed adjusting dial
1
► 1. Speed adjusting dial
The tool speed can be innitely adjusted between 1.4
m/s and 2.7 m/s by turning the adjusting dial. Higher
speed is obtained when the dial is turned in the direc-
tion of number 6; lower speed is obtained when it is
turned in the direction of number 1.
Select the proper speed for the workpiece to be cut.
CAUTION:
• The speed adjusting dial can be turned only as
far as 6 and back to 1. Do not force it past 6 or
1, or the speed adjusting function may no longer
work.
Lighting up the lamp
1
► 1. Lamp
CAUTION:
• Do not apply impact to the lamp, which may
cause damage or shorted service time to it.
Pull the switch trigger to light up the lamp. The lamp
keeps on lighting while the switch trigger is being pulled.
The lamp goes out 10 -15 seconds after releasing the
trigger.
NOTE:
• Use a dry cloth to wipe the dirt o the lens of
lamp. Be careful not to scratch the lens of lamp,
or it may lower the illumination.
• Do not use thinner or gasoline to clean the lamp.
Such solvents may damage it.
• When the tool is overloaded during operation,
the lamp ickers.
• When the remaining battery capacity becomes
small, the lamp ickers.
ASSEMBLY
CAUTION:
• Always be sure that the tool is switched o and
the battery cartridge is removed before carrying
out any work on the tool.
Installing or removing the blade
CAUTION:
• Oil on the blade can cause the blade to slip or
come o unexpectedly. Wipe o all excess oil
with a cloth before installing the blade.
• Use caution when handling the blade so that
you are not cut by the sharp edge of the blade
teeth.
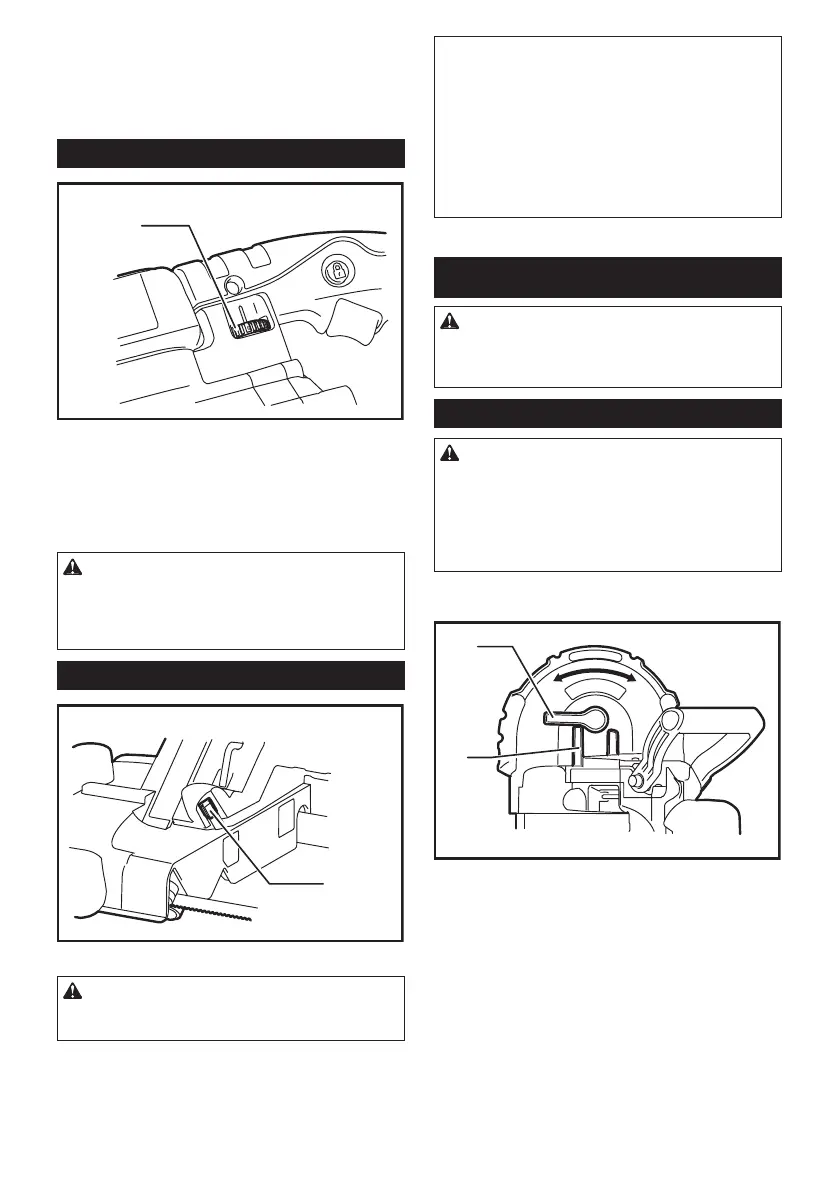
Turn the blade tightening lever clockwise until it hits
against the protrusion on the frame.
4
3
1
2
► 1. Tighten 2. Loosen 3. Protrusion 4. Lever

 Loading...