Do you have a question about the Makita DTW180Z and is the answer not in the manual?
This document serves as an instruction manual for the Makita Cordless Impact Wrench, model DTW180. It provides comprehensive information on the tool's operation, safety guidelines, maintenance, and applicable accessories. The manual emphasizes the importance of reading all safety warnings and instructions to prevent electric shock, fire, and serious injury.
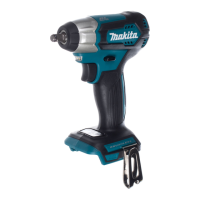
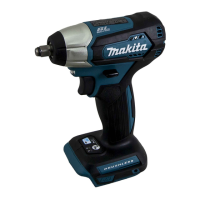
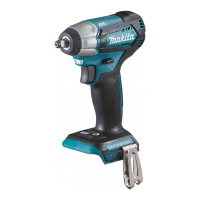
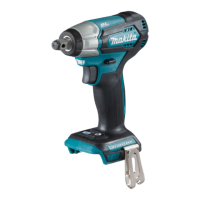
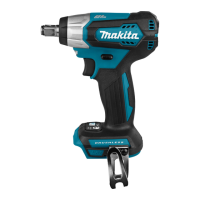
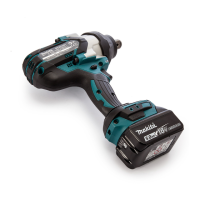
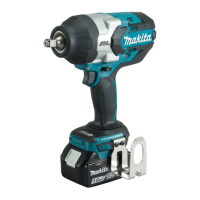
The Makita DTW180 is a cordless impact wrench designed for fastening bolts and nuts. It operates on a D.C. 18 V battery and offers variable impact force settings to suit different applications. The tool features a square drive for impact sockets and a reversing switch to change the direction of rotation. It also includes a front lamp for illuminating the work area and a tool/battery protection system to enhance durability and safety.
The impact wrench offers three impact force settings: "Hard," "Soft," and "Reverse rotation auto stop mode." These settings allow users to adjust the tightening force and speed according to the specific task, ensuring optimal performance and preventing overtightening or damage to fasteners. The "Reverse rotation auto stop mode" is a unique feature that stops the impact and rotation once a bolt or nut is sufficiently loosened, which is particularly useful for disassembling tasks.
The tool is equipped with a tool/battery protection system that automatically cuts off power to the motor under certain conditions to extend the life of both the tool and the battery. This system includes overload protection, overheat protection, and overdischarge protection. Overload protection activates if the tool draws an abnormally high current, causing it to stop without indication. Overheat protection engages if the tool or battery becomes too hot, stopping operation until it cools down. Overdischarge protection stops the tool when the battery capacity is insufficient, prompting the user to recharge the battery.
Battery Installation and Removal: To install the battery cartridge, align the tongue on the cartridge with the groove in the tool's housing and slide it in until it locks with a click. A red indicator on the upper side of the button should not be visible when the battery is fully inserted, indicating a secure connection. To remove the battery, slide the button on the front of the cartridge and pull the battery out. It is crucial to always switch off the tool before installing or removing the battery cartridge and to hold both the tool and battery firmly to prevent accidental drops and potential injury.
Switch Action: The tool is activated by pulling the switch trigger. The speed of the tool increases with greater pressure on the trigger. Releasing the trigger stops the tool. A safety feature automatically stops the tool if the switch trigger is pulled for approximately 6 minutes continuously.
Front Lamp: The front lamp illuminates the work area when the switch trigger is pulled. It remains on for about 10 seconds after the trigger is released. The lamp status can be toggled on or off by pulling and releasing the switch trigger, then pressing the button for one second within 10 seconds. Pressing the button again similarly will turn the lamp status back on. The lamp also serves as an indicator for overheating; if the tool is overheated, the light flashes for one minute before turning off, signaling the need to cool down the tool.
Reversing Switch Action: A reversing switch allows users to change the direction of rotation. Depressing the lever from the "A" side results in clockwise rotation, while depressing it from the "B" side results in counterclockwise rotation. When the lever is in the neutral position, the switch trigger cannot be pulled, preventing unintentional starting. It is essential to ensure the tool comes to a complete stop before changing the direction of rotation to avoid damage.
Changing Impact Force: The impact force can be adjusted in three steps: "Hard," "Soft," and "Reverse rotation auto stop mode," by pressing a dedicated button. Each press cycles through these settings, allowing users to select the appropriate tightening force for their specific task. The "Reverse rotation auto stop mode" is particularly useful for loosening bolts and nuts, as it automatically stops the impact and rotation once the fastener is sufficiently loose, preventing over-loosening or accidental drops. This mode only functions when the tool rotates counterclockwise.
Impact Socket Installation and Removal: To install an impact socket, simply push it onto the square drive until it locks into place. To remove it, pull it off. Using the correct size impact socket is critical for accurate and consistent fastening torque and to prevent damage to the bolt, nut, or socket.
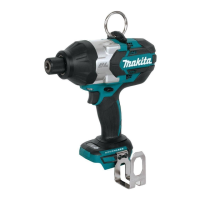
Hook Installation: A hook can be installed on either side of the tool's housing by inserting it into a groove and securing it with a screw. This hook is convenient for temporarily hanging the tool, enhancing portability and ease of access during work.
Proper Fastening Torque: Achieving the proper fastening torque depends on various factors, including the type and size of the bolt, the material of the workpiece, and the fastening time. The manual provides graphs illustrating the relationship between fastening torque and fastening time for standard and high tensile bolts. It recommends performing a test operation to determine the proper fastening time for specific bolts or nuts before starting a job. After fastening, it is always advisable to check the torque with a torque wrench to ensure accuracy.
General Maintenance: Before performing any inspection or maintenance, it is crucial to ensure the tool is switched off and the battery cartridge is removed. This prevents accidental startup and potential injury. The manual advises against using gasoline, benzine, thinner, alcohol, or similar substances for cleaning, as these can cause discoloration, deformation, or cracks.
Service and Repair: To maintain the safety and reliability of the product, all repairs, maintenance, or adjustments should be performed by Makita Authorized or Factory Service Centers. These centers use genuine Makita replacement parts to ensure the tool's integrity and performance. The manual also specifies that damaged battery packs should only be serviced by the manufacturer or authorized service providers.
Battery Care: To maximize battery life, it is recommended to charge the battery cartridge before it is completely discharged. Users should stop operation and charge the battery when they notice a decrease in tool power. Overcharging a fully charged battery cartridge should be avoided, as it can shorten the battery's service life. The ideal charging temperature for the battery cartridge is between 10 °C and 40 °C (50 °F and 104 °F). If a hot battery cartridge needs charging, it should be allowed to cool down first. For prolonged storage (more than six months), the battery cartridge should be charged before storage.
Impact Socket Inspection: Regularly check the impact socket for wear, cracks, or damage before installation. A worn or damaged impact socket can lead to a reduction in fastening torque and potential damage to fasteners.
Lamp Lens Cleaning: To maintain optimal illumination from the front lamp, use a dry cloth to wipe away any dirt from the lens. Care should be taken not to scratch the lens, as this could reduce its illumination effectiveness.
Factors Affecting Fastening Torque: The manual highlights several factors that can influence the fastening torque:
By adhering to these maintenance guidelines and understanding the factors that influence tool performance, users can ensure the longevity, safety, and efficiency of their Makita Cordless Impact Wrench.
| Type | Impact Wrench |
|---|---|
| Voltage | 18V |
| Max Torque | 180 Nm |
| Battery Type | Lithium-ion |
| Drive | 1/2" Square Drive |