Do you have a question about the Makita DTW181Z and is the answer not in the manual?
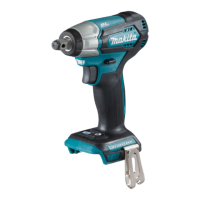
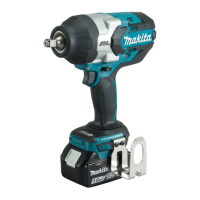
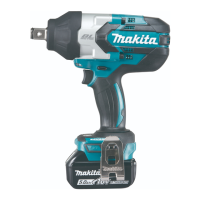
This document provides an instruction manual for the Makita Cordless Impact Wrench, model DTW181. It covers safety warnings, functional descriptions, operation, and maintenance.
The manual emphasizes the importance of reading all safety warnings, instructions, illustrations, and specifications provided with the power tool to prevent electric shock, fire, or serious injury. Users are advised to keep the work area clean and well-lit, avoid operating in explosive atmospheres, and keep children and bystanders away. Electrical safety precautions include matching power tool plugs to outlets, avoiding body contact with earthed surfaces, and not exposing power tools to rain or wet conditions. The use of an extension cord suitable for outdoor use is recommended when operating outdoors, and a residual current device (RCD) protected supply is advised in damp locations.
Personal safety is paramount, urging users to stay alert, use common sense, and avoid operating the tool while tired or under the influence of drugs, alcohol, or medication. The use of personal protective equipment, especially eye protection (goggles complying with ANSI Z87.1, EN 166, or AS/NZS 1336), is mandatory. Preventing unintentional starting by ensuring the switch is in the off-position before connecting to power sources or carrying the tool is crucial. Users should remove any adjusting key or wrench before turning the power tool on. Maintaining proper footing and balance, dressing properly (avoiding loose clothing or jewelry), and keeping hair away from moving parts are also highlighted. If dust extraction and collection facilities are provided, they must be connected and properly used. The manual warns against complacency from frequent use, stressing that careless actions can cause severe injury.
The manual advises using the correct power tool for the application and not forcing it. If the switch does not turn the tool on and off, it must be repaired. Before making any adjustments, changing accessories, or storing the tool, the plug must be disconnected from the power source and/or the battery pack removed. Idle power tools should be stored out of reach of children and untrained persons. Proper maintenance of power tools and accessories, including checking for misalignment, binding, or breakage of parts, is essential. Cutting tools should be kept sharp and clean. The tool, accessories, and bits must be used in accordance with instructions, considering working conditions and the task to be performed. Handles and grasping surfaces should be kept dry, clean, and free from oil and grease. When using the tool, cloth work gloves that may become entangled should not be worn.
Only the charger specified by the manufacturer should be used for recharging battery packs. Using other chargers may create a risk of fire. Power tools should only be used with specifically designated battery packs to avoid injury and fire. When not in use, battery packs should be kept away from other metal objects that could short the terminals, which may cause burns or fire. In case of liquid ejection from the battery under abusive conditions, contact should be avoided, and if contact occurs, the area should be flushed with water and medical attention sought. Damaged or modified batteries should not be used, as they may exhibit unpredictable behavior leading to fire, explosion, or injury. The manual also specifies not to short the battery cartridge by touching terminals with conductive material, storing it with other metal objects, or exposing it to water or rain. Storing the tool and battery cartridge in locations where the temperature may exceed 50 °C (122 °F) is prohibited. Battery cartridges should not be incinerated, even if severely damaged or worn out, as they can explode in a fire. Users are advised to be careful not to drop or strike the battery and not to use a damaged battery. For commercial transports, specific requirements for packaging and labeling must be observed, and local regulations for battery disposal must be followed. Only genuine Makita batteries should be used, as non-genuine or altered batteries may cause fire, personal injury, damage, and void the Makita warranty.
To maximize battery life, the battery cartridge should be charged before it is completely discharged. Tool operation should stop, and the battery should be charged when less tool power is noticed. Overcharging a fully charged battery cartridge should be avoided, as it shortens service life. Charging should occur at room temperature (10 °C - 40 °C / 50 °F - 104 °F), and a hot battery cartridge should be allowed to cool down before charging. If the battery cartridge is not used for a long period (more than six months), it should be charged.
The tool is equipped with a tool/battery protection system that automatically cuts off power to the motor to extend tool and battery life. This system activates under overload or overdischarge conditions. In case of overload, the tool stops automatically without indication; the user should turn the tool off, stop the application, and then restart. If the battery capacity is insufficient, the tool stops automatically, requiring the battery to be removed and charged.
The remaining battery capacity can be indicated by pressing a check button on the battery cartridge, which illuminates indicator lamps for a few seconds. The lamps show capacity ranges from 75-100% down to 0-25%, and also indicate when the battery needs charging or if it has malfunctioned.
The switch trigger starts the tool, and tool speed increases with pressure on the trigger. Releasing the trigger stops the tool. The tool automatically stops if the trigger is pulled for about 6 minutes. The front lamp lights up when the switch trigger is pulled and goes out approximately 10 seconds after release. The lamp status can be toggled on/off by pressing a button for one second after pulling and releasing the switch trigger. Users are warned not to look directly into the light source.
The tool features a reversing switch to change the direction of rotation. Depressing the lever from the A side results in clockwise rotation, and from the B side, counterclockwise rotation. When the lever is in the neutral position, the switch trigger cannot be pulled. Users are cautioned to always check the direction of rotation before operation, use the reversing switch only after the tool has come to a complete stop to prevent damage, and set the lever to the neutral position when not operating the tool.
The impact force can be changed in three steps: hard, soft, and Reverse rotation auto stop mode, allowing for tightening suitable to the work. Each press of a button changes the number of blows. The Reverse rotation auto stop mode functions only when the trigger is fully pulled in counterclockwise rotation; the tool stops impact and rotation once the bolt/nut is sufficiently loosened. The impact force grade can be changed for approximately one minute after releasing the switch trigger.
Before any work on the tool, it must be switched off, and the battery cartridge removed. The correct size impact socket must be used for bolts and nuts to avoid inaccurate fastening torque or damage.
For installing or removing impact sockets, users are cautioned to ensure the impact socket and mounting portion are not damaged and that the socket is firmly secured after insertion. The installation method varies depending on the square drive type. For tools with a ring spring, the impact socket is pushed onto the square drive until it locks into place and pulled off to remove. For tools with a detent pin, the O-ring and pin are removed from the impact socket, which is then aligned with the square drive hole, and the pin is reinserted to retain it. To remove, the installation procedures are reversed.
A hook can be installed on either side of the tool for temporary hanging. It is secured with a screw. Users are warned to secure the hook firmly to prevent personal injury.
Before operation, the battery cartridge must be fully inserted until it locks in place and the red indicator on the button's upper side is no longer visible. The tool should be held firmly, and the impact socket placed over the bolt or nut. The tool is then turned on and fastened for the proper fastening time. The manual notes that proper fastening torque varies depending on the bolt type, size, and workpiece material, and the relationship between fastening torque and fastening time is illustrated in figures. Excessive fastening torque can damage the bolt/nut or impact socket, so a test operation is recommended before starting a job. If the tool is operated continuously until the battery cartridge is discharged, a 15-minute rest period is advised before using a fresh battery cartridge. Factors affecting fastening torque include battery discharge, incorrect or worn impact sockets, bolt diameter, and the use of universal joints or extension bars. The manner of holding the tool and operating at low speed also affect torque.
Before any inspection or maintenance, the tool must be switched off, and the battery cartridge removed. Users are warned not to use gasoline, benzine, thinner, alcohol, or similar substances, as they can cause discoloration, deformation, or cracks. All repairs, maintenance, or adjustments should be performed by Makita Authorized or Factory Service Centers using genuine Makita replacement parts to maintain product safety and reliability.
| Type | Impact Wrench |
|---|---|
| Voltage | 18V |
| Max Torque | 180Nm |
| Impact Rate | 0-3, 200ipm |
| Chuck Type | 1/2" Square Drive |
| Battery Type | Li-ion |