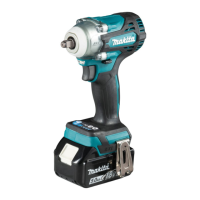
This document serves as an instruction manual for the Makita Cordless Impact Wrench models DTW300, DTW301, and DTW302. It provides essential safety warnings, operational guidelines, and maintenance instructions to ensure safe and effective use of the tool.
Function Description
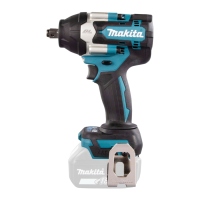
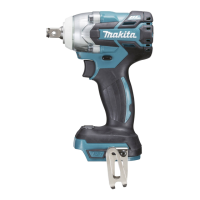
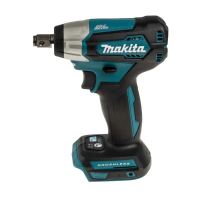
The Makita Cordless Impact Wrench is designed for fastening bolts and nuts. It operates on a battery system and offers various modes to control impact force and speed, making it suitable for a wide range of applications. The tool features a robust design to handle demanding tasks while prioritizing user safety and convenience.
Usage Features
The impact wrench incorporates several features to enhance its usability and performance:
- Battery Cartridge System: The tool uses Makita's BL1815N, BL1820B, BL1830B, BL1840B, BL1850B, or BL1860B battery cartridges, which are installed by aligning the tongue with the housing groove and pushing until it clicks. A red indicator on the battery cartridge confirms if it is not fully locked. The tool is equipped with a battery protection system that automatically cuts off power to extend tool and battery life under overload, overheat, or overdischarge conditions. The remaining battery capacity can be checked by pressing a button on the cartridge, which illuminates indicator lamps.
- Switch Action: The tool is activated by pulling the switch trigger, and speed increases with pressure. Releasing the trigger stops the tool. A safety feature automatically stops the tool if the trigger is pulled for 6 minutes continuously.
- Electric Brake: An integrated electric brake ensures the tool stops quickly after the switch trigger is released, enhancing safety and control.
- Front Lamp: The tool includes a front lamp that can be turned on or off by pressing a dedicated button for one second. When the lamp status is ON, pulling the switch trigger activates the lamp, which stays on for approximately 10 seconds after the trigger is released. This feature improves visibility in dimly lit work areas.
- Reversing Switch Action: A reversing switch lever allows users to change the direction of rotation (clockwise or counterclockwise). It is crucial to ensure the tool comes to a complete stop before changing direction to prevent damage. For safety, the lever should be set to the neutral position when the tool is not in use, which also prevents accidental trigger pulls.
- Application Modes (Impact Force): The tool offers four steps of impact force: 4 (max), 3 (hard), 2 (medium), and 1 (soft). These settings allow for precise tightening suitable for different tasks. The impact force level can be changed by pressing a button, and this setting can be adjusted within approximately one minute after releasing the switch trigger.
- 4 (Max): Provides maximum force and speed for heavy-duty tightening.
- 3 (Hard): Offers less force and speed than Max mode, providing better control.
- 2 (Medium): Ideal for tasks requiring a good finish or controlled power.
- 1 (Soft): Designed for fine adjustments with small diameter bolts, preventing screw thread breakage.
- Application Modes (Assist Type - Bolt Mode): The tool also features specialized bolt modes for enhanced control:
- Clockwise Mode: Helps achieve consistent torque and reduces the risk of overtightening and bolt breakage.
- Counterclockwise Mode: Prevents bolts from falling off by automatically stopping or slowing down the tool once the bolt is sufficiently loosened.
- Bolt Mode (1) Clockwise: Stops automatically as soon as impact blows begin.
- Bolt Mode (1) Counterclockwise: Uses impact force 4 and stops automatically as soon as impact blows cease.
- Bolt Mode (2) Clockwise: Stops automatically approximately 0.5 seconds after impact blows start.
- Bolt Mode (2) Counterclockwise: Uses impact force 4 and stops automatically approximately 0.2 seconds after impact blows cease.
- Bolt Mode (3) Clockwise: Stops automatically approximately 1 second after impact blows start.
- Bolt Mode (3) Counterclockwise: Slows down after impact blows stop.
- Full Speed Mode: This mode allows the tool to operate at its fastest speed without requiring the trigger to be pulled fully. It can be toggled on or off by pressing and holding a dedicated button.
- Impact Socket Installation: The manual describes two methods for installing impact sockets:
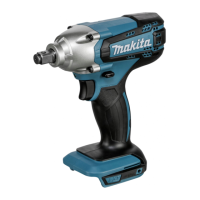
- For O-ring and pin type (DTW300): Involves moving the O-ring, removing the pin, aligning the socket with the square drive, inserting the pin, and returning the O-ring to secure the socket.
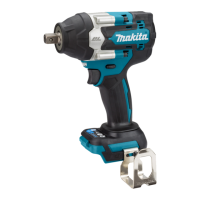
- For detent pin type (DTW301): Involves aligning the socket hole with the detent pin on the square drive and pushing the socket into place.
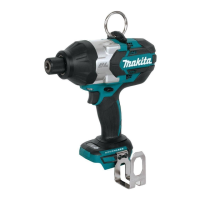
- Hook Installation: A hook can be installed on either side of the tool for temporary hanging, secured with a screw.
Maintenance Features
Proper maintenance is crucial for the longevity and safe operation of the impact wrench:
- General Maintenance: Always ensure the tool is switched off and the battery cartridge is removed before performing any inspection or maintenance.
- Cleaning: Avoid using gasoline, benzine, thinner, alcohol, or similar substances, as they can cause discoloration, deformation, or cracks. For the lamp lens, use a dry cloth to wipe off dirt, being careful not to scratch it.
- Repairs: For product safety and reliability, all repairs, maintenance, or adjustments should be performed by Makita Authorized or Factory Service Centers, using genuine Makita replacement parts.
- Battery Care:
- Charge the battery cartridge before it is completely discharged, and stop operation when tool power decreases.
- Avoid overcharging fully charged battery cartridges to prolong service life.
- Charge battery cartridges at room temperature (10 °C - 40 °C). Allow hot battery cartridges to cool down before charging.
- Remove the battery cartridge from the tool or charger when not in use for extended periods.
- Charge the battery cartridge if it will not be used for more than six months.
- Do not store or use the tool and battery cartridge in locations where the temperature may exceed 50 °C (122 °F).
- Impact Socket Inspection: Regularly check impact sockets for wear, cracks, or damage before installation. Using incorrect or worn impact sockets can reduce fastening torque and damage bolts or nuts.
- Fastening Torque Check: After fastening, always verify the torque with a torque wrench, as various factors (battery discharge, socket condition, material, and holding manner) can affect the actual fastening torque.
- Accessory Usage: Only use accessories or attachments recommended by Makita for this tool to prevent injury and ensure proper function.