13
OPERATION
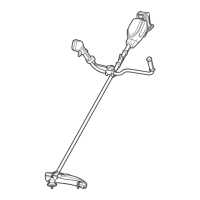
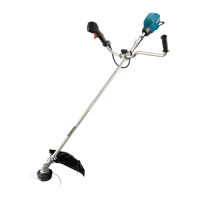
Correct handling of tool (Fig. 13)
Correct posture
WARNING:
• Always position the tool on your right-hand side
so that the barrier is always in front of your body.
Correct positioning of the tool allows for maximum
control and will reduce the risk of serious personal
injurycausedbykickback.
CAUTION:
• If during operation the cutting tool accidentally
impacts a rock or hard object, stop the tool and
inspect for any damage. If the cutting tool is
damaged, replace it immediately.Useofadamaged
cuttingtoolcouldresultinseriouspersonalinjury.
Puttheshoulderharnessonyourleftshoulderbyputting
yourheadandrightarmthroughitandkeepthetoolon
yourrightsidewhilealwayskeepingthebarrierinfront
ofyourbody.
Attachment of shoulder harness (Fig. 14)
Adjusttheharnesslengthsothatthecuttingtooliskept
parallelwiththeground.
Connectthehangerandtheharness.
WARNING:
• Be extremely careful to maintain control of the tool
at all times. Do not allow the tool to be deected
toward you or anyone in the work vicinity.Failureto
keepcontrolofthetoolcouldresultinseriousinjuryto
thebystanderandtheoperator.
Adjustment of the hanger position and shoulder
harness (Fig. 15)
Adjustthehangerpositionasillustrated.(Fig. 16)
To change the hanger position, loosen the bolt on the
hanger.Thenmovethehanger.
Afteradjustingthehangerposition,tightentheboltwith
thewrenchsecurely.
MAINTENANCE
WARNING:
• Always be sure that the tool is switched off and
unplugged before attempting to perform inspection
or maintenance on the tool. Failure to switch off
andunplugmayresultinseriouspersonalinjuryfrom
accidentalstart-up.
NOTICE:
• Never use gasoline, benzine, thinner, alcohol or the
like.Discoloration,deformationorcracksmayresult.
Replacing the nylon cord (Fig. 17)
WARNING:
• Make sure that the nylon cutting head is secured to
the tool properly before operation.Failuretoproperly
securethenyloncuttingheadmaycauseittoyapart
resultinginseriouspersonalinjury.
1. Removethenyloncuttinghead.
2. Take offthecover, pressing two latches whichare
slottedsectionoppositelyonsideofthecup.
3. Removethespool.Andremovetheoldnyloncord
fromthespool.
4. Cutanylonlinein3–6m.Foldthecuttinglineintwo
halves,leaveone ofhalflonger80–100mmthan
another. (Fig. 18)
5. Hookthemiddleofthenewnyloncordtothenotch
locatedatthecenterofthespoolbetweenthetwo
channelsprovidedforthenyloncord. (Fig. 19)
6. Wind both ends rmly along the channels in the
direction indicated by arrow mark on the spool.
(Fig. 20)
7. Putthenyloncordsthroughtheeyeletstocomeout
ofthecup.
8. Align the protrusion on the underside of the cover
with the slots of the eyelets. Then push the cover
rmly onto the cup to secure it. Make sure the
latchesfullyspreadinthecover.
To maintain product SAFETY and RELIABILITY,
repairs,anyothermaintenanceoradjustmentshouldbe
performedbyMakitaAuthorizedServiceCenters,always
usingMakitareplacementparts.
 Loading...