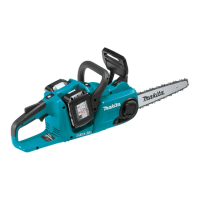
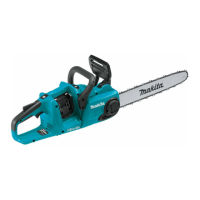
This document provides an instruction manual for the Makita Cordless Chain Saw models XCU05 and XCU06. It includes specifications, safety warnings, functional descriptions, assembly instructions, operation guidelines, and maintenance procedures.
Function Description
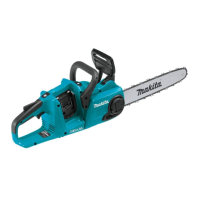
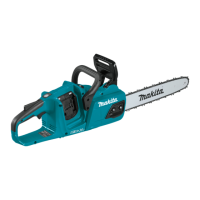
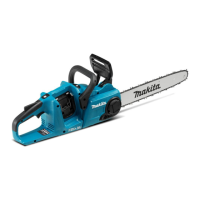
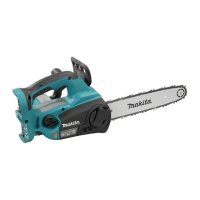
The Makita Cordless Chain Saw is a power tool designed for cutting wood. It operates on D.C. 18V battery cartridges and features automatic chain lubrication, a chain brake for safety, and electronic functions such as soft start. The tool is intended for tasks like bucking, limbing, and pruning trees. It also incorporates a tool/battery protection system to extend the life of the tool and battery by automatically cutting off power under certain conditions like overload, overheating, or overdischarge. The Torque Boost mode allows for cutting thick or hard branches by providing increased power for up to 30 seconds.
Important Technical Specifications
- Model: XCU05, XCU06
- Overall length (without guide bar): 256 mm (10-1/8")
- Rated voltage: D.C. 18 V
- Net weight: 2.8 - 3.3 kg (6.2 - 7.2 lbs) (depending on attachments and battery cartridge)
- Standard guide bar length: XCU05: 200 mm (8"), XCU06: 250 mm (10")
- Recommended guide bar length (with 90PX saw chain type): 200 - 250 mm (8" - 10")
- Applicable saw chain type: 90PX
- Standard sprocket: 6 teeth, 3/8" pitch
- Chain speed: 0 - 24 m/s (0 - 1,440 m/min) (0 - 4,720 ft/min)
- Chain oil tank volume: 140 cm³ (4.7 fl oz)
- Applicable battery cartridges: BL1815N, BL1820B, BL1830, BL1830B, BL1840B, BL1850B, BL1860B (Note: Some may not be available in all regions).
- Saw chain, guide bar, and sprocket combination (90PX):
- Number of drive links: 33 (for 200 mm guide bar), 40 (for 250 mm guide bar)
- Guide bar length: 200 mm (8"), 250 mm (10")
- Cutting length: 180 mm (7-1/8"), 244 mm (9-5/8")
- Part No.: 161848-6 (for 200 mm guide bar), 161846-0 (for 250 mm guide bar)
- Pitch: 3/8"
- Gauge: 1.1 mm (0.043")
- Type: Sprocket nose bar
Usage Features
- Battery Cartridge Installation/Removal: Always switch off the tool before installing or removing the battery cartridge. Hold both the tool and cartridge firmly to prevent slipping. Ensure the cartridge is fully installed until the red indicator is no longer visible and it locks with a click.
- Remaining Battery Capacity Indication: For battery cartridges with an indicator, press the check button to see the remaining capacity via indicator lamps.
- Tool/Battery Protection System: The system automatically cuts off power for overload, overheating (main power lamp lights up in red), and overdischarge (main power lamp blinks in red).
- Main Power Switch: Press to turn on (green light) or off. The tool has an auto power-off function if idle for a certain period.
- Torque Boost Mode: To activate, press the main power switch for a few seconds until the main power lamp lights up in yellow. This mode provides increased power for up to 30 seconds for cutting thick/hard branches. Not available with BL1815N or BL1820B battery cartridges.
- Switch Action: Features a lock-off lever to prevent unintentional starting. Depress the lock-off lever and pull the switch trigger to start. Tool speed increases with trigger pressure.
- Chain Brake: A safety feature that stops the chain immediately. To check, start the saw and push the front hand guard forward. The chain should stop instantly.
- Run-down Brake: The saw chain must come to a standstill within two seconds after releasing the switch trigger.
- Adjusting Chain Lubrication: The oil pump feed rate can be adjusted in 3 steps using the universal wrench.
- Carabiner (Rope Attachment Point): For hanging the tool by attaching a rope.
- Soft Start: Minimizes start-up shock for smooth tool initiation.
- Saw Chain Installation/Removal: Requires releasing the chain brake, loosening the chain adjusting screw and retaining nut, and removing the sprocket cover. Ensure the saw chain direction matches the mark on the body.
- Adjusting Saw Chain Tension: After installing the chain, lift the guide bar tip slightly and adjust the chain adjusting screw (clockwise to tighten, counterclockwise to loosen) until the lower side of the chain fits snugly in the guide bar rail.
- Spike Bumper (Optional Accessory): Recommended for cutting thick branches. Install by aligning holes and tightening screws.
- Working with the Chain Saw:
- First-time users should practice on logs on a saw-horse or cradle.
- Secure round pieces against rotation.
- Keep body parts away from the saw chain when operating.
- Hold the chain saw firmly with both hands.
- Do not overreach; maintain proper footing and balance.
- For pruning, bring the saw body into contact with the branch before switching on.
- For bucking, rest the saw body on the wood, saw into the wood using the top handle to raise and the front handle to guide.
- When cutting wood under tension, cut the pressured side first, then the tensioned side.
- Limbing should only be performed by trained persons. Support the chain saw on the trunk if possible.
- Carrying Tool: Always apply the chain brake, remove battery cartridges, and attach the guide bar cover.
Maintenance Features
- Periodic Maintenance: A schedule is provided for inspection and maintenance tasks, including daily, weekly, monthly, and annual checks, as well as before operation and storage.
- Sharpening the Saw Chain:
- Sharpen when mealy sawdust is produced, chain penetrates with difficulty, cutting edge is damaged, or saw pulls to one side.
- Use a suitable round file (optional accessory) with a diameter of 4.5 mm (3/16") for 90PX chain blades.
- Maintain a sharpening angle of 30° and a depth gauge distance of 0.65 mm (0.025").
- Sharpen the shortest cutter first and use its length as the standard.
- Replace the chain when cutter length reaches 3 mm (1/8") or shorter.
- Cleaning the Sprocket Cover: Remove the sprocket cover and saw chain, then clean chips and sawdust.
- Cleaning the Guide Bar: Clean chips and sawdust from the guide bar groove every time the saw chain is sharpened or replaced to ensure proper oil flow.
- Cleaning the Oil Discharge Hole: Remove the sprocket cover and saw chain. Use a slotted screwdriver to remove dust/particles. Insert the battery and pull the switch trigger to discharge chain oil and clear the hole.
- Replacing the Sprocket: Check the sprocket condition before fitting a new saw chain. Replace worn sprockets and always use a new locking ring.
- Storing the Tool: Clean the tool, lubricate the saw chain and guide bar by running under no load, cover the guide bar, and empty the oil tank.
- General Maintenance: All repairs, maintenance, or adjustments not described in the manual should be performed by Makita Authorized or Factory Service Centers using genuine Makita replacement parts. Always wear gloves when performing inspection or maintenance.