Do you have a question about the Makita XPS02 and is the answer not in the manual?
General safety advice for power tools, covering warnings, instructions, and specifications.
Safety precautions related to the work environment, such as cleanliness, lighting, and avoiding explosive atmospheres.
Safety measures concerning electrical connections, plugs, and grounding to prevent shock.
Advice on staying alert, using common sense, and wearing personal protective equipment.
Guidance on maintaining power tools and accessories, including checking for damage and proper repair.
Guidelines for safe and effective cutting operations, including hand placement and depth adjustment.
Explanation of kickback causes and associated warnings for safe operation.
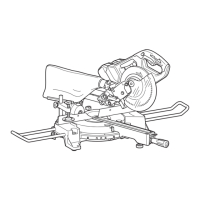
Specifies the tool's intended applications, materials, and the importance of using correct blades.
Step-by-step instructions for installing and removing the battery cartridge from the tool.
Describes how the tool stops automatically when it draws an abnormally high current to prevent damage.
Explains that the tool stops if overheated, and the battery indicator blinks, requiring cooldown.
Details how the tool stops when battery capacity is low, requiring battery recharge.
Explains how to check the battery capacity on cartridges equipped with an indicator.
Explains the meaning of the mode indicator light (green for high torque, blinking for overload).
Steps to set and perform a 48-degree bevel cut using the clamping screws and lever.
Steps to set and perform a -1-degree bevel cut using the clamping screws and levers.
Electronic control for maintaining constant speed, ensuring fine finish even under load.
Implements a soft start function to reduce starting shock and improve control.
Instructions for storing the hex wrench to prevent it from getting lost.
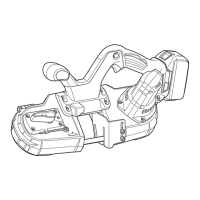
Detailed steps for safely removing and installing the circular saw blade using the correct tools.
Guidance on performing standard section cuts, emphasizing smooth movement and avoiding forcing the tool.
Operation of the slide lever for smooth tool movement along the guide rail.
Using clamping screws to secure the sub base for accurate repeated cuts.
How to position the tool using the rear edge of the base against a fixed stop for plunge cutting.
Explains the benefits of the wireless activation function for automatic vacuum cleaner operation.
Addresses issues where the wireless activation lamp fails to light or blink, indicating setup or connection problems.
Troubleshooting steps for when tool registration or cancellation procedures fail to complete.
Solutions for connection issues caused by excessive distance or radio interference.
Procedures for adjusting the accuracy of 0° and 45° cuts if they deviate from factory settings.
| Blade Diameter | 6-1/2 inches |
|---|---|
| No Load Speed | 3, 700 RPM |
| Battery Voltage | 18V |
| Weight | 10.1 lbs. (w/ battery) |
| Voltage | 18V |
| Max Cutting Depth at 45 Degrees | 1-9/16 inches |
| Battery | 18V LXT Lithium-Ion |
| Power Source | Battery |
| Max. Cutting Depth at 45° | 1-9/16 inches |
| Arbor | 20 mm |
| Arbor Size | 20 mm |