6
Installation
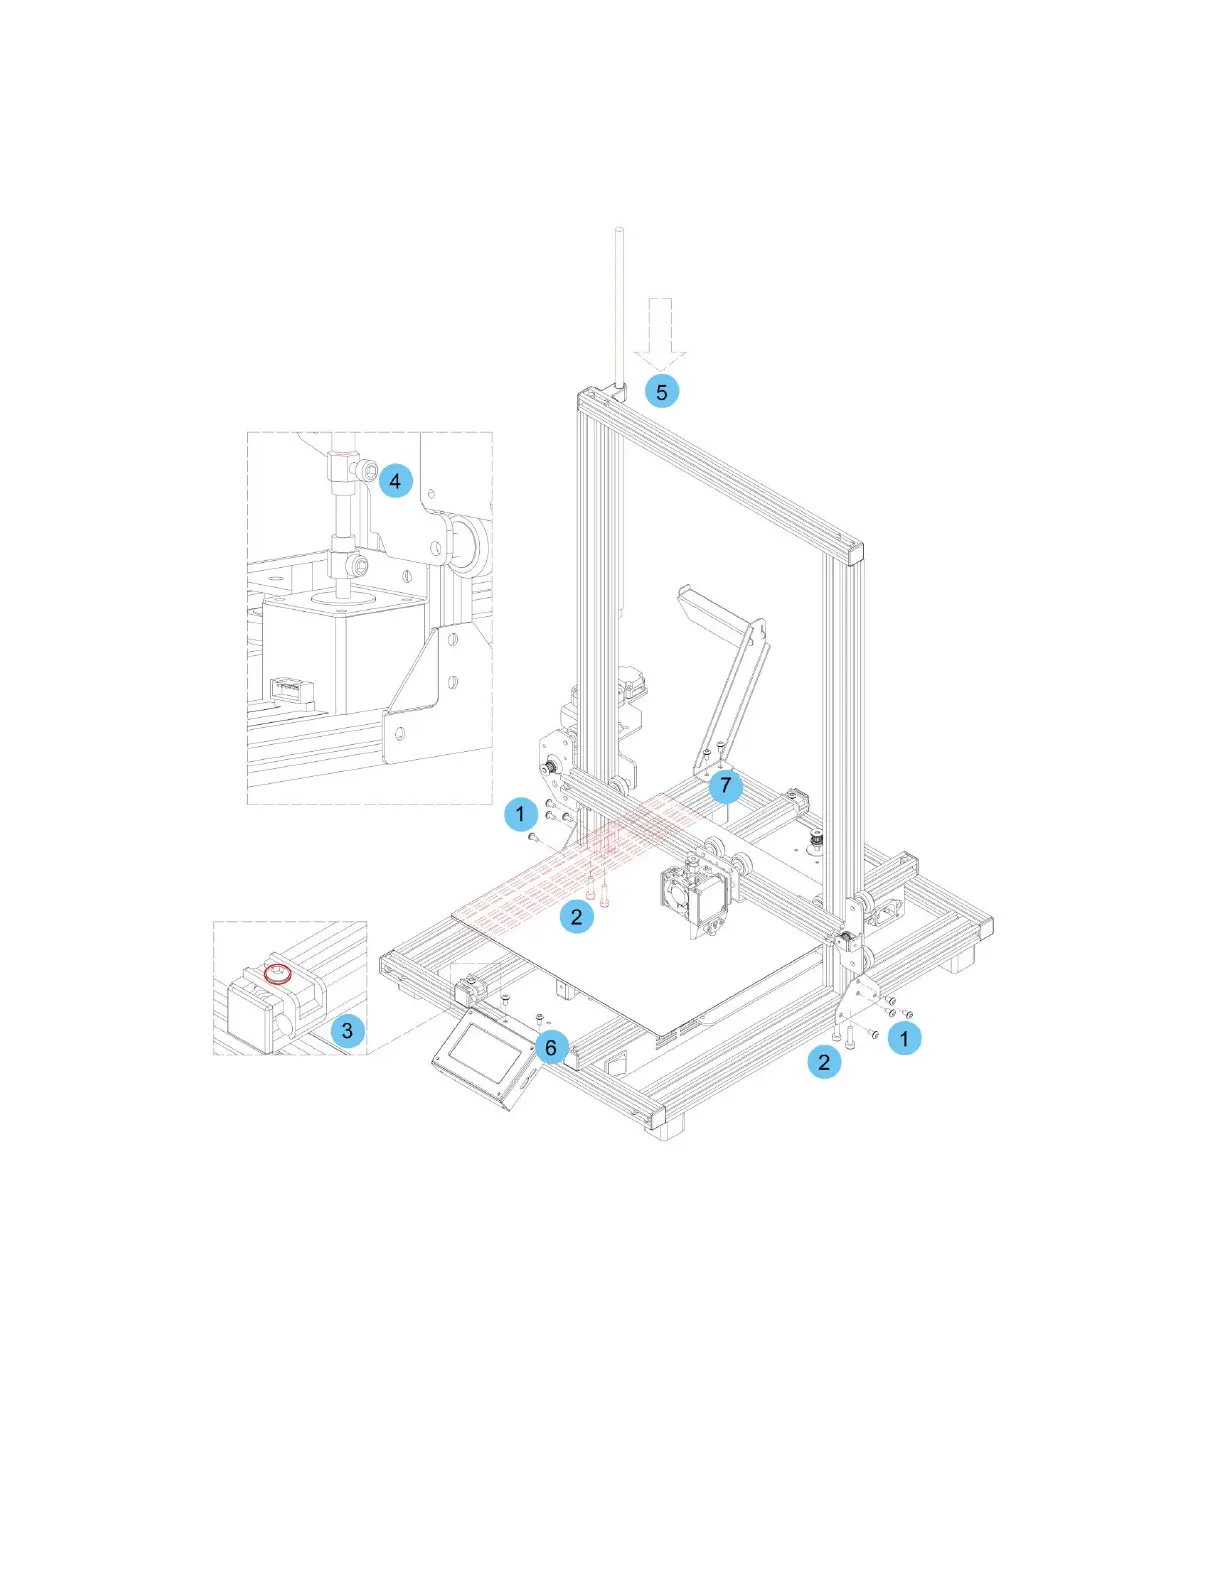
1. Use 4.0mm Hex Wrench and 8 pieces M4*6 screw to fix two metal frame on the each side of the
printer.(4 pieces of each side)
2. Use the 2.5mm Hex wrench to lock the 4 pieces M5*20 screw on the bottom of the base.(2
pieces of each side)
3. Loosen the screw marked with red circle by a 2.5mm Hex wrench and remove the screw rod,
then tighten the screw again.
4. Use the 3mm Hex wrench to loosen the screw on the top side.
5. Put the screw rod into the hole on the top of the printer, then tighten the screw on step 4.
6. Use the 2.5mm Hex Wrench and 2 pieces M4*6 screw to fix the LCD module on the printer, and
insert the plug into the back of the LCD module.
7. Use the 2.5mm Hex Wrench to fix the filament rack by 2 pieces M4*6 screw.