X3. SECTION 4 OF THE CONSUMER PRODUCT SAFETY COMMISSION’S
OUTDOOR HOME PLAYGROUND SAFETY HANDBOOK
X3.1 Select Protective Surfacing – One of the most important things you can do to reduce the likelihood of serious head injuries is to install shock-
absorbing protective surfacing under and around your play equipment. The protective surfacing should be applied to a depth that is suitable for the
equipment height in accordance with ASTM Specication F 1292. There are dierent types of surfacing to choose from; whichever product you select,
follow these guidelines:
X3.1.1 Loose Fill Materials:
X3.1.1.1 Maintain a minimum depth of 9 inches of loose-ll materials such as wood mulch/ chips, engineered wood ber (EWF), or shredded/ recycled
rubber mulch for equipment up to 8 feet high; and 9 inches of sand or pea gravel for equipment up to 5 feet high. NOTE: An initial ll level of 12 inches
will com-press to about a 9-inch depth of surfacing over time. The surfacing will also compact, displace, and settle, and should be periodically relled
to maintain at least a 9-inch depth.
X3.1.2 Use a minimum of 6 inches of protective surfacing for play equipment less than 4 feet in height. If maintained properly, this should be
adequate. (At depths less than 6 inches, the protective material is too easily displaced or compacted.) NOTE: Do not install home playground equipment
over concrete, asphalt, or any other hard surface. A fall onto a hard surface can result in serious injury to the equipment user. Grass and dirt are not
considered protective surfacing because wear and environmental factors can reduce their shock absorbing eectiveness. Carpeting and thin mats are
generally not adequate protective surfac-ing. Ground level equipment such as a sandbox, activity wall, playhouse or other equipment that has no
elevated play surface does not need any protective surfacing.
X3.1.3 Use containment, such as digging out around the perimeter and/orv lining the perimeter with landscape edging. Don’t forget to account for
water drainage.
X3.1.3.1 Check and maintain the depth of the loose-ll surfacing material. To maintain the right amount of loose-ll materials, mark the correct level
on play equipment support posts. That way you can easily see when to replenish and/or redistribute the surfacing.
X3.1.3.2 Do not install loose ll surfacing over hard surfaces such as concrete or asphalt.
X3.1.4 Poured-in-Place Surfaces or Pre-Manufactured Rubber Tiles You may be interested in using surfacing other than loose ll materials like rubber
tiles or poured-in-place surfaces.
X3.1.4.1 Installations of these surfaces generally require a professional and are not “do-it-yourself” projects.
X3.1.4.2 Review surface specications before purchasing this type of surfacing. Ask the installer/ manufacturer for a report showing that the product
has been tested to the following safety standard: ASTM F1292 Standard Specication for Impact Attenuation of Surfacing Materials within the Use
Zone of Playground Equipment. This report should show the specic height for which the surface is intended to protect against serious head injury.
This height should be equal to or greater than the fall height – the vertical distance between a designated play surface (elevated surface for standing,
sitting, or climbing) and the protective surfacing below – of your play equipment.
X3.1.4.3 Check the protective surfacing frequently for wear.
X3.1.5 Placement – Proper placement and maintenance of protective surfacing is essential. Be sure to: X3.1.5.1 Extend surfacing at least 6 feet from
the equipment in all directions.
X3.1.5.2 For to-fro swings, extend protective surfacing in front of and behind the swing to a distance equal to twice the height of the top bar from
which the swing is suspended.
X3.1.5.3 For tire swings, extend surfacing in a circle whose radius is equal to the height of the suspending chain or rope, plus 6 feet in all directions.
To reduce the likelihood of injury please follow the guidelines as outlined in this manual.
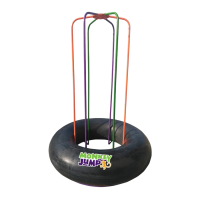
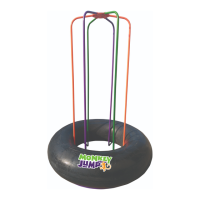
Your M&M Web Riderz Swing has been tested to ensure safety and complies with: ASTM F1148 Standard Consumer Safety Performance Specications
for Home Playground Equipment, F1487 Standard Consumer Safety Performance Specications for Playground Equipment for Public Use, and CPSIA
Specications for lead paint.
For assistance please contact:
M&M Sales Enterprises, Inc.
7425 Chavenelle Rd. Suite 200 · Dubuque, IA 52002
877-242-0154 · info@mandmsalesinc.com
www.mandmsalesinc.com
WARNING: This product contains one or more polycyclic aromatic hydrocarbon chemicals
(PAHs) known to the State of California to cause cancer and birth defects or other
reproductive harm. To learn more visit oehha.ca.gov/prop65.
Assembly, Installation, Operation &
Maintenance Instructions
Treadz Traditional Tire Swing