3-18
C - EVERY 250 HOURS SERVICE
Carry out the operations described previously as well as the following operations.
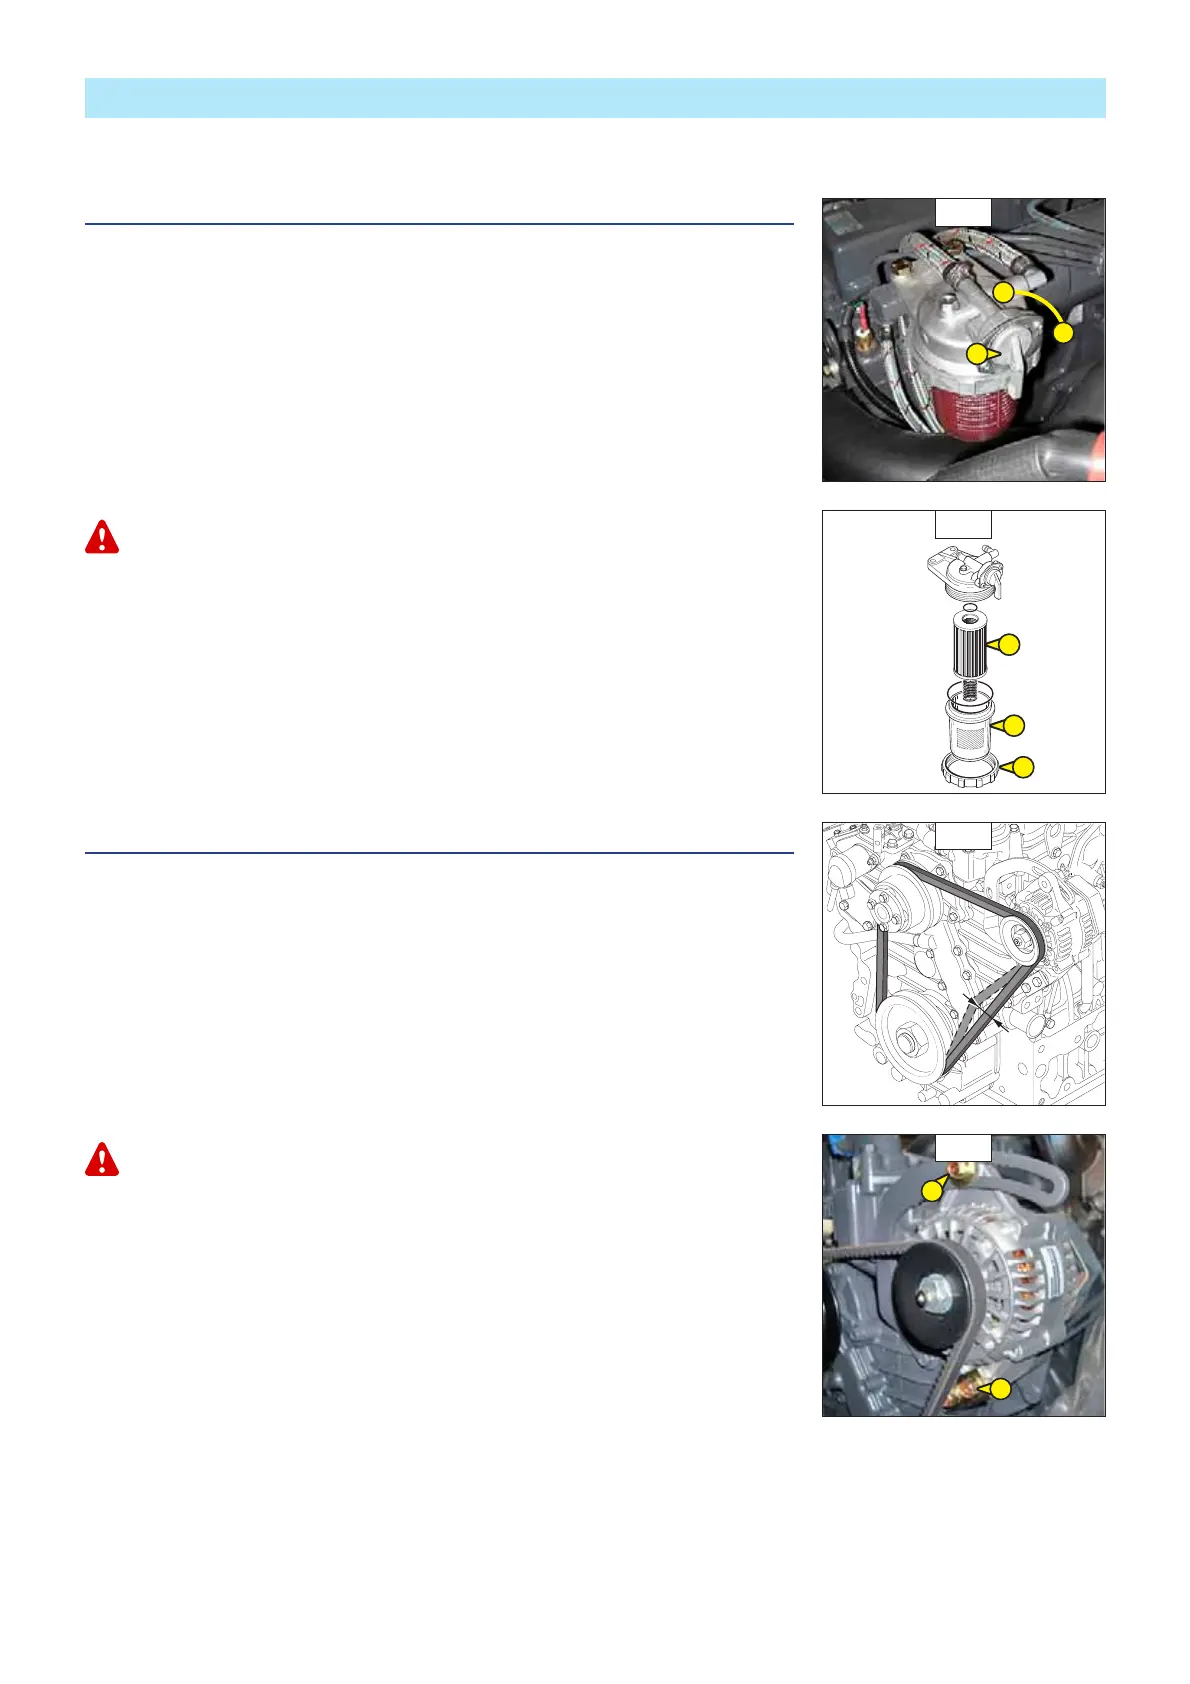
C1 - FUEL FILTER
CLEAN
- Lift up the overhead guard or the cab (see: 2 - DESCRIPTION: INSTRUMENTS AND
CONTROLS).
- Close the fuel valve 1 (fig. C1/1) by setting to position B.
- Carefully clean the outside of the pre-filter and its holder, to prevent dust from getting into
the system.
- Unscrew the retaining ring 2, remove the housing 3 (fig. C1/2) and clean the inside using
a brush immersed in clean diesel oil.
- Remove the cartridge filter 4 (fig. C1/2) and dip in diesel oil to rinse.
- Reassemble the unit.
- Open the fuel valve 1 (fig. C1/1) by setting to position A.
- Bleed the fuel circuit (see: 3 - MAINTENANCE: G1 - FUEL SYSTEM).
Dust and impurities in the fuel will cause the injection pump and injectors to wear more quickly. To avoid
this, regularly clean the fuel filter housing.
C2 - ALTERNATOR/FAN/CRANKSHAFT BELT TENSION
CHECK - ADJUST
- Lift up the overhead guard or the cab (see: 2 - DESCRIPTION: INSTRUMENTS AND
CONTROLS).
- Check the belt for signs of wear and cracks and change if necessary (see: 3 - MAINTENANCE:
FILTERS CARTRIDGES AND BELTS).
- Check the belt tension between the pulleys of the crankshaft and of the alternator.
- Under pressure applied by the thumb (98 N), the tension should be between 7 and 9 mm
(fig. C2/1).
- Carry out adjustments if necessary.
- Untighten screws 1 (fig. C2/2) by two to three thread turns.
- Swivel the alternator assembly so as to obtain the belt tension required.
- Retighten screws 1 (fig. C2/2).
If the alternator belt has to be changed, check the tension again after the first 20 hours of operation.
C1/1
A
B
1
C2/1
C1/2
4
3
2
C2/2
1
1