3 in 1 Detector
item-no. 99980
Instruction manual
Introduction
The 3-in-1 detector can be used to seek out metal,
power cables, and timber beams beneath concrete.
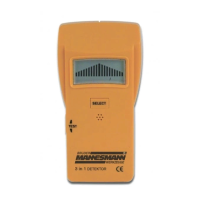
Description (pic.1)
1. Indicator light
2. Test button
3. Selection button
4. Display
Display Symbols (pic.2)
1. Bar chart display
2. Battery control
3. Bar mode
4. Metal mode
5. Current mode
Technical Data
Maxim detection depth:
Bar mode: up to 19mm
Metal mode: up to 35mm
Current mode: up to 50mm for 90-250V~/50-
60 Hz
Operating temperature: -7° - +40°C for 75% RH
Operating voltage: 9V Battery (6F22)
Inserting the Battery
A new battery must be inserted into the detector
before it can be switched on for the first time, or the
battery control be operated.
1. Open the battery box panel on the back of the
detector.
2. Remove the old battery and connect a new 9V
battery to the correct connection points.
3. Replace the battery in the battery box and close
the cover carefully.
WARNING: Used batteries must not be thrown away
in household refuse, but must be disposed of at the
proper collection points.
Instructions for use
1. The detector can be used in three modes, on
rough, smooth or papered walls.
2. The surface should be as smooth and even as
possible.
3. WARNING: Plastic or metal-lined wall coverings
can produce erroneous results.
4. In all operating modes, repeated measurements
should be carried out on different areas of the
wall to verify any results.
5. If the middle bar of the bar chart display is
indicated in any operating mode, a continuous
audible signal will also be heard, and a red light
will appear on the marker.
6. In order to avoid draining the battery, the detector
will automatically switch itself off if the test button
is not pressed approximately every 20 seconds.
Operation: Bar mode (woodwork, underlays etc.)
1. Switch on the detector with a short press of the
test button.
2. Press the selection button until the ‘Wood’ test
mode symbol appears on the display.
3. Hold the detector flat against the wall, and press
and hold the test button.
4. The audible signal indicates that the detector is
ready for use.
5. With the test button depressed, move the detec-
tor slowly along the wall in a sideways motion.
When the middle bar in the bar chart display
appears, this indicates that the detector has
reached the edge of a bar. Mark this point with
the help of the notch on the top of the detector
(Keep the test button depressed).
6. Continue to move the detector slowly with the
test button depressed until the middle bar of the
display is extinguished.
7. Move the detector in the opposite direction until
the middle bar once again appears, indicating the
second edge. Mark this point in the same way as
above.
8. The centre axis of the bar is in the centre of the
two points.
Operation: Metal mode (Pipes, concrete
reinforcing steel bars, cable channels etc.)
1. Switch the detector on and press the test button
several times until the ‘Metal’ test mode symbol
appears on the display.
2. Hold the detector away from metal objects, and
press the test button.
3. The audible signal indicates that the detector is
ready for use.
4. With the test button depressed, move the detec-
tor slowly along the wall in a sideways motion.
When the middle bar in the bar chart display
appears, this indicates that the detector has
reached the edge of a metal object. Mark this
point with the help of the notch on the top of the
detector (Keep the test button depressed).
5. Continue to move the detector slowly with the
test button depressed until the middle bar of the
display is extinguished.
 Loading...