7
Tumbler Drum Assembly
Tumbler Drum Assembly
STEP 1:
Initial Drum
Body Assembly
Select:
g
1 Drum Segment A (item 12)
g
2 Drum Segments B (item 13)
g
10 #10 Bolts (silver) (item 22)
g
10 #10 Flat Washers (item 23)
g
10 #10 Lock Washers (item 24)
g
10 #10-32 Hex Nuts (item 25)
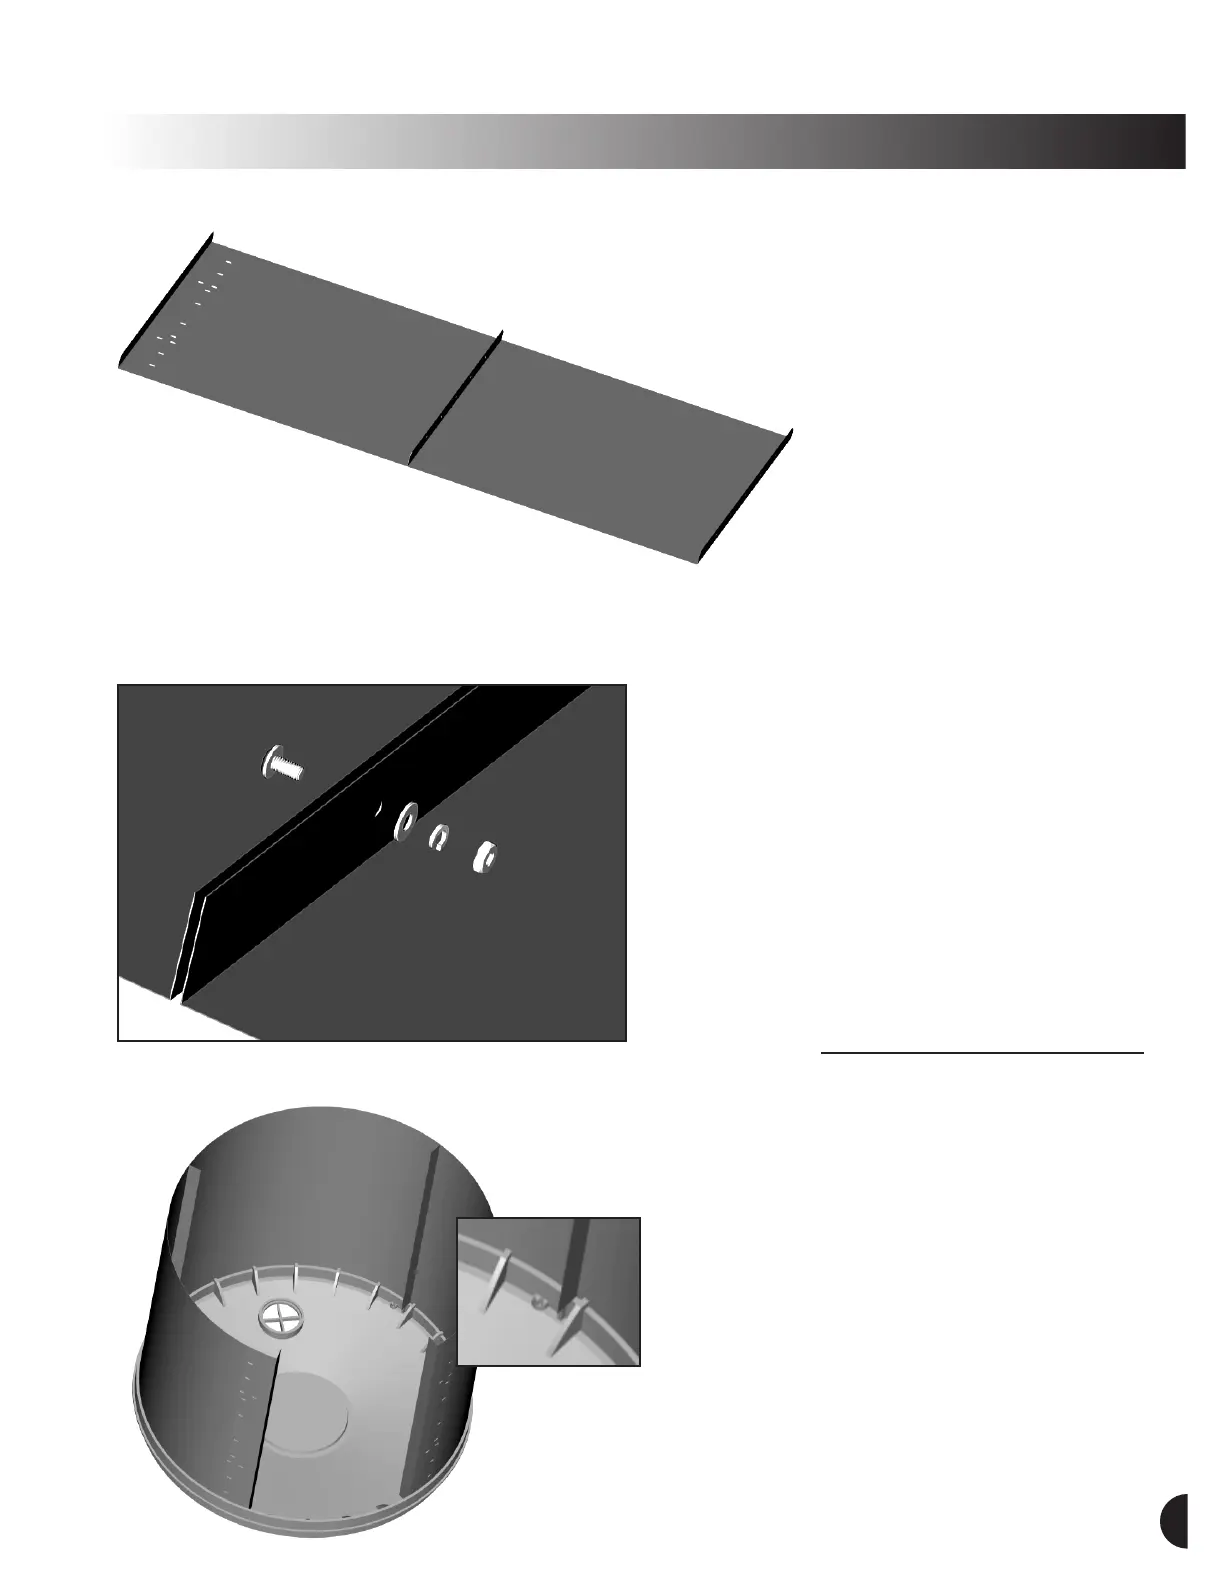
A. Place Drum Segment A on a
flat, smooth work surface with the flanged mixing fins facing upright. Align one Drum Segment B
along one side of Segment A, matching up the holes in the fins.
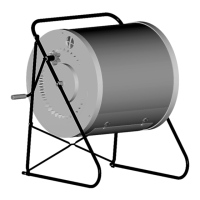
B. Fasten Segment A to first Segment B using:
1 #10 Bolt (silver)
1 #10 Flat Washer
1 #10 Lock Washer
1 #10 Hex Nut
at each of the five holes. Hand tighten all bolts.
C. Attach the other Segment B to the other side of
Segment A the same way.
D. Using the slotted screwdriver and
3
/8" wrench,
tighten all the fasteners.
STEP 2:
Drum Assembly
Select:
g
1 Endcap (item 14)
g
1 Drum Body Assembly (from Step 1)
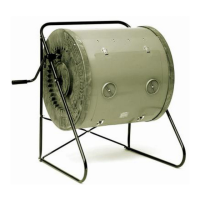
A. Place the endcap, name plate down, on work
surface. Note position of the screen on the endcap.
Carefully pick up the 3 sectioned partially assembled
drum from Step 1 and by bending it with the mixing
fins on the inside, fit it into the rim of the endcap,
forming three-quarters of the cylinder. Be careful to
locate the center panel (Segment A) adjacent to the
screen and fit the mixing fins on both sides of this
segment into the alignment slots of the endcap.