Do you have a question about the Mantis compact compostumbler and is the answer not in the manual?
Assemble the initial drum body by connecting two drum panel A segments using bolts, flatwashers, lockwashers, and nuts.
Attach the first endcap to the partially assembled drum, ensuring mixing fins align with the endcap's screen and slot.
Fit drum panel B into the drum cylinder, overlapping segments and fastening with shoulder bolts, flatwashers, and lock nuts.
Attach the second endcap to the drum assembly using tie rods and acorn nuts to secure the drum cylinder.
Assemble the door by attaching aerator bases and caps to the door panel using bolts and wing nuts.
Attach latches and latch hooks to the door assembly and panel, adjusting for proper tension.
Assemble the drive handle by attaching the grip and grip cap using a screw.
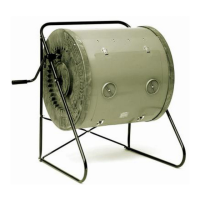
Assemble the gear drive by fitting the drive gear into the drive support and connecting the drive handle.
Guide the drive gear into the gear recess of one endcap, possibly adjusting the drive support.
Attach frame legs to the drum assembly by inserting stub axles and securing with bolts, washers, and nuts.
Assemble struts and braces to the drum and frame leg assembly using bolts, washers, and nuts.
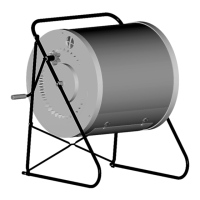
Position the completed unit onto its support frame and attach the door.
| Brand | Mantis |
|---|---|
| Model | compact compostumbler |
| Category | Lawn and Garden Equipment |
| Language | English |