1-6
Removal of the DVD module for DV-17/DV-18mkII
1. Remove the top cover (001D).
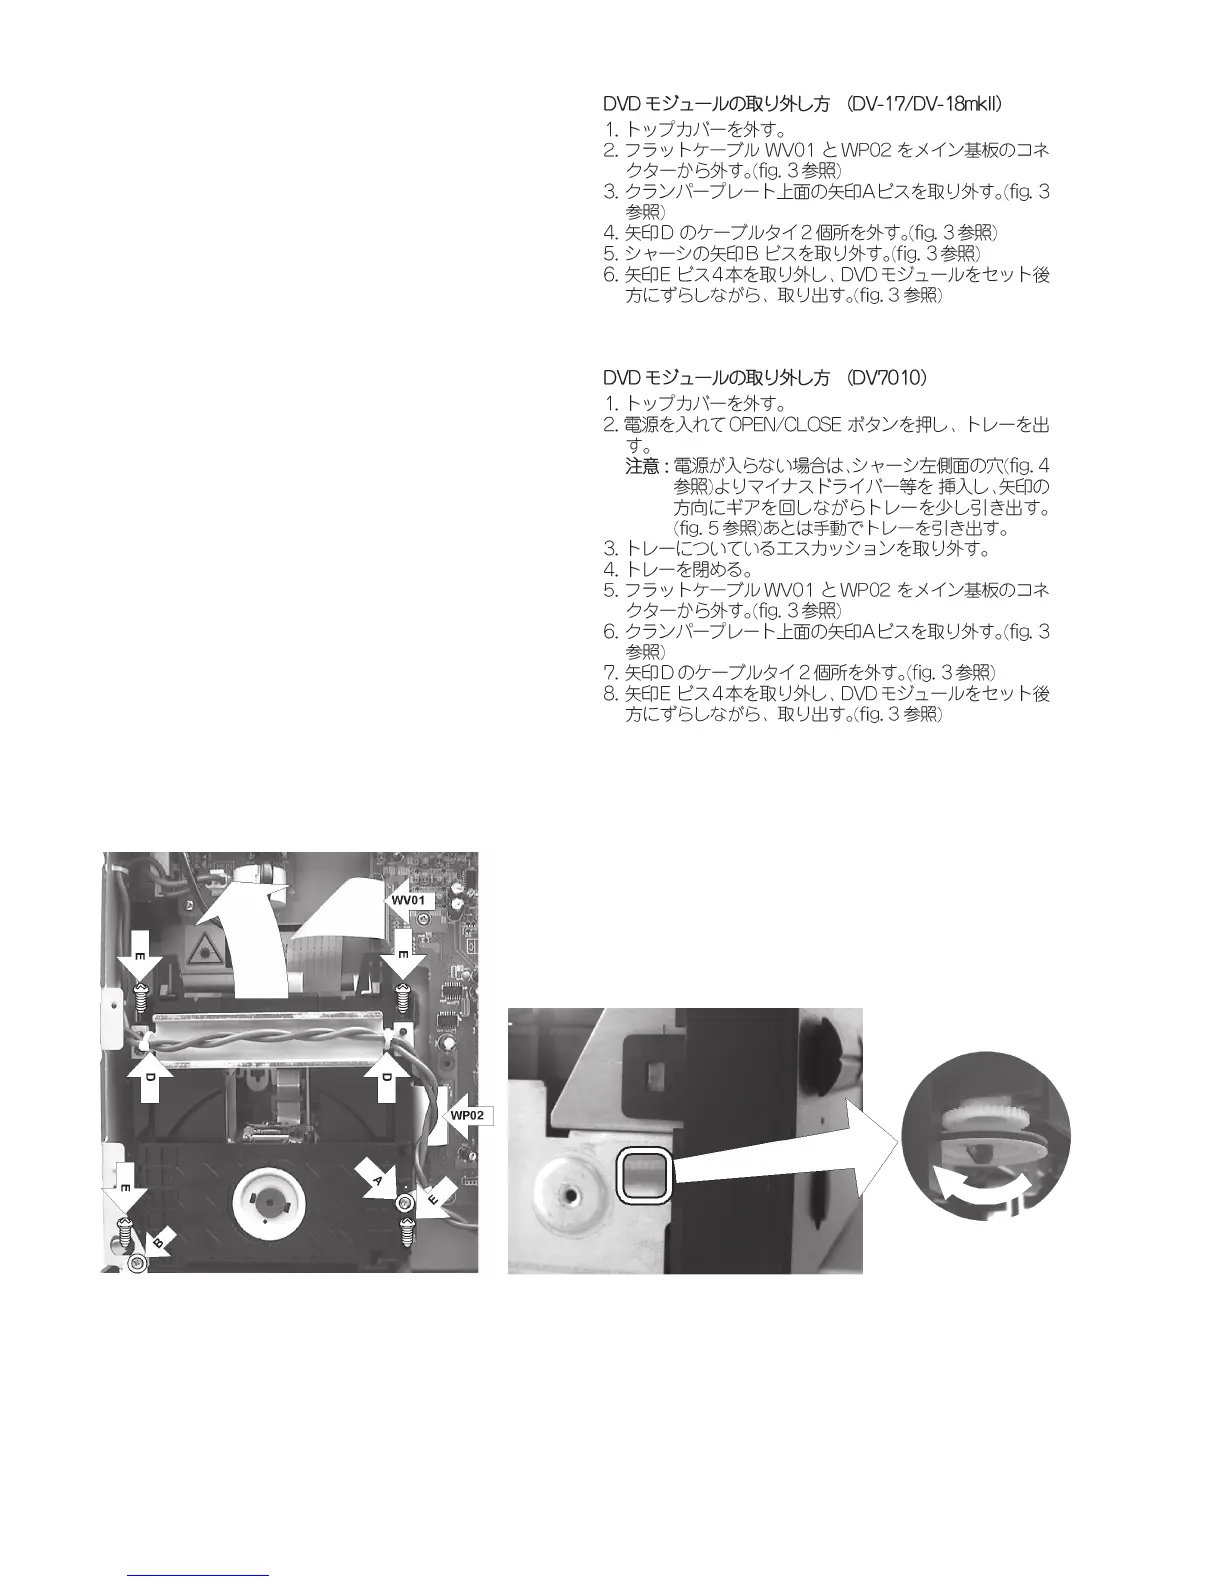
2. Disconnect the two flat cables (WV01 and WP02) from the
connectors on the main PCB. (see fig. 3)
3. Remove the A screw from the bridge on the loader base.
(see fig. 3)
4. Cut and remove the two D cable ties from the cables and
chassis. (see fig. 3)
5. Remove the B screw from the chassis. (see fig. 3)
6. Remove the four E screws. (see fig. 3)
7. Remove the DVD module from the chassis, while sliding it
in the direction of the rear panel.
Removal of the DVD module for DV7010
1. Remove the top cover (001D).
2. Turn on the product and press the OPEN/CLOSE button.
Then the tray is opened.(If the product shuts down the
power completely, see below "REMARK".)
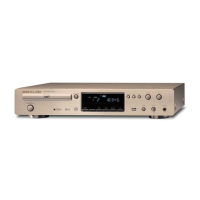
REMARK : Insert a screwdriver (minus) into the hole at
the left side of chassis. (see fig. 4)
Turn the gear with the screwdriver. (see fig. 5)
Then the tray is moved a little. Pull the tray with
your hand at this time.
3. Remove the escutcheon on the tray.
4. Press the OPEN/CLOSE. (or Push the tray with your hand.)
Then the tray is closed.
5. Disconnect the two flat cables (WV01 and WP02) from the
connectors on the main PCB. (see fig. 3)
6. Remove the A screw from the bridge on the loader base.
(see fig. 3)
7. Cut and remove the two D cable ties from the cables and
chassis. (see fig. 3)
8. Remove the DVD module from the chassis, while sliding it
in the direction of the rear panel.
Fig. 4
Fig. 5
Fig. 3