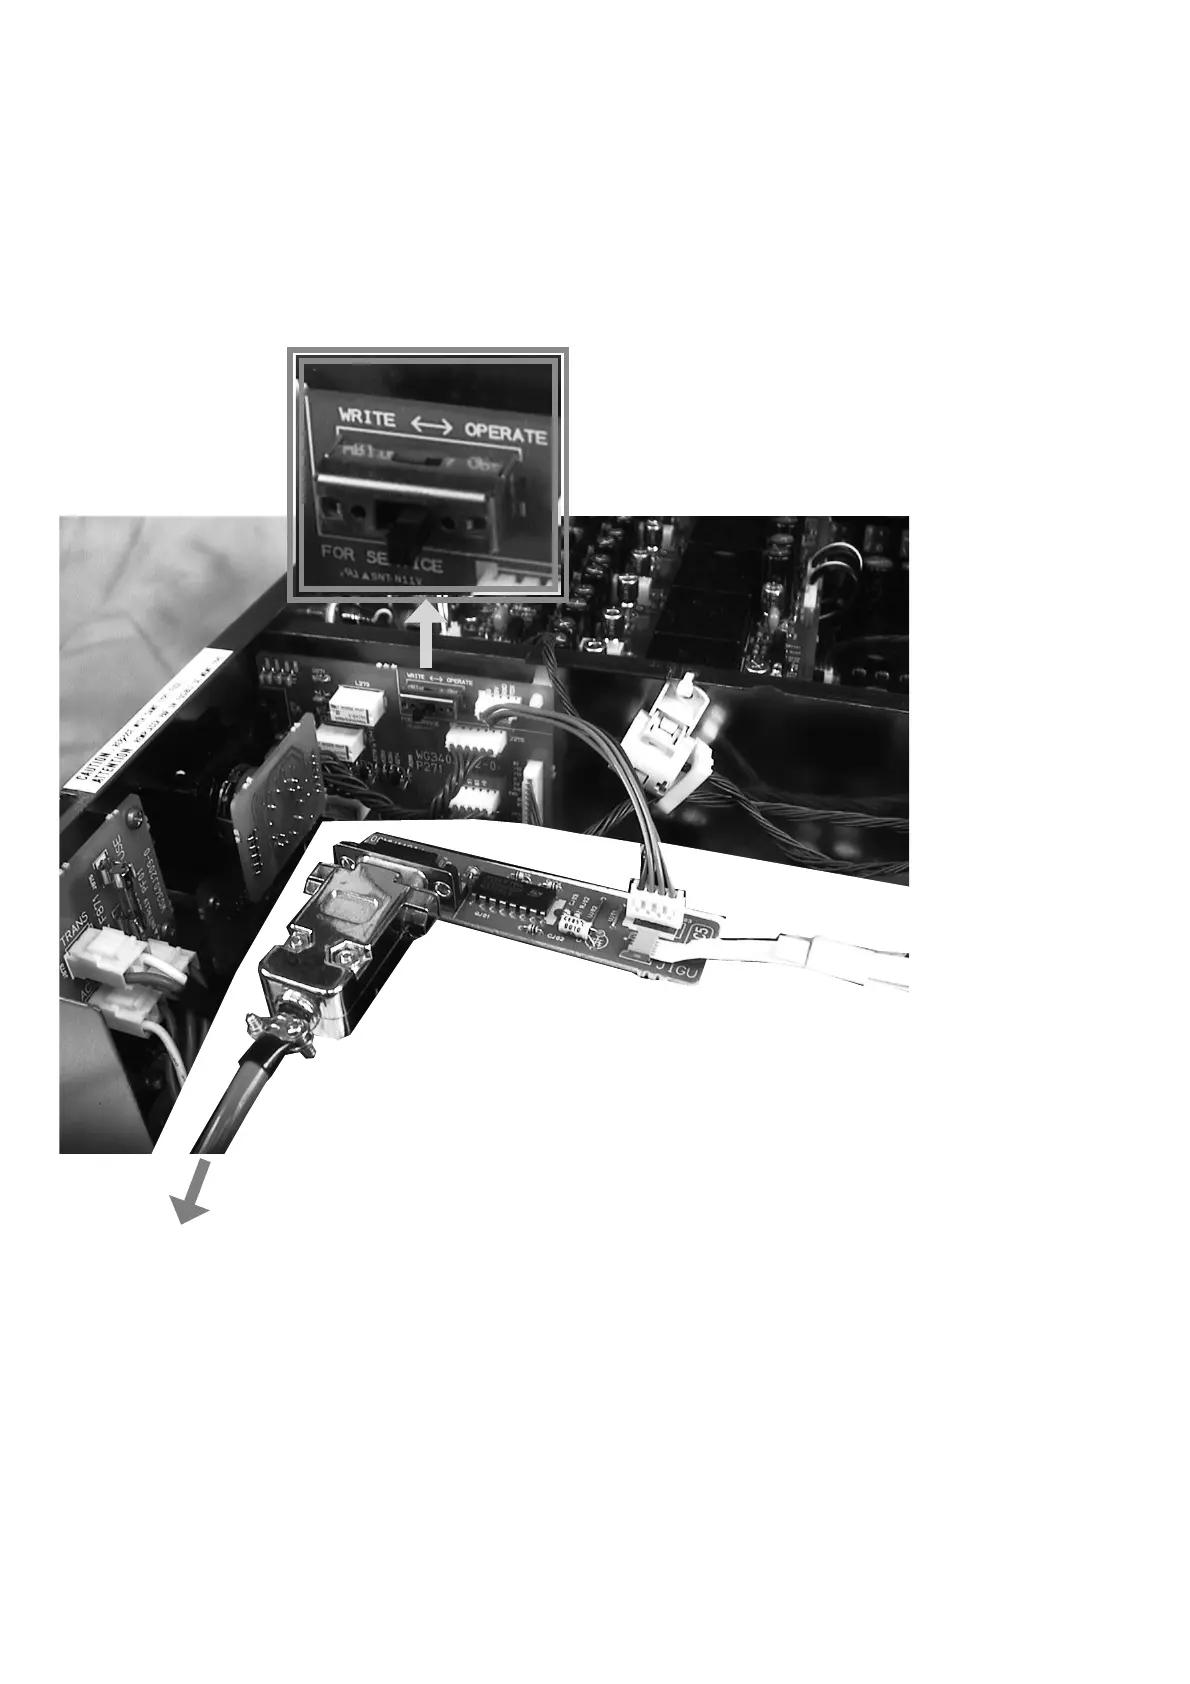
36
[2] Writing Procedure for microprocessor
1. Remove the top lid of the unit.
2. Connect the RS-232C on the connection JIG and the
Serial Port of windows PC with RS-232C cable.
3. Connect the 4 pins connective cord to the connector
(J274) on the P271 (FCBS PWB) of the unit from the
connection JIG.
4. Turn the slide switch (S271) of P271 on the WRITE side.
5. Connect the mains cord into the unit.
6. Launch the Flash Development Toolkit (FDT), When FDT
is not launch.
When FDT is already launch, please advance to step
No.10.
[2] Writing Procedure for HDMI CPU
1. 本機のトップカバーを外します。
2. 接続冶具のRS-232CコネクタとWindows PCのSerialポー
トを
RS-232Cケーブルで接続します。
3. 本機内部のP271(FCBS PWB)上のコネクタ(J274)に
接続冶具からの
4ピンケーブルを接続します。
4. P271のスライドスイッチ(S271)をWRITE側に切替えま
す。
5.
本機に電源コードを接続します。
6. Flash Development Toolkit v3.06(FDT)を起動していない
場合は起動します。
既に
FDTを起動している方はステップ10に進んでくださ
い。
Windows PC with RS-232C port
DATA UPDATE KIT
(Connection JIG : Parts No. 90M-PM11S1JIG)
RS-232C cable