7
1.
6021と6040もしくはCentral Stationと、トランスや
ACアダプターを接続します。まだ電源をオンしない
でください。
2.
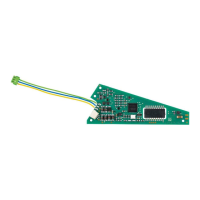
信号機を接続した信号制御モジュールにプログラ
ミングピン(ボール紙にはさまれた針金状のもの)を
差し込みます。信号制御モジュールの黄色と茶色
のペア線をコントローラーの赤色(黄色ではありま
せん!)と茶色の線路出力端子に接続します。
3.
KeyboardのDIPスイッチの設定(例:キーボード1な
らすべてoff)を行い、設定したいアドレスのボタンを
押せるようにしておきます。 Central Stationの場合
は、画面に登録した信号機を呼び出しておき、信号
機をすぐにタッチできるようにしておきます。現示は
Hp0(赤、停止)にしておきます。
4.
コントローラをオンし、立ち上がったらすぐに
“STOP”ボタンを押します。
5.
“GO”ボタンを押します(または“STOP”を解除しま
す)。すると、信号機は2現示を交互に表示し始め
ます。その後、約30秒以内に以下の手順を開始し
ないと設定モードは自動的に終了しますので注意
して下さい。
Procedure for Entering the Address
1. Connect the Control Unit, Keyboard, and
transformer. Do not turn the Control Unit on
yet.
2. Leave (!) the signal control module with
the home signal mast connected to it in its
original packaging. Connect only the brown
and the yellow wires from the signal control
module to the brown and red (!) terminal clips
on the Control Unit.
3. Set the Keyboard address to the desired
address. In our example (Keyboard No. 1) all
four coding switches at the „off“ position.
4. Turn on the 6021 Control Unit. Press the
„stop“ button.
5. Press the „go“ button. The home signal will
begin to switch between 2 signal aspects.
If the following step does not begin within
several seconds, the electronic circuit will end
the address setting process automatically.
アドレス設定手順