Marpo Kinetics, Inc.
258 LINDBERGH AVE, Livermore, CA 94551 • (925) 606-6919 • www.marpokinetics.com
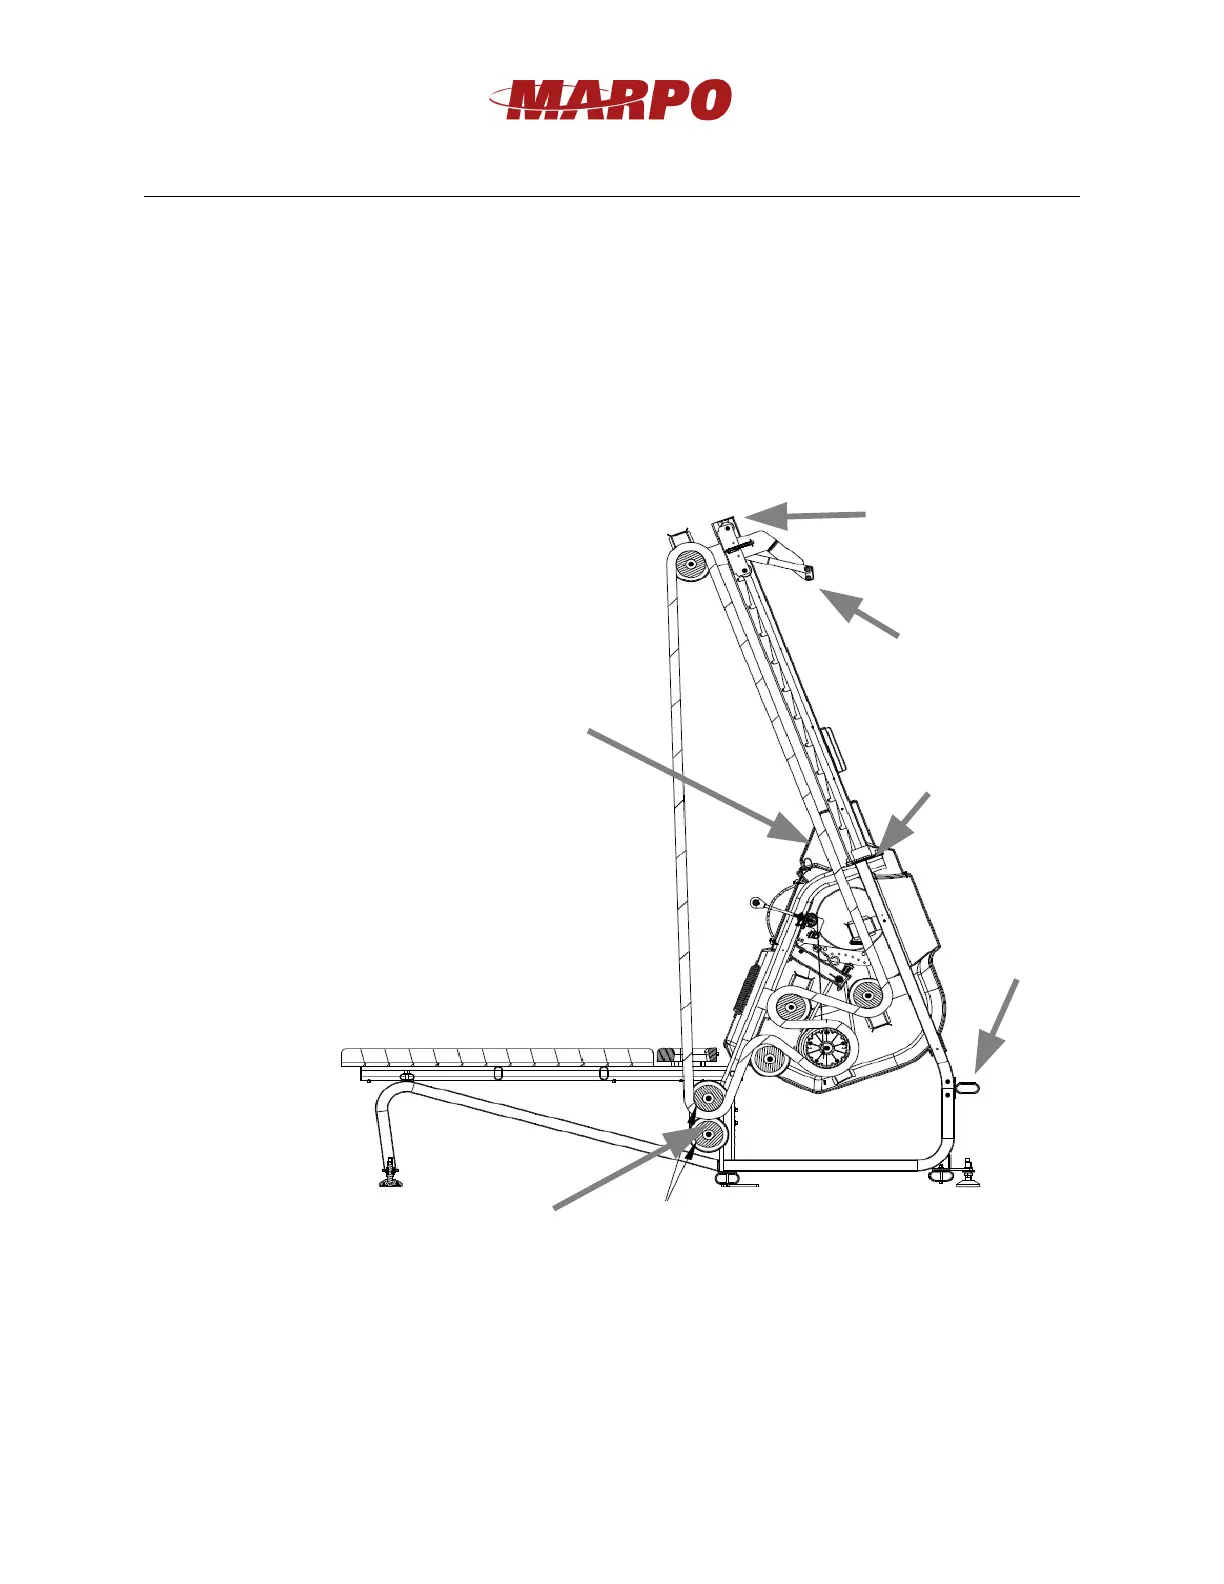
8. Connect HORSE SHOE as shown. Note orientation, the flat end of the horseshoe faces
the MAIN UNIT.
9. If the product rocks side-to-side or front to back, adjust the nuts on the 3 threaded
LEVELING FEET. Re-tighten the nuts after calibration.
10. Attach the ADJUSTABLE BOTTOM PULLEYS (WITH BRACKETS) to the MAIN
UNIT. Use provided screws (screws temporarily attached to the frame of the MAIN
UNIT).
11. Install the STEP to the rear of the MAIN UNIT.
12. Install the CARRIAGE on the BOOM and then attach the BOOM CAP to the BOOM.
To install the CARRIAGE, slide the 4 metal rollers of the CARRIAGE inside the two
4
Boom
Cap
Carriage
Handle
Boom
connection
Step
Adjustable Bottom Pulleys
with Brackets
Covers for Boom
Base


 To Next Page