Marpo Kinetics, Inc.
258 LINDBERGH AVE, Livermore, CA 94551 • (925) 606-6919 • www.marpokinetics.com
barrels of the BOOM. Note the CARRIAGE PULLEY orients to the front of the unit.
Remove the pulley from the CARRIAGE and install the rope on it. Make sure rope is not
twisted when installing it on the CARRIAGE. After the BOOM CAP is attached to the
BOOM, slide carriage to the bottom slot in the boom before proceeding. (Ropes with
plastic cap ends may be connected to carriage at a later time)
13. Connect the BOOM to the MAIN UNIT with the 3/8-16 bolts, nuts and washers. .
14. Connect the two PLASTIC COVERS for Boom Base. Attach the small covers to the
main covers first. Afterwards, attach the top of the small cover to the boom with provided
screws on boom.
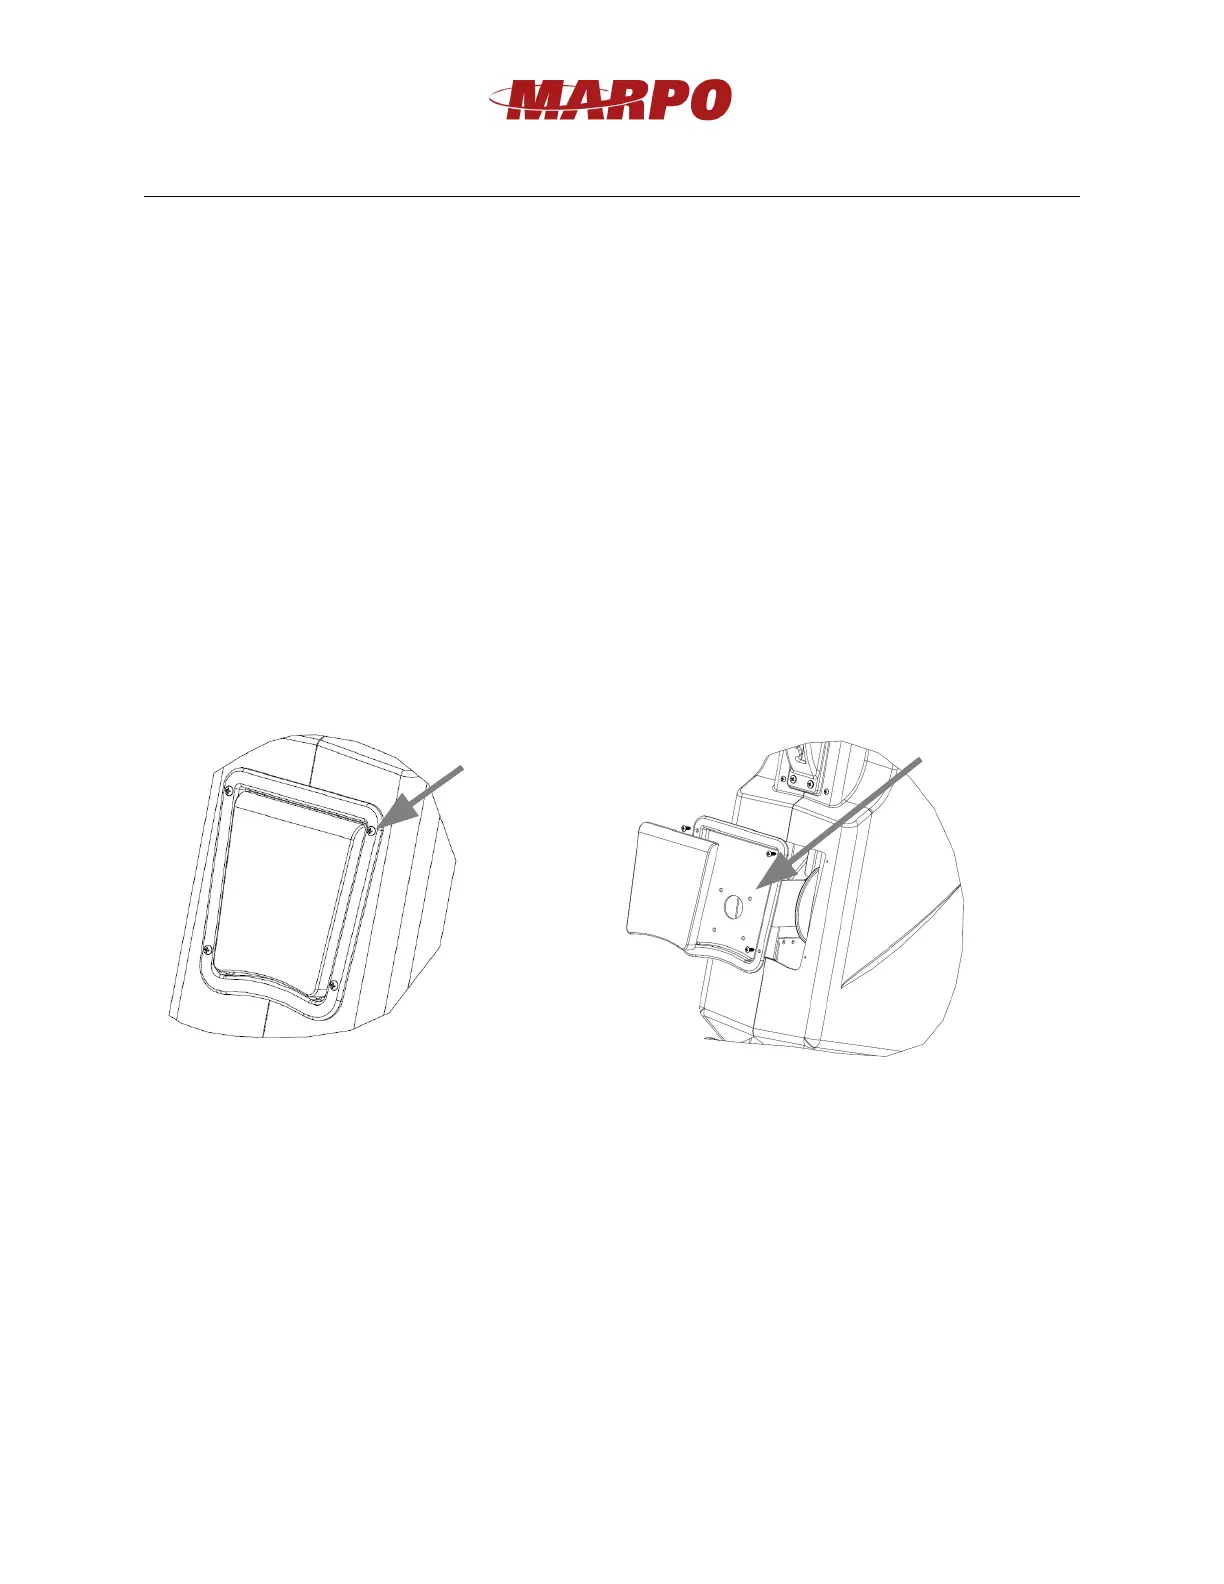
15. The electronic display works with two AAA batteries. To replace the batteries remove
the 4 screws that connect the DISPLAY TRAY to the main covers. Slowly pull the
DISPLAY TRAY away from the machine. Disconnect the display from the main
harness. Next remove the 4 machine screws that connect the DISPLAY to the the
DISPLAY TRAY to access the battery cover on the back of the DISPLAY.
16. If the unit has black plastic end caps on the rope ends, pull end of the rope through the
BOOM and over the top of the CARRIAGE PULLEY and the other end of the rope, pull
under and around the BOTTOM ROPE PULLEY and through the HORSE SHOE of the
BENCH to connect the two ends of the rope. See illustration on previous page for rope
routing diagram. Also see steps 18 and 19 for ends connection.
NOTE: the rope tends to tighten up during shipping so you may need to stretch it before
connecting the two ends. To do this hold the two ends of the rope and work the rope up
and down with a few pulls, to stretch it until the ends can reach each other. For optimal
unit performance, allow some slack in the rope after the two ends are connected. If
needed, the slack in the rope can be adjusted by moving the BOTTOM ROPE PULLEY
to a higher or lower set of holes.
5
Remove these
screws first and
watch out for the
harness as pulling
the display tray
away from the
main covers
Remove these
screws next to
access batteries.


 To Next Page
 Loading...