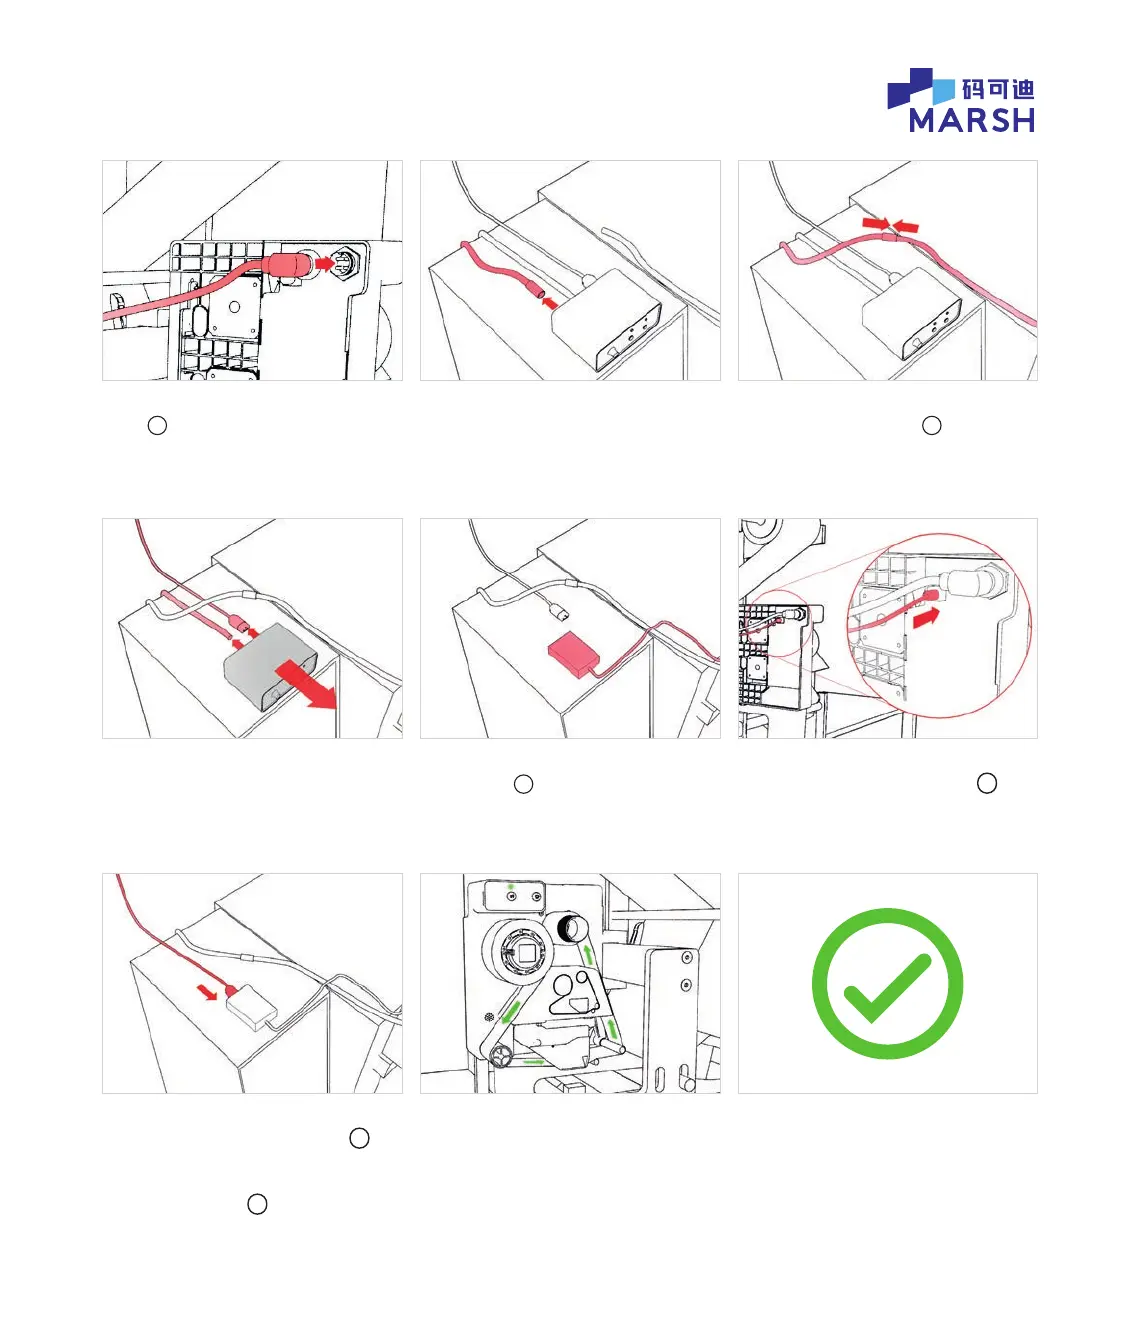
4. Connect Marsh 241D
4.1 Unpack Marsh 241D I/O extension
cable
e
and t to Marsh 241D.
4.4 Unplug mains connector and
remaining connector from the hot date
coder control box. Remove the hot date
coder control box.
4.7 Using either the existing mains
IEC cable or the mains IEC cable
f
supplied with the Marsh 241D,
connect mains power to the
power supply unit
f
.
4.2 Now focus on the hot date coder
control box, sitting on top of the VFFS
control cabinet. Unplug I/O connector
from the hot date coder control box.
4.5 Unpack Marsh 241D power
supply unit
f
and place it in place
of the hot date coder control box.
4.8 The Marsh 241D will power up with
a ashing light sequence and it will
wind a small amount of ribbon.
4.3 Connect I/O connector to
the I/O extension cable
e
.
4.6 Connect the 24VDC cable from the
Marsh 241D power supply unit
f
to
the Marsh 241D printer.
The Marsh 241D is
now ready to print
© 2020 All rights reserved. We reserve the right to alter design and/or specifications without notice.
 Loading...