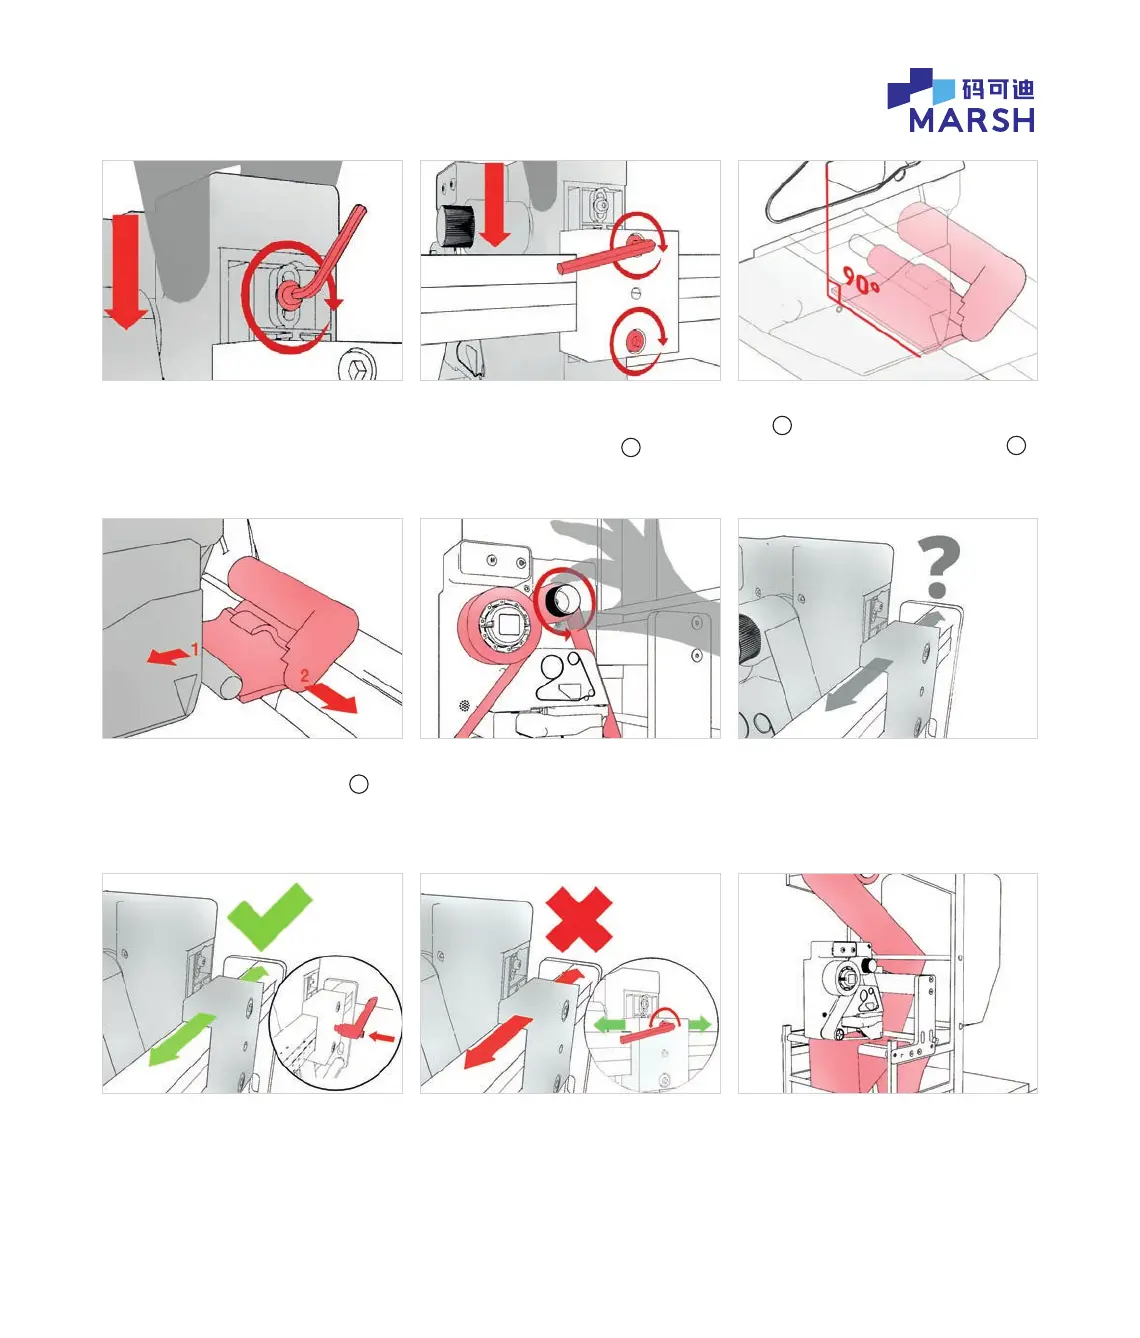
3.4 Hold the printer rmly to keep in
this position and then tighten the
gap adjustment screw.
3.7 Push printhead carriage away to
unclip from the gap setting tool
d
.
Pull out the gap setting tool and
keep safe.
3.9a If it DOES slide, then re-t the
bracket locking handle.
3.5 Continue to hold the printer rmly
to keep in this position. Tighten both
bracket mounting screws
c
.
3.8 Wind on the ribbon by hand to
ensure it is tight.
3.9b If it does NOT slide, the bracket
locking handle is not needed. Unscrew
the top mounting screw ½ turn ONLY,
slide printer into desired position and
re-tighten the top mounting screw.
3.6 IMPORTANT: Check the gap setting
tool
d
has remained in contact with,
and is square to, the platen rubber
b
.
3.9 Push on bracket clamp to see if it is
free to slide along the bracket slide bar.
3.10 Re-thread the packaging material
in the host machine.
© 2020 All rights reserved. We reserve the right to alter design and/or specifications without notice.
 Loading...