4.2.2.5 Precautions for installation
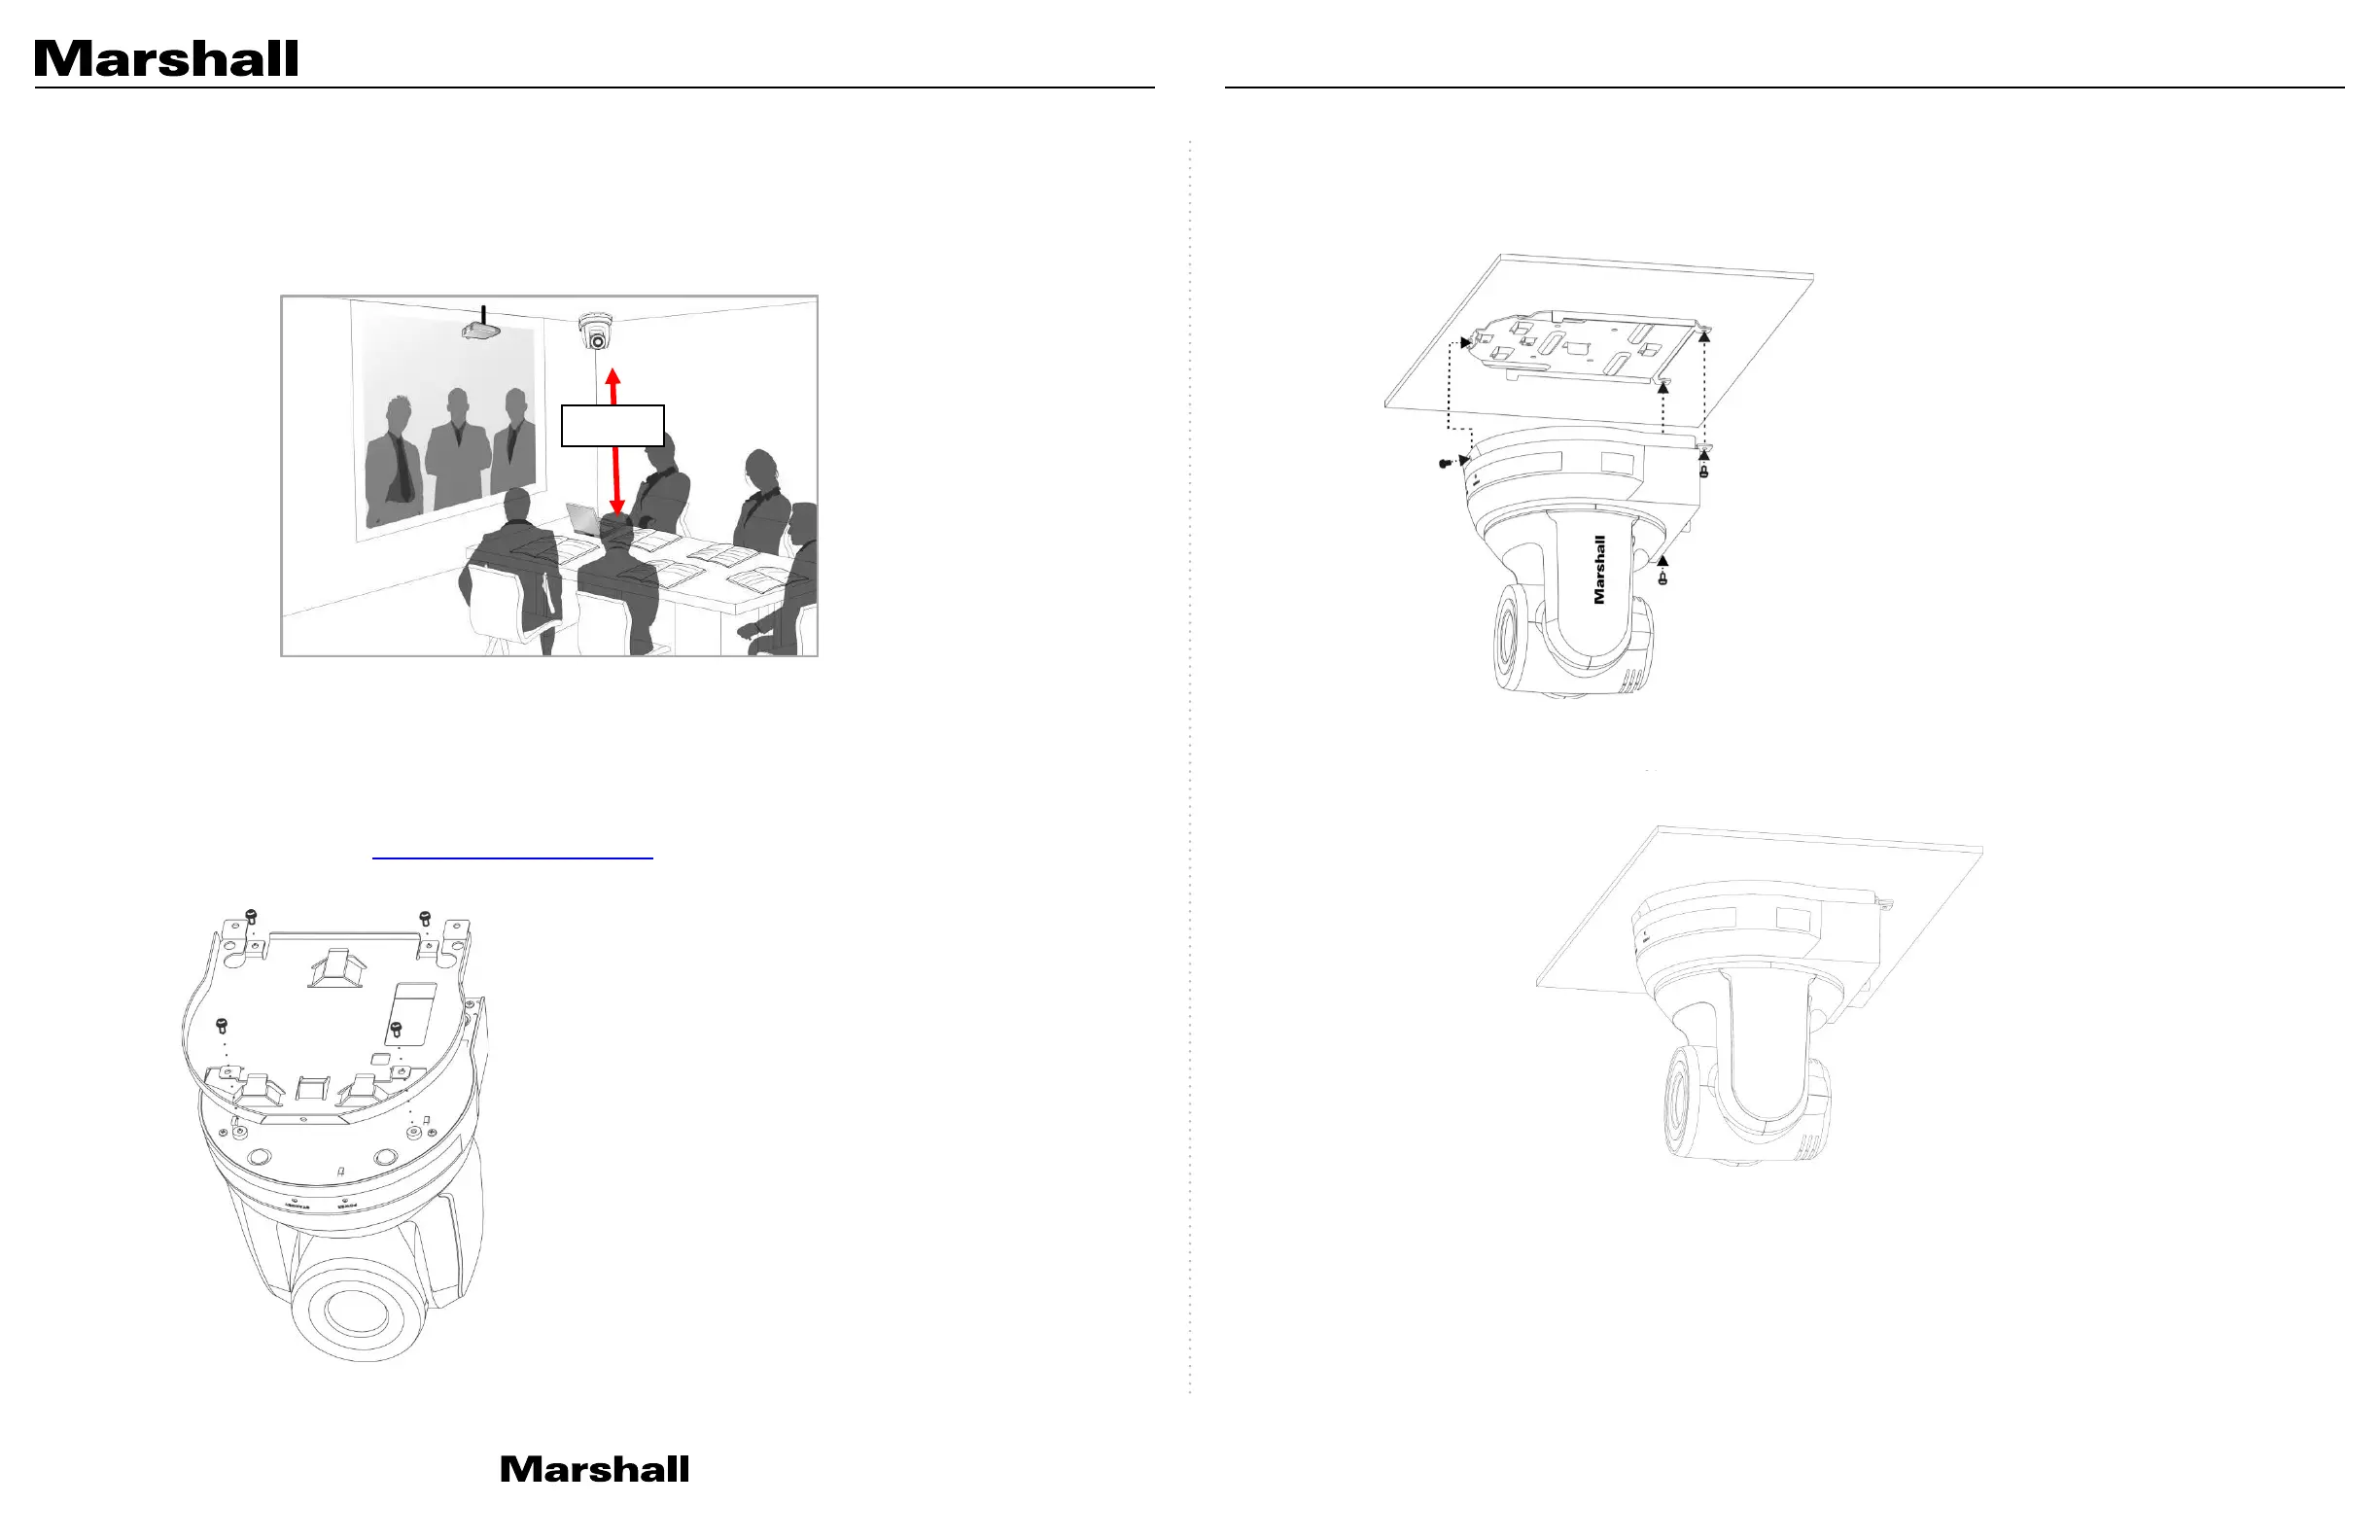
1. Prior to installation, please confirm the orientation of the camera relative to the
object to be captured to ensure Horizontal and Vertical integrity axis.
2. It is recommended for camera be set at a distance of one (1) meter or more from
the object to be captured. Please adjust for a best distance according to the
magnification of the lens
3. The camera (including metal plates) weights approximately 2.5 kg. If it is to be
installed on the ceiling, please use the hanger that has obtained UL security
approval to prevent the camera from coming loose and falling.
4. Please check that camera is securely installed on a regular basis.
4.2.2.6 Installation steps
1. Please set desired resolution and framerate on Output Switch dial.
Please refer to Chapter 7 DIP Switch Setting for the relevant descriptions on DIP
switch settings.
2. Fix the metal plate A on the machine base with 4 M3 silver screws
3. Lock the metal plate B on ceiling mounted hanger
※ Caution: (1) Please use the hanger with UL security approval
(2) Please make hole for connecting and running wires to the camera
4. Combine the metal plate A and the metal plate B
(1) Push the metal plate A up to the ceiling and then to the right to latch the metal
plate B into place.
(2) And then secure with 2 x M3 silver screws and 1 x M3 black screw
4.2.2.7 How to remove
1. Remove the connected cables and wires from the camera
2. Uninstall the camera attached to ceiling, loosen the three screws that fix the
metal plates A and B and push to the left to remove the camera
3. Then remove the screws on the hanger and the camera
CV630-IP Manual
www.marshall-usa.com13 14

 Loading...