EasyManua.ls Logo

Marshall Amplification CV630-NDI - User Manual

Marshall Amplification CV630-NDI
25 pages
Print Icon
To Next Page IconTo Next Page
Loading...
Broadcast A/V Division
CV630-NDI
CV630-NDIW
30X UHD30 PTZ Camera with NDIĀ®|HX
User Manual

Questions and Answers

  • J
    Jennifer ZunigaAug 4, 2025
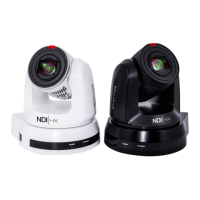
    What to do if there is no image output from CV630-NDI Marshall Amplification Security Camera?
    • C
      Chris WardAug 4, 2025
      If your Marshall Amplification Security Camera, model CV630-NDI, isn't displaying an image, verify the power and PoE supply are working correctly. Ensure the output signals are set to streaming output. Check that the camera resolution is compatible with your monitor. If using 4K output, confirm your monitor supports it. Finally, try replacing the cables to rule out any faults.
  • W
    william17Aug 10, 2025
    How to fix Marshall Amplification Security Camera boot without power signal?
    • C
      Charles Gould IIIAug 10, 2025
      If your Marshall Amplification Security Camera is booting without a power signal, ensure the power cord is properly plugged in. If using a PoE connection, verify that your power supply supports POE+ (IEEE 802.3at) hubs.
  • A
    Anthony GrayAug 16, 2025
    Why RS-232 cannot be controlled on Marshall Amplification CV630-NDI Security Camera?
    • E
      Emily SmithAug 16, 2025
      If the RS-232 cannot be controlled on your Marshall Amplification Security Camera, first confirm the connection is correct, paying attention to the RS-232 In/Out ports. Then, ensure that the baud rate setting matches that of the control equipment.
  • J
    James WagnerAug 22, 2025
    What to do if CV630-NDI Marshall Amplification Security Camera image is severely delayed?
    • E
      Eileen PaulAug 22, 2025
      If your CV630-NDI Marshall Amplification Security Camera image is severely delayed, try using 1080p or 720p at 60/50 fps instead of 25/30 fps signals.
  • K
    Katrina GallegosAug 28, 2025
    Why is there no image for 3G-SDI output resolution 3840x2160 29.97/ 25 on Marshall Amplification Security Camera?
    • D
      david86Aug 28, 2025
      The 3G-SDI output resolution 3840x2160 29.97/ 25 is not supported. Please confirm the screen menu/ Dip Switch setting 3G-SDI supports output resolutions up to 1080p 59.94/50.

Summary

Copyright Information

Chapter 1 Safety Instructions

Operation Safety

Safety instructions for operating the product, covering environment, placement, power, and handling.

Installation Safety

Safety considerations for installation, emphasizing approved racks and technician installation.

Storage Guidelines

Guidelines for product storage, including cord placement, avoiding spills, and unplugging during thunderstorms.

Cleaning Instructions

Instructions for cleaning the device, recommending a damp cloth and avoiding liquid cleaners.

Remote Control Precautions

Precautions for using the remote control, focusing on battery type and disposal.

Chapter 2 Package Contents

FCC Warning

Compliance statement for FCC regulations regarding digital device radio noise emissions.

CE Radiation Warning

Warning regarding potential radio interference in residential environments due to CE radiation.

Chapter 3 Function Introduction

I;O Functions Overview

Overview of the camera's input/output ports and their functions, with a table listing items and descriptions.

LED Indicator Description

Explains the status and color of LED indicators for power and standby modes.

Tally Indicator Light Function

Details how to enable and control the tally indicator light using RS-232 commands.

Chapter 4 Installation Instructions

Preparation for Installation

Steps and considerations before installing the camera, focusing on safety and environment.

Desk Installation

Precautions and steps for installing the camera on a flat desk.

Ceiling Installation Overview

Details for ceiling installation, including parts, camera size, and rotation dimensions.

Chapter 4 Installation Instructions

Camera Bottom Diagram

Detailed diagrams showing the bottom view and dimensions of the camera.

Metal Plate B Diagram

Diagrams illustrating the dimensions and components of Metal Plate B for ceiling mounting.

Chapter 4 Installation Instructions

Metal Plate A Diagram

Diagrams showing the dimensions and locking screws for Metal Plate A.

Ceiling Installation Precautions

Important precautions for ceiling installation, including orientation and distance.

Ceiling Installation Steps

Steps for installing the camera on the ceiling, including DIP switch adjustment and fixing metal plate A.

Chapter 4 Installation Instructions

Securing Metal Plate B

Instructions for securing Metal Plate B to the ceiling hanger, with safety cautions.

Combining Mounting Plates

Steps for combining Metal Plate A and Metal Plate B and securing them with screws.

Camera Removal Procedure

Procedures for safely removing the camera and its mounting plates from the ceiling.

Connecting Devices

Instructions for connecting the camera to PCs or monitors via SDI or HDMI.

PC Connection (Video Conference)

Detailed steps for connecting the camera to a PC for video conferencing.

HDTV;Monitor Connection (HDMI)

Instructions for connecting the camera to an HDTV or monitor using an HDMI cable.

Chapter 4 Installation Instructions

Connecting to Internet

Guidance on connecting the camera to the internet, referring to network settings.

Connecting Audio Input

Instructions for connecting an audio input device, like a microphone or mixer.

Connecting RS-232

How to connect multiple cameras using RS-232 serial communication.

Chapter 4 Installation Instructions

Connecting RS-422

Instructions for connecting multiple cameras using RS-422 serial communication.

Chapter 5 Remote Control and Settings

Remote Control Functions

Lists and describes the functions available on the remote control.

Setting Menu Overview

Details the main menu items and their adjustable settings for camera configuration.

Chapter 5 Remote Control and Settings

Iris Priority Settings

Explains how to set the iris aperture when the exposure mode is set to Iris Pri.

Manual Gain Adjustment

Describes how to adjust gain levels when the exposure mode is set to Manual.

Manual Shutter Speed

Details how to manually set the shutter speed for exposure control.

Chapter 5 Remote Control and Settings

Manual Iris Adjustment

Instructions for manually setting the iris aperture.

Gain Limit Settings

Explains how to set the maximum electron gain limit.

Iris Limit Settings

Sets the maximum limit for the iris aperture.

WDR Settings

Configures Wide Dynamic Range (WDR) settings for better image quality.

White Balance Configuration

Options for setting the camera's white balance mode and manual adjustments.

Picture Effect Settings

Adjusts picture effects like Off, Neg, and Black and White.

Chapter 5 Remote Control and Settings

3 D Noise Reduction

Adjusts 3D Noise Reduction settings (Off, Low, Typ, Max).

Image Mode Customization

Allows customization of image modes or selection of default/custom settings.

Image Mode Loading

Loads pre-defined image mode parameters after selection.

Brightness Adjustment

Adjusts brightness levels when the image mode is set to Custom.

Hue Adjustment

Adjusts hue levels when the image mode is set to Custom.

Saturation Adjustment

Adjusts saturation levels when the image mode is set to Custom.

Gamma Adjustment

Adjusts gamma levels when the image mode is set to Custom.

Pan;Tilt Limit Settings

Enables or disables angle limits for pan and tilt movements.

Pan Limit Adjustments

Sets the limits for the leftward and rightward pan movements.

Tilt Limit Adjustments

Sets the limits for the upward and downward tilt movements.

Pan Flip Function

Activates the reverse pan command for image orientation.

Tilt Flip Function

Activates the reverse tilt command for image orientation.

Chapter 5 Remote Control and Settings

Focus and Mirror Settings

Adjusts manual/automatic focus modes, sensitivity, and mirror image settings.

Digital Zoom and D-Effect

Sets the digital zoom limit and controls image orientation modes.

Preset Speed Configuration

Defines the rotation speed of the cradle head when presets are executed.

PTZ Speed Compensation

Adjusts PTZ speed based on zoom position.

Auto Focus Settings

Manages auto focus functions, including triggering and frame settings.

Ethernet DHCP Settings

Manages Ethernet settings like DHCP.

Chapter 6 Network Settings

Connecting to Network

Guides on connecting the camera to a network via switch, router, or direct cable.

Connecting to Internet

Two common methods for connecting the camera to the internet.

Viewing via Browser

Instructions for accessing the camera's live view via a web browser.

Chapter 6 Network Settings

Web Page Function Description

Overview of the camera's web interface functionalities.

Login Screen Details

Details of the web interface login screen, including user name, password, and language.

Real-Time Viewing

Describes how to view the camera's live feed and control basic functions through the web interface.

Chapter 6 Network Settings

Account Management

How to add, edit, and manage user accounts and their permissions.

System Settings

Configuration of system settings like resolution and HDMI format.

Chapter 6 Network Settings

Video Settings

Settings related to video output, including camera name and location.

Camera Settings

Camera-specific settings for exposure, white balance, focus, and WDR.

Chapter 6 Network Settings

Focus and Mirror Settings

Adjusts manual/automatic focus modes, sensitivity, and mirror image settings.

Digital Zoom and D-Effect

Sets the digital zoom limit and controls image orientation modes.

Picture Settings

Picture settings including effects, noise reduction, image mode, gamma, brightness, contrast, saturation, and sharpness.

Audio Settings

Audio settings including enable, input type, and volume adjustment.

Chapter 6 Network Settings

Network Configuration

Configuration of network settings like DHCP, IP address, SNTP server, and port settings.

Time Settings

Settings for camera time, synchronizing with computer or SNTP server.

Chapter 6 Network Settings

Firmware Upgrade

Instructions for upgrading the camera's firmware via the web page.

Incident Log

Information on viewing event logs for camera errors.

System Service Settings

System service settings including factory reset and profile loading.

About Camera

Displays camera information such as ID, firmware version, and serial number.

Chapter 7 DIP Switch Settings

DIP Switch Overview

Explains the function of DIP switches for output and IR selection.

Output Switch Settings

Details the resolution and frame rate settings controlled by the OUTPUT DIP switch.

IR Select Settings

Describes the settings for the IR (Infrared) selection switch.

Chapter 8 Troubleshooting

Common Problems

Lists common problems encountered with the CV630-NDI camera.

Troubleshooting Solutions

Provides solutions for common issues like no power signal, no image, or delayed output.

Warranty Information

Marshall Amplification CV630-NDI Specifications

General IconGeneral
BrandMarshall Amplification
ModelCV630-NDI
CategorySecurity Camera
LanguageEnglish

Related product manuals