4/27/20 3 Ultimate Glider WOCD
19916116 Field Applied Instructions
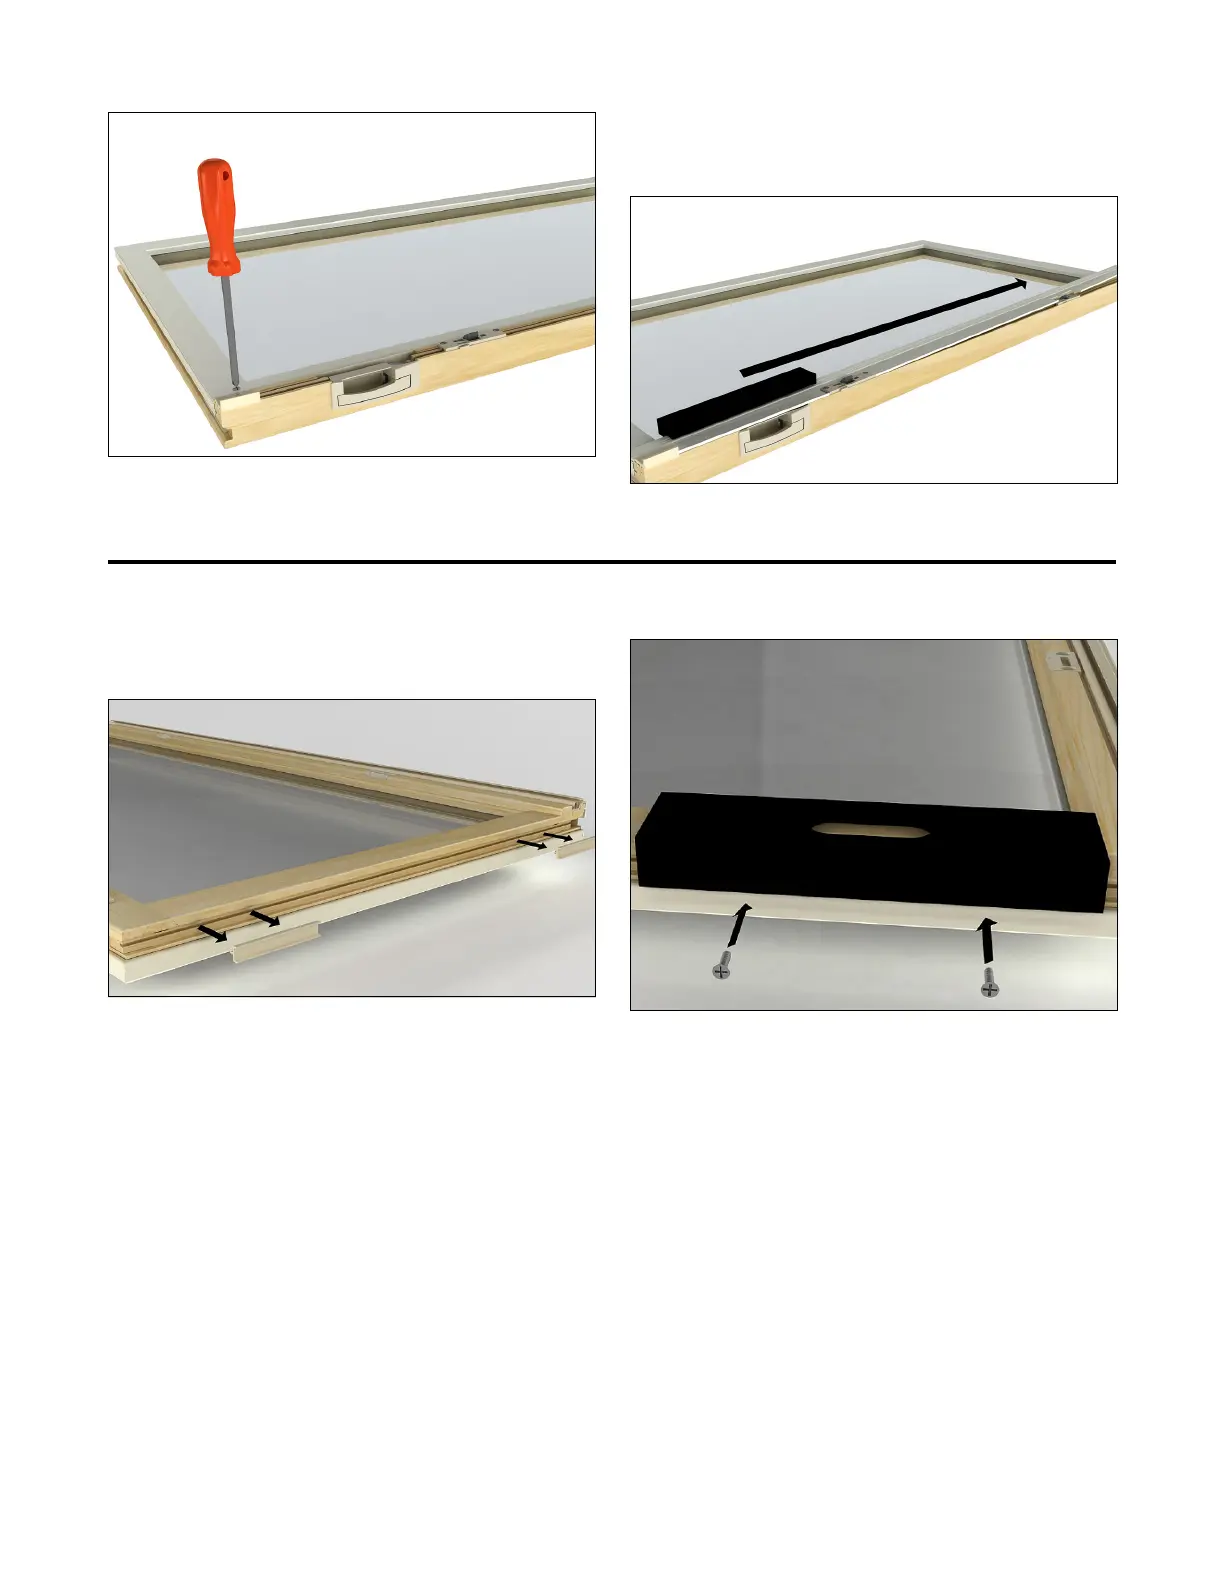
Figure 3
4. Reinstall the interlock using a wood block or rubber
mallet (supplied by others) and reinstall the screws. See
Figure 4.
Figure 4
Secondary Sash
1. Lay sash on a flat surface. Remove the bottom rail
glide blocks from the bottom rail. See Figure 5.
Figure 5
2. Place the jig on the bottom rail and position against
the check rail. Secure with two #7 x 1" screws (not
provided) into the bottom rail. See Figure 6.
Figure 6
3. Set router depth to 13/16" and route. See Figure 7.