Do you have a question about the Master Bilt CCR-49DR and is the answer not in the manual?
Details specifications for refrigerator models including COMP H.P., V/Hz, REFRIGERANT, AMPS, and WEIGHT.
Details specifications for freezer models including COMP H.P., V/Hz, REFRIGERANT, AMPS, and WEIGHT.
Ensure adequate space around the unit for proper air flow at the rear.
Avoid placing the unit near heat sources as high ambient temperature affects cooling efficiency.
This unit is designed for indoor installation and use only.
Lock front wheels for stability and ensure the unit is level front-to-back and side-to-side.
The unit must be connected to a dedicated electrical outlet.
Clean the unit's interior and exterior with warm, soapy water. Avoid abrasive cleaners.
Periodically clean condenser fins (every 3 months) to maintain refrigeration performance.
Clean the door gasket frequently to ensure proper sealing.
After cleaning, check the unit for safety and proper operation.
Ensure correct voltage, use a protected circuit, and turn off power before maintenance.
Wait 5 minutes before re-starting the unit after it has been disconnected.
Locate the controller inside, set to 'Normal' (38°F). Adjust for warmer ('Cool') or colder ('Cold') temperatures.
Thermostat cycles compressor. Interior light activates with door. Cooling fans activate when door is closed.
Plug in and turn on the power switch. The display panel lights up, and the compressor starts.
Default setting is '5'. Set level '1' for higher temp, '9' for lower temp. Uses electronic controller for cycling and defrost.
Interior light activates with door opening. Evaporator fan runs when doors are completely closed.
Details the function of Temp. Setting, Control Buttons, Inner Temp display, indicators (QC, Fan, Door), and Quick Cooling.
Push the Q.C. button to run the compressor continuously until 14°F (-10°C) is reached (max 120 min).
Push the Q.C. button again to return to normal operation. Up/Down buttons are disabled during this mode.
Use Up/Down buttons to set temperature from level '1' (higher) to '9' (lower).
Displays inside temperature from 14°F to 69°F. Shows 'LO' below 14°F and 'HI' above 69°F.
Indicates when the fan motor is running. Evaporator fan activates when the door is closed.
Indicator turns on when door is opened. Beep warnings activate after 30s (3 beeps), 1 min (5 beeps), 5 min (continuous).
Plug in and turn on the power. The display lights up, and the compressor starts running.
Default setting is '5'. Adjust temp '1' (higher) to '9' (lower). Electronic controller manages cycling and defrost.
Interior light activates with door opening. Evaporator fan runs when doors are completely closed.
Ensure good air flow in freezer; do not block back wall or evaporator compartment.
Shows Temp. Setting, Control Buttons, Inner Temp, and indicators for DF, Fan, Door, Manual Defrost.
Push the MANUAL DEFROST button for 5 seconds to start the defrost cycle.
During manual defrost, Up/Down buttons cannot control compressor cycles.
Use Up/Down buttons to set temperature from level '1' (higher) to '9' (lower).
Factory set for a defrost cycle every 6 hours (4 per day). Intervals can be adjusted internally.
Cycle ends when coil reaches 60°F (15°C). Panel displays 'd F' during defrost.
Push MANUAL DEFROST button for 5 seconds to start defrost. Cannot alter compressor cycle during mode.
Use Up/Down buttons to set temperature from level 1 to 9. Setting locks automatically after five seconds.
Press Up/Down buttons simultaneously for 5 seconds to cancel lock.
Factory set for a defrost cycle every 6 hours (4 per day). Intervals can be adjusted internally.
Cycle ends when coil reaches 60°F (15°C). Panel displays 'd F' during defrost.
Displays inside temperature from -50°F to 50°F. Shows 'LO' below -50°F and 'HI' above 50°F.
Indicates when the fan motor is running. Evaporator fan activates when the door is closed.
Indicator turns on when door is opened. Beep warnings activate after 30s (3 beeps), 1 min (5 beeps), 5 min (continuous).
Remove the bottom grill by hand and the top grill using a screwdriver.
Remove grill caps and disconnect heater wire from the main harness.
Unscrew top hinge bolts (3 points), remove door assembly, then unscrew bottom hinge bolts (3 points).
Substitute left and right grill fixtures. Use bolts to fix top and bottom hinges at the new positions.
Set up door at top hinge, pull out heater wire, connect wire to harness, assemble grill caps, set up top grill, and assemble bottom grill.
Cause: High temperature setting. Solution: Push temperature down button.
Cause: Power issue, sunlight, hot food, frequent door openings, incorrect dial. Solution: Check power, placement, food, door usage, dial.
Cause: Clogged condenser, incorrect leveling, unit too close to wall. Solution: Check condenser, leveling, wall clearance.
Cause: Weak floor, incorrect leveling, unit too close to wall, tray position. Solution: Check floor, leveling, clearance, tray.
Cause: High-moisture air during rainy season. Solution: Wipe with dry cloth.
Cause: Frequent door openings, damp food. Solution: Keep door closed, remove dewdrops.
Cause: Bent door, leveling failure, dislodged gasket. Solution: Level unit, reposition gasket.
Covers defects in material/workmanship for one year. Labor covered if installed by authorized personnel.
Four-year compressor replacement warranty for defects in material/workmanship.
Excludes damage from misuse, improper maintenance, alterations, or acts of God.
Prices subject to change without notice. Quotations void if not accepted within 30 days.
Delivery dates are approximate. Master-Bilt may use any responsible carrier. Prices are F.O.B. factory.
Claims for transit damage must be made with the carrier. Master-Bilt assumes no responsibility.
Buyer compensates for special items on cancellations. Returns require authorization and a 25% handling charge.
List prices include a one-year parts and labor warranty and an extended four-year compressor warranty.
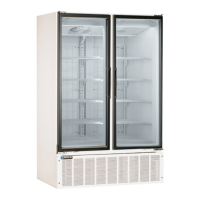
| Capacity | 49 cu. ft. |
|---|---|
| Number of Doors | 2 |
| Defrost Type | Automatic |
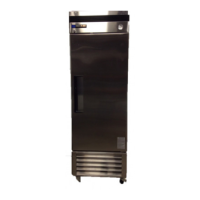
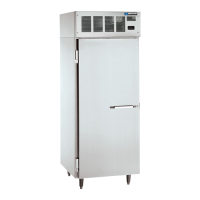
| Type | Commercial Refrigerator |
| Shelves | Adjustable |
| Exterior Material | Stainless Steel |
| Cooling System | Forced Air |
| Power Supply | 115V / 60Hz / 1Ph |
| Door Type | Solid |