Page 10
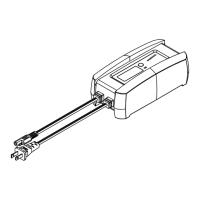
BATTERY CLAMP
QUICK-CONNECT
1.
Connect the end of the charger output
cable to the end of the battery clamp
quick-connect.
2.
Follow the steps in previous sections
to connect the output clamps to the
battery.
3.
After a good electrical connection is
made to the battery, plug the power cord
into a live grounded 120V AC outlet.
4.
Select the battery type.
5.
When charging is complete, disconnect
the AC cord from the outlet, remove the
negative clamp, and finally the positive
clamp.
RING TERMINAL
QUICK-CONNECT
The ring connectors permanently attach
to the battery, providing easy access to
quickly connect the charger to your battery.
This application is appropriate for motorcy-
cles, lawn tractors, ATVs and snowmobiles.
1.
To permanently attach to a battery,
loosen and remove each nut from the
bolt at the battery terminal.
2.
Connect the red POSITIVE connector
ring to the POSITIVE battery terminal.
3.
Connect the black NEGATIVE con-
nector ring to the NEGATIVE battery
terminal.
4.
Replace and tighten the nuts to secure.
5.
Connect the cable to the end of the
charger output cord. Take care to keep
the wires and plug away from metal
and moving parts.
6.
Plug the charger power cord into a live
grounded 120V AC outlet.
7.
Select the battery type.
8.
When charging is complete, disconnect
the AC cord from the outlet, and then
disconnect the quick-connect cable
from the charger output cord.
12V ACCESSORY PLUG
QUICK-CONNECT
Charge or maintain your battery without
lifting the hood.
1.
Connect the end of the 12V accessory
plug quick-connect to the charger.
2.
Insert the 12V accessory plug into the
12V accessory outlet.
3.
Route the power cord from the charger
through the vehicle’s open window.
4.
Plug the charger power cord into a live
grounded 120V AC outlet.
5.
If the vehicle’s ignition key has to be
on in order for the accessory outlet
to supply/receive power, turn the key,
without starting the engine.
6.
Select the battery type.
7.
When charging is complete, discon-
nect the AC cord from the outlet, and
then remove the 12V accessory plug
from the 12V outlet.
BATTERY CHARGING TIMES
CCA = Cold Cranking Amps
Ah = Amp Hour
RC = Reserve Capacity
MO = Maintain only
BATTERY SIZE/RATING
CHARGE
TIME (3A)
SMALL BATTERIES
Motorcycle, garden
tractor, etc.
6-12 Ah 1½-2½ h
12-32 Ah 2½-7 h
CARS
AND
TRUCKS
200-315
CCA
40-60 RC 7½-9½ h
315-550
CCA
60-85 RC 9½-12¼ h
550-1000
CCA
85-190 RC MO
MARINE/DEEP-CYCLE
80 RC 11¾ h
140 RC MO
160 RC MO
180 RC MO
Times are based on a 50% discharged battery
and may change, depending on age and condi-
tion of battery.