12
Lowes.com/masterforge
®
ASSEMBLY INSTRUCTIONS
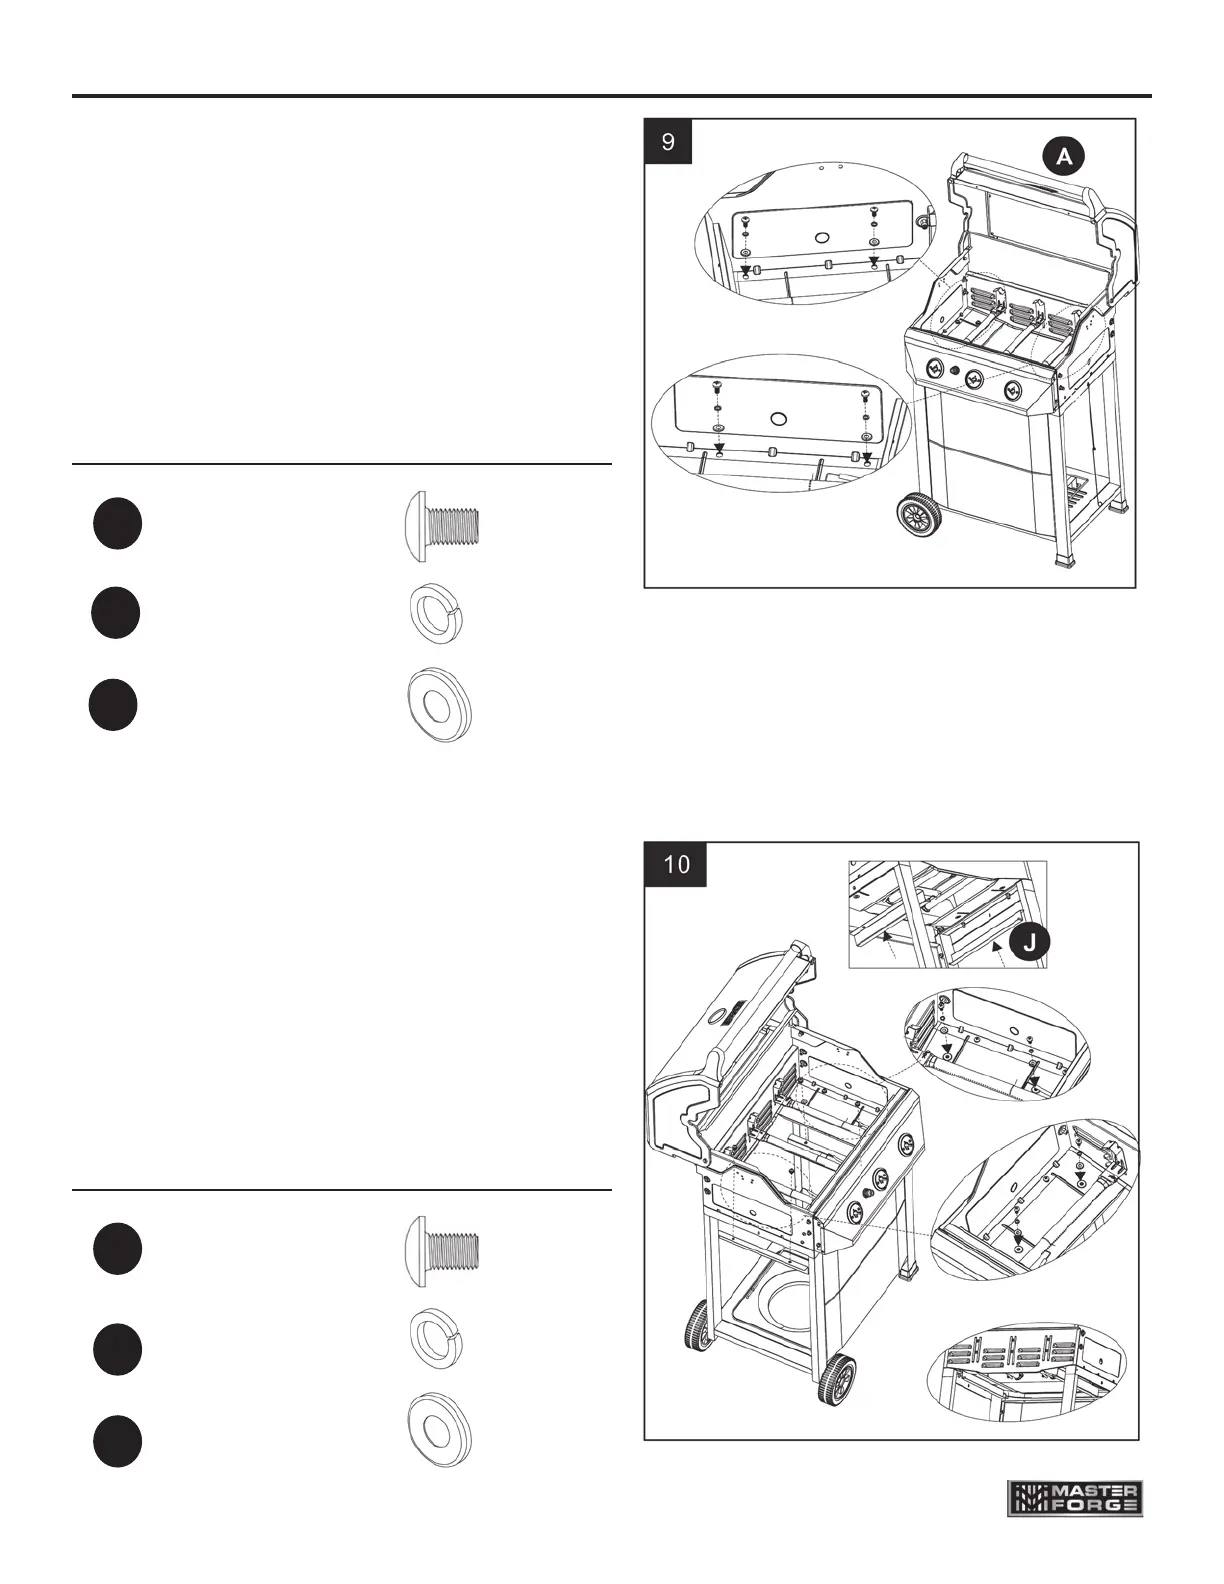
9. Install rebox and hood assembly
Set rebox and hood assembly (A)
onto cart. Align the 4 pre-drilled
holes in bottom of rebox and hood
assembly (A) to the pre-drilled holes in
the top of the cart assembly. Using 4
M6 x 12 screws (FF), 4 M6 lock
washers (GG) and 4 M6 spring
washers (HH), secure rebox and
hood assembly (A) to the cart
assembly.
Hardware Used
FF
GG
M6 x 12
Screw
M6
Lock Washer
M6
Spring Washer
HH
x 4
x 4
x 4
10. Install drip tray brackets
Locate the holes at the bottom of
rebox and hood assembly (A). Put
drip tray brackets (J) under the
rebox and hood assembly (A). Align
drip tray brackets (J) with the holes at
the bottom of rebox and hood
assembly (A). Tighten drip tray
brackets with M6 x 12 screws (FF) and
M6 lock washers (GG) and M6 spring
washers (HH) from the top to the
bottom of rebox and hood assembly
(A).
Hardware Used
FF
GG
M6 x 12
Screw
M6
Lock Washer
M6
Spring Washer
HH
x 4
x 4
x 4