2
PREPARE FENCE LAYOUT1
GENERAL INFORMATION:
Read this instruction sheet completely before starting work.
During panel/gate assembly, work on a soft, non-abrasive surface to avoid scratching the PVC.
When cutting PVC components with a power saw, use a fine-toothed blade (plywood blade,
finishing blade, etc.).
Plan ahead when working with PVC glue. It dries very fast, requiring speed and precision.
Laying out the fence is the critical first step toward ensuring a quality installation.
NOTE: Standard fence sections and gates are designed for level terrain. Significant slopes in the
terrain will necessitate modifications to panel kits, gate kits and posts.
STEP 1
Locate the boundary lines to your property.
STEP 2
Drive stakes into the ground along the
property line and stretch a string between
each stake. Be sure to extend the string
about 24" beyond the property line (Fig. 1).
It is recommended that all posts be set
approximately 6" inside of the property line
so that concrete footings do not encroach
onto the adjoining property.
STEP 3
Mark the location of each terminal post with
a stake (corner, end and gate posts are called
terminal posts).
When determining the position of the gate
posts, refer to Privacy Gate section for
actual gate opening.
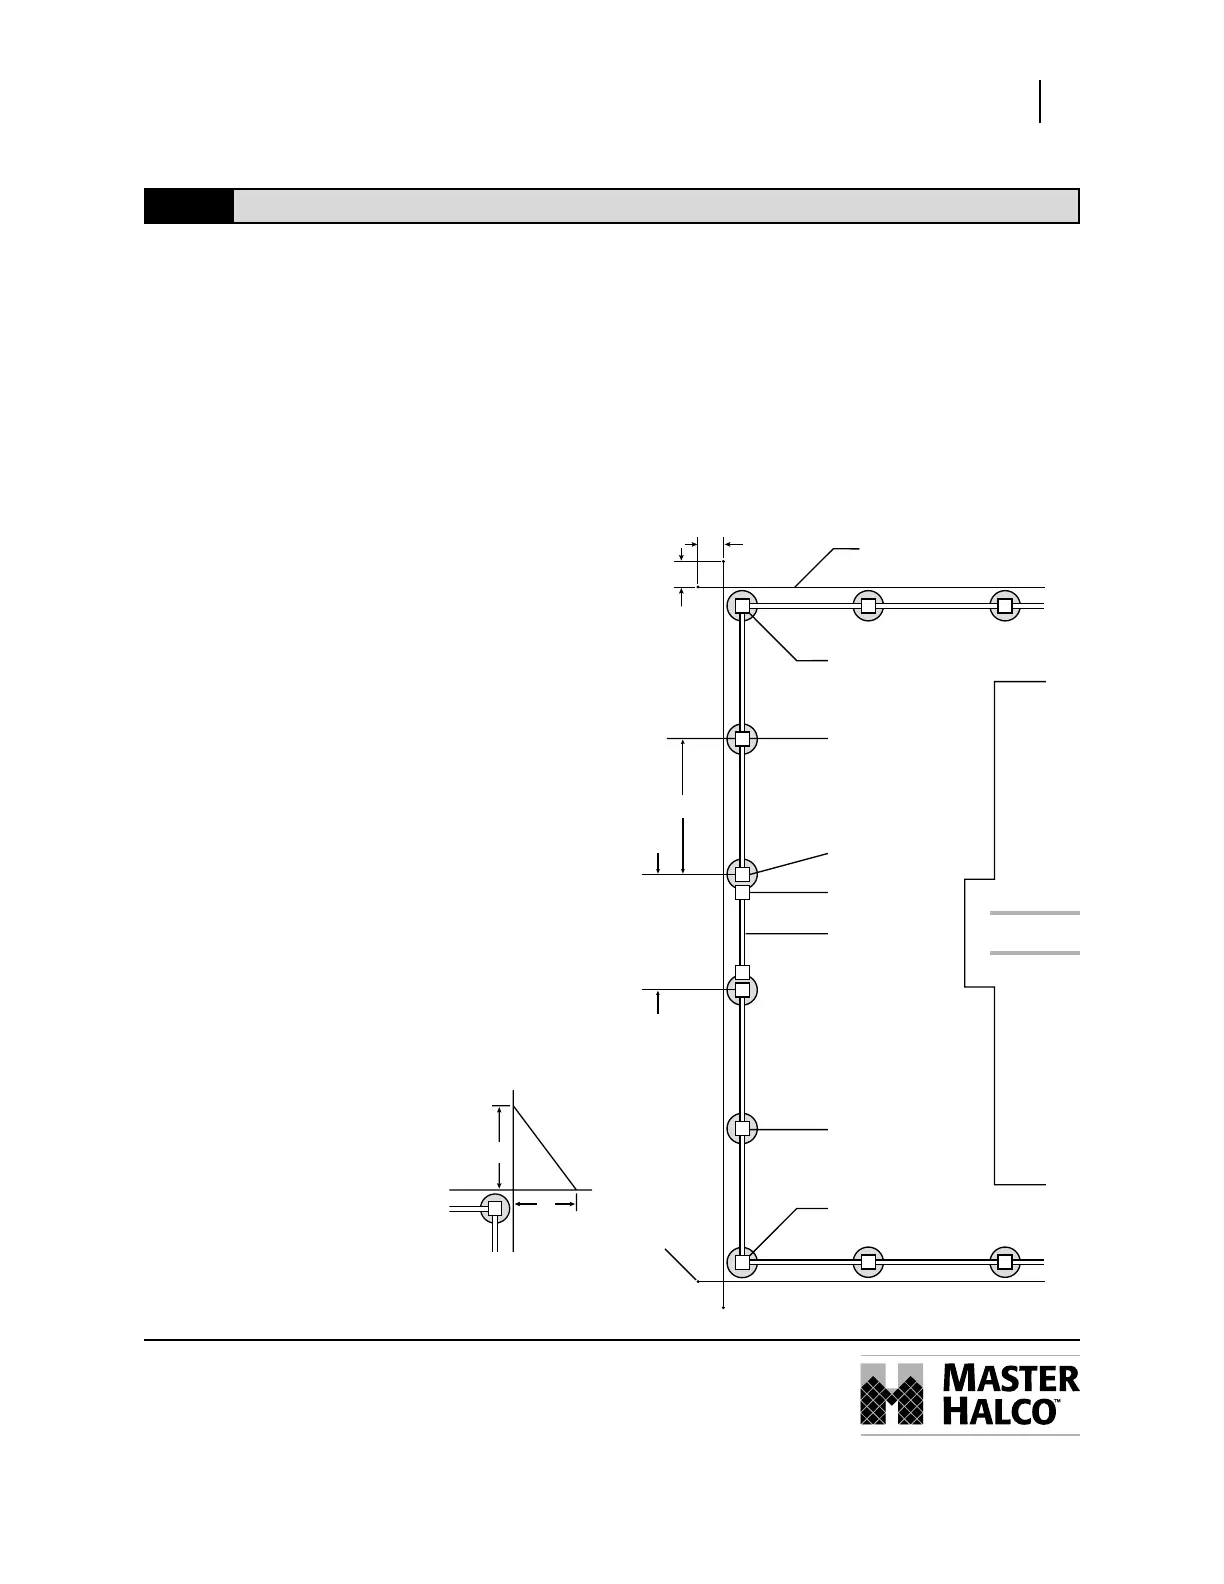
LEGEND PRIVACY PANEL & GAT E
Installation Instructions
Line Post
Line Post
C
L
C
L
Corner Post
Corner Post
Gate Post
Gate Vertical
Gate
Use the 3-4-5 rule to
check for square corners
C
L
Figure 1
5'
4'
3'
24"
24"
String
Stak
95.5" Sections
Gate opening width
+ post size (5")
= gate post centers