3
SETTING TERMINAL POSTS2
LOCATING AND SETTING LINE POSTS3
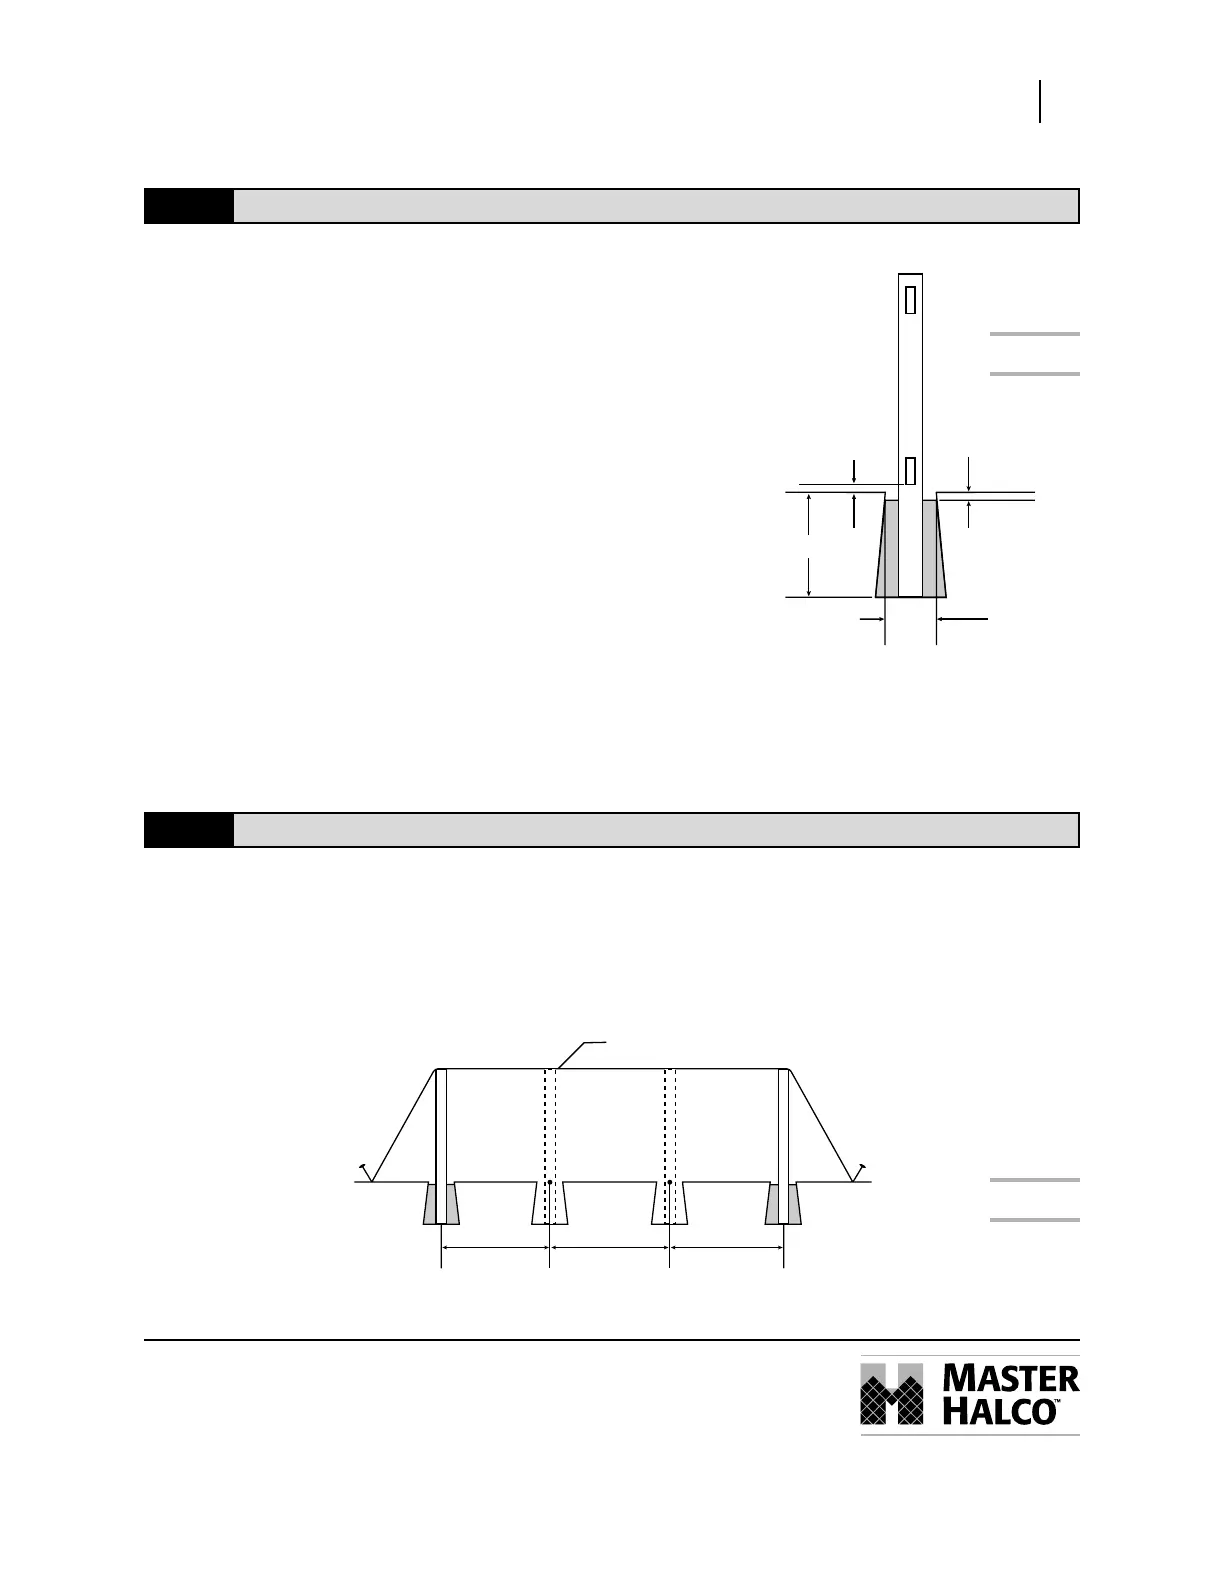
Figure 2
Figure 3
Although post depth and hole diameter will be determined
by local weather and soil conditions, holes for terminal
posts and line posts are typically dug 10" in diameter and
30" deep with sloped sides (Fig. 2).
STEP 1
Dig all terminal post holes.
SET ALL TERMINAL POSTS IN CONCRETE.
STEP 2
Position the post in the hole. The posts should be centered in the hole
and must be square with the fence line so that when the rails are
inserted into the posts they will parallel the string line. Check the post
on two adjacent sides with a carpenter’s level and adjust as necessary
to make sure it is plumb. The fence height above grade is determined
at this time as well. We recommend 2" be left from the bottom of the
bottom rail to the ground.
STEP 3
Pour concrete around post, fill to 2" below ground level. Once the
concrete is completely dry, fill the balance of the hole with dirt.
STEP 1
After the terminal post footings have hardened enough for the posts to remain stable, stake and stretch a string line
taut across the tops of the posts to mark the desired height of the line posts (Fig. 3).
STEP 2
Working along the string line, stake out the positions of all line posts.
STEP 3
Dig all line post holes.
2"
2"
10" dia.
Terminal
Post
Line Post
String
Line Post Terminal
Post
30"
LEGEND PRIVACY PANEL & GAT E
Installation Instructions