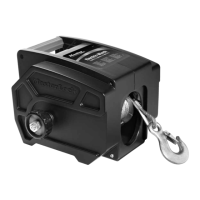
Your winch is designed to be mounted permanently. No Hardware Included.
Permanent
Mounting
1. Select a mounting
site on the front or
rear of your ATV
vehicle, truck bed,
or other suitable
locations. Never
install your winch
in a location
that obscures
its warning and
instruction labels.
Your winch can
generate 1,500lbs of pulling force so be sure that the mounting
site selected can withstand a load well in excess of the 1,500lb
pulling force.
WARNING: You may need to use steel reinforcement plates,
or weld on additional bracing on your vehicle, depending on the
mounting site you select. Do not mount the winch where there
would be the possibility of it being submerged in water. The
winch is weather resistant but not water proof.
2. Position winch in desired location, and mark for drilling the
locations of the holes on the mounting plate of the winch.
WARNING: Prior to drilling, always verify that the marked
locations for drilling are clear of fuel lines, fuel tank, brake lines,
electrical wires, etc. Drill the marked locations on your vehicle.
3. Attach the winch to the
desired location using
bolts, nuts, washers,
and lock washers.
Do not use any bolts
weaker than ISO grade 5.
4. Be sure that the winch is
positioned so that the
cable does not rub the
front opening of the winch
or across sharp edges,
corners, or moving parts
of the vehicle or any other object.
Temporary Mounting on Ball Mount/Hitch Ball
1. Bolt winch to mounting
plate using bolts and
nuts provided.
2. Attach the winch adapter
mounting plate assembly
to your trailer hitch, by
inserting the trailer hitch
ball through the shaped
hole in the adapter
mounting plate. Never
install your winch in a
way that obscures its
warning and instruction labels.
Wiring Instructions
Plan a route for the electrical wiring from the point of the vehicle where the winch is mounted. Route the electrical wiring from the winch
to the battery being careful to avoid contacting hot or sharp surfaces. Make sure that the electrical wiring is secured along its route with
appropriate fasteners in a location clear of moving parts, road or trail debris or any
possibility of being damaged by operation or maintenance of the vehicle.
Your winch is designed to be wired permanently.
Connect wire #3, black wire of shorter wire pair, to (–) winch motor terminal.
Connect wire #1, red wire of shorter wire pair, to (+) winch motor terminal.
Connect wire #4, black wire of longer wire pair, to (–) battery post.
Connect metal plate exiting from overload relay to positive battery post. Note that
opposite side of overload relay should have been previously connected to wire #2,
red wire of longer wire pair.
WARNING: Always wear eye protection when working around a battery.
Do not lean over the battery while making connections. Remove all jewelry,
loose clothing, or anything that may get caught in the motor’s moving parts
prior to connecting wiring to the battery.
WARNING: Be sure you are using a 12 volt automotive battery or equivalent,
in good condition.
#2 Red
#1 Red
Positive (+)
#4 Black
Negative (-)
#3 Black
4
Mounting Instructions
 Loading...