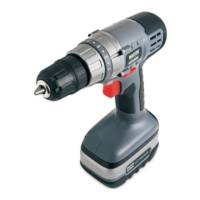
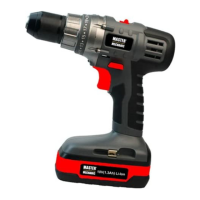
The Master Mechanic 12V 3/8" Cordless Drill/Driver, model 134454, is a versatile power tool designed for drilling and driving screws. It is part of a 12V 3 Piece Tools and Accessory Kit (#137459) which also includes a flashlight and a 57-piece accessory kit.
Function Description:
This cordless drill/driver is equipped with an adjustable torque clutch, allowing it to drive different types of screws into various materials. It also features a dedicated "drilling" mode for drilling holes. The variable-speed ON/OFF trigger switch provides precise control over the drill's speed, with slower speeds for small holes and faster speeds for larger holes. A forward/reverse switch enables clockwise rotation for drilling and counter-clockwise rotation for removing screws. The keyless chuck simplifies the installation and removal of drill bits.
Important Technical Specifications:
- Chuck speeds: 0–550 RPM (no load)
- Battery: 12V Ni-Cd, 1.3 Ah
- Clutch positions: 16 + drilling mode
- Keyless chuck: 3/8" Double sleeve
- Weight: 3 lb. 4 oz. (1.5 kg)
- Charger: 3-5 Hour, Class 2
- Charger input: 100-240V AC, 50-60 Hz, 13W
- Charger output: 24V DC, 300 mA
Usage Features:
- Adjustable Torque Clutch: The drill features a torque adjustment ring with settings from 1-16, plus a drilling mode.
- 1-3: For driving small screws.
- 4-7: For driving medium-sized screws into soft materials.
- 8-11: For driving screws into soft & medium-density materials.
- 12-15: For driving screws into hardwood.
- 16: For driving large screws.
- Drilling mode (marked with a drill bit icon): For drilling operations.
The proper setting depends on the material type, screw size, and required function. If the workpiece material is soft or porous, a lower torque setting is recommended to prevent overdriving. If the screw is not driven far enough, a higher setting can be used. It's important to stop driving once the clutch releases to prevent unnecessary wear.
- Forward/Reverse Switch: Conveniently located above the trigger switch, this switch controls the rotation direction. Pushing it to the left enables clockwise rotation for drilling, while pushing it to the right enables counter-clockwise rotation for removing screws. The trigger switch will not function if the forward/reverse switch is in the middle position. It's crucial not to change the switch position while the chuck is turning.
- Variable-Speed Trigger Switch: The drill starts by gently squeezing the trigger switch. The slowest speed is achieved with a slight depression, and the fastest speed with a full depression. Releasing the trigger stops the drill. Prolonged drilling at slow speeds can cause the motor or battery pack to overheat; in such cases, stop drilling and allow them to cool for at least 15 minutes.
- Installing Drill Bits: The keyless chuck requires grasping the chuck collar with one hand and rotating the chuck body counter-clockwise with the other hand until the jaws open wide enough. Insert the bit fully into the jaws, ensuring it is properly aligned and not at an angle. Then, hold the chuck collar and firmly tighten the chuck body by rotating it clockwise. Hand-tightening is recommended; pliers should not be used. Bits exceeding 7" (17.5 cm) in length or extending more than 6" (15 cm) beyond the chuck jaws should not be used as they can bend or break. Before starting, jog the drill switch to ensure the bit does not wobble or vibrate.
- Removing Drill Bits: To remove a bit, grasp the chuck collar with one hand and rotate the chuck body counter-clockwise with the other hand until the jaws open and release the bit.
- Drilling: When drilling into smooth, hard surfaces like metal, use a center punch to mark the hole location to prevent the bit from slipping. Secure the workpiece with clamps or a vice. Ensure the drill bit is firmly locked and the forward/reverse switch is in the forward position. Set the torque clutch to the drilling position. Hold the drill firmly with both hands, or one hand on the handle and switch, avoiding covering the air vents. Place the drill bit at the marked point and squeeze the trigger. Use higher speeds for small holes and slower speeds for large holes. Apply only enough pressure to keep the bit cutting; do not force the drill or apply sideways pressure. Be prepared for binding and bit breakthrough, as the drill may kick opposite to the rotation direction, leading to loss of control and potential injury. For metals, use light oil to prevent overheating and improve bit life. If the bit jams or stalls, release the trigger immediately and remove the bit to determine the cause.
- Driving Screws: Select the correct screwdriver bit that fits the screw head. Fasten the bit into the chuck, ensuring the flat sides are gripped by the jaws. Set the torque clutch based on the material and screw size. Adjust the clutch setting as needed if the screw is overdriven or not driven far enough. Do not continue driving once the clutch has released.
- Removing the Chuck: First, remove the battery pack. Insert a 5/16" (8 mm) or larger hex key into the chuck and tighten the jaws securely, ensuring each jaw is seated on the flat surfaces of the hex key. Tap the hex key sharply with a mallet in a clockwise direction to loosen the screw in the chuck. Open the chuck jaws and remove the hex key. Then, open the chuck jaws as far as possible. Remove the chuck screw using a #2 screwdriver (turn clockwise as it has a left-handed thread). Insert the hex key into the chuck and tighten the jaws securely. Tap the hex key sharply with a mallet in a counter-clockwise direction to loosen the chuck on the spindle. The chuck can then be unscrewed by hand.
- Retightening a Loose Chuck: If the chuck becomes loose or develops a wobble after reinstallation, or if the chuck screw loosens causing the jaws to bind, follow these steps: Insert a hex key into the chuck and tighten it securely. Tap the hex key sharply with a mallet in a clockwise direction to tighten the chuck on the spindle. Open the chuck jaws and remove the hex key. Finally, tighten the chuck screw using a #2 screwdriver (turn counter-clockwise as it has a left-handed thread).
Maintenance Features:
- General Maintenance: When servicing, use only identical replacement parts to avoid hazards or product damage. Do not use solvents for cleaning plastic parts, as plastics are susceptible to damage from commercial solvents. Use a clean cloth to remove dirt, dust, oil, and grease. Avoid contact with brake fluids, gasoline, petroleum-based products, or penetrating oils, as these chemicals can damage, weaken, or destroy plastic. Do not abuse power tools or attempt to modify them, as this can lead to injury and void the warranty.
- Lubrication: All bearings in this tool are pre-lubricated with a high-grade lubricant sufficient for the unit's normal lifespan. No further lubrication is required.
- Battery Charging: The 12V Ni-Cd battery should only be charged with the supplied charger (#134463). Place the discharged battery in a dry location near a 110–120V 60 Hz electrical outlet. Slide the battery charging cap (#134459) onto the battery, ensuring the keys align with the grooves. Insert the transformer plug into the charging cap and plug the transformer into the wall receptacle. The green indicator light turns ON when the charger is "live." The red indicator light turns ON when the charging cap is properly installed onto the battery. If the red light does not come on, check the cap installation and electrical outlet. The green light turns ON when the battery is fully charged. The battery should be left on the charger for 5 hours or until the green light indicates full charge. It is normal for the charger to hum and be warm during operation. Do not charge batteries when the work area or battery temperature is below 0°C (32°F) or above 45°C (113°F). Unplug the charger when not in use and before cleaning.
- Battery Safety: Do not store or carry the battery in a way that allows metal objects to contact the exposed metal end, as this can cause short circuits, fire, or injury. Never attempt to open the battery. If the housing breaks or cracks, discontinue use and do not recharge. Do not charge a wet or corroded battery. In case of minor leakage, wash skin immediately with soap and water, and neutralize with a mild acid like lemon juice or vinegar. If liquid contacts eyes, flush with clean water for at least 10 minutes and seek medical attention. The battery liquid is slightly acidic. Do not incinerate the battery, as it can explode.
- Charger Safety: Do not use an extension cord; plug the charger directly into a standard 120V 60 Hz electrical outlet. Do not use the charger in wet or damp conditions, near sinks or tubs, or immerse it in water. Keep the cord away from hot surfaces and do not let it hang over edges. Do not use the charger for batteries other than the cordless drill batteries, as other batteries may explode. Do not operate a damaged charger; replace the cord and plug immediately. If the charger has received a sharp blow, been dropped, or otherwise damaged, have a qualified technician examine and repair it. Do not disassemble the charger.
- Battery Pack Recycling: To preserve natural resources, recycle or dispose of batteries properly. Rechargeable batteries contain chemicals and metals harmful to the environment and should not be disposed of in household garbage or landfill sites. Call 1-800-822-8837 for the nearest RBRC battery recycling location.
Safety Warnings:
- Always read the entire manual before using the tool.
- Wear eye protection (safety goggles conforming to CSA requirements or ANSI Z87.1) at all times. Prescription eyeglasses are not a substitute for proper eye protection.
- Wear hearing protection, especially during extended or noisy operation.
- Wear a dust mask designed for dusty environments when operating the tool.
- Be aware that dust from power sanding, sawing, grinding, drilling, and other construction activities may contain chemicals known to cause cancer, birth defects, or other genetic abnormalities. Work in well-ventilated areas and use approved safety equipment.
- Ensure proper circuit protection (120V AC, 15AMP circuit with time-delayed fuse or circuit breaker). Replace damaged power cords immediately.
- Keep the work area clean and well-lit.
- Do not operate power tools in explosive atmospheres.
- Keep children and bystanders away.
- Power tool plugs must match the outlet; do not modify plugs or use adapter plugs with grounded tools.
- Avoid body contact with earthed or grounded surfaces.
- Do not expose power tools to rain or wet conditions.
- Do not abuse the cord; keep it away from heat, oil, sharp edges, or moving parts.
- Use an extension cord suitable for outdoor use when operating outdoors.
- If operating in damp locations, use a residual current device (RCD) or ground fault circuit interrupter (GFCI) protected supply.
- Stay alert and use common sense; do not operate while tired or under the influence of drugs, alcohol, or medication.
- Prevent unintentional starting by ensuring the switch is off before connecting to power or battery pack.
- Remove any adjusting key or wrench before turning the tool on.
- Do not overreach; maintain proper footing and balance.
- Dress properly; avoid loose clothing, jewelry, or long hair near moving parts.
- If dust extraction/collection facilities are provided, ensure they are connected and properly used.
- Do not force the power tool; use the correct tool for the application.
- Do not use the tool if the switch does not turn it on and off.
- Disconnect power/battery pack before making adjustments, changing accessories, or storing.
- Store idle power tools out of reach of children and untrained users.
- Maintain power tools; check for misalignment, binding, breakage, or other conditions affecting operation.
- Keep cutting tools sharp and clean.
- Use the power tool, accessories, and bits according to instructions and working conditions.
- Hold power tools by insulated gripping surfaces when cutting or driving into areas with hidden wiring or the tool's own cord.
- Only recharge with the manufacturer-specified charger.
- Use only specifically designated battery packs.
- When the battery pack is not in use, keep it away from metal objects that could short the terminals.
- If liquid is ejected from the battery under abusive conditions, avoid contact. If contact occurs, flush with water and seek medical help if it contacts eyes.
- Have the tool serviced by a qualified repair person using identical replacement parts.
- Secure the workpiece with clamps or a vice.
- Ensure no nails or foreign objects are in the workpiece.
- Remove the battery from the tool before installing or removing a drill bit.
- Do not drill material too small to be securely held.
- Keep hands out of the path of the drill bit.
- Ensure the spindle has come to a complete stop before touching the chuck or changing the drill bit.
- Always ensure the chuck and drill bit are firmly tightened before starting.
Warranty:
This product comes with a 3-Year Limited Warranty against defects in material and workmanship. Defective products will be repaired or replaced free of charge with proof of purchase. Normal wear, damage due to abuse, mishandling, or unauthorized repairs are not covered. The warranty does not apply to accessories. This warranty provides specific legal rights, which may vary by state.
For technical and product support or parts, call 1-866-FIXTOOL (1-866-349-8665) Monday – Friday from 9am to 5pm Eastern Standard Time.