The device is a Vintage Wooden AM/FM Radio with Bluetooth & Aux In, model number RAD-V1. It is designed to provide audio playback through various sources, including AM/FM radio, Bluetooth, and an auxiliary input.
Function Description
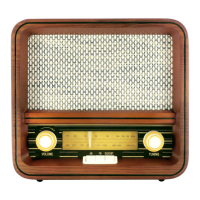
The primary function of this device is to serve as an audio player with multiple input options. It features a classic wooden design, emphasizing a vintage aesthetic.
- AM/FM Radio: The radio allows users to tune into both AM and FM frequencies.
- Bluetooth Connectivity: It supports Bluetooth for wireless audio streaming from compatible devices.
- Auxiliary Input: An AUX IN jack allows for wired connection of external audio devices.
Important Technical Specifications
- Frequency Range:
- AM: 530-1700KHz
- FM: 88-108MHz
- Power Source: AC 120V ~ 60 Hz
- Power Consumption: 9W
- Antennas:
- AM: Built-in Ferrite Bar
- FM: External Antenna
- Speaker: 3.5 Dynamic type 5W x 2
- Bluetooth Version: 4.1
Usage Features
The device is designed for straightforward operation with easily accessible controls.
Power Operation
- Turning On: Press the "POWER" switch located at the back of the unit to the "I" position.
- Turning Off: Press the "POWER" switch at the back of the unit to the "O" position.
Radio Operation
- Select Radio Mode: Press the "RADIO/BT" button to switch to Radio mode.
- Select Band: Press either the "AM" or "FM" button for the desired radio band.
- Tune Station: Rotate the "TUNING" control to find the desired radio station.
- Adjust Volume: Rotate the "VOLUME" control to set the desired listening level.
- AM Antenna: The AM bar antenna is internal. If AM reception is poor, slightly reposition the cabinet to find the strongest signal.
- FM Antenna: The FM wire antenna is located on the back cabinet. Adjust its position and direction as needed for optimal reception.
Bluetooth Operation
- Select Bluetooth Mode: Press the "RADIO/BT" button to switch to Bluetooth mode. An activation sound will confirm the mode change.
- Pair Device: On your audio device, enable Bluetooth and search for "MTFUSE1" to pair.
- Confirmation: A short confirmation sound will play once your device is successfully paired.
- Play Music: Begin playing music from your device.
- Adjust Volume: Rotate the "VOLUME" control to set the desired level.
- Connect Cable: Use a 3.5mm auxiliary cable to connect your external audio device to the "AUX IN" jack on the unit.
- Play Music: Start playing music from your connected device.
Note: The AUX IN connection has the highest priority. When an auxiliary cable is plugged in, it will automatically override AM/FM and Bluetooth modes. To resume using other functions, unplug the auxiliary cable.
Maintenance Features
The manual provides important safeguards and recommendations for maintaining the device and protecting furniture.
Important Safeguards
- Read and Retain Instructions: Always read and keep the user manual for future reference.
- Heed Warnings: Pay attention to all warnings on the product and in the instructions.
- Follow Instructions: Adhere to all operating and use instructions.
- Cleaning: Unplug the product before cleaning. Use a damp cloth; avoid liquid or aerosol cleaners.
- Attachments/Accessories: Use only manufacturer-recommended attachments and accessories to prevent hazards or damage.
- Water and Moisture: Do not use the product near water or in damp environments.
- Ventilation: Ensure proper ventilation. Do not block cabinet slots or openings, and avoid placing the product on soft surfaces or in enclosed spaces without adequate airflow.
- Power Sources: Operate only from the specified power source (120V 60Hz AC).
- Power Cord Protection: Route power cords carefully to prevent them from being walked on or pinched.
- Protective Attachment Plug: The product has an attachment plug with overload protection. If replacement is needed, use a manufacturer-specified plug with the same protection.
- Lightning Protection: Unplug the unit from the outlet and disconnect the antenna/cable system during lightning storms or when unused for long periods to prevent damage.
- Power Lines: When installing an external antenna, exercise extreme caution to avoid contact with overhead power lines.
- Overloading: Do not overload wall outlets, extension cords, or integral convenience receptacles.
- Liquid Spills: Never spill any liquid on the product.
- Servicing: Do not attempt to service the product yourself. Refer all servicing to qualified service personnel.
- Safety Check: After any service or repair, ensure a safety check is performed by a technician.
- Heat: Keep the product away from heat sources like radiators, heaters, fireplaces, cookers, and amplifiers.
- Disconnect Device: The plug serves as the disconnect device and should remain readily operable.
Protect Your Furniture
The unit is equipped with non-skid rubber feet to prevent movement. These feet are made from non-migrating rubber. However, certain furniture polishes, wood preservatives, or cleaning sprays may cause the rubber feet to soften and leave marks. To prevent damage, it is strongly recommended to apply small self-adhesive felt pads (available at hardware stores) to the bottom of the rubber feet before placing the product on fine wooden furniture.
Unpacking and Set Up
- Carefully remove the unit and all packing materials from the carton.
- Unwind and extend the AC power cord and FM antenna wire to their full length.
- Place the unit on a stable, level surface, away from direct sunlight, excess heat, dust, moisture, humidity, or strong magnetic fields.
- Connect the plug to an AC outlet.