NEVER LEAVE A FAN UNATTENDED WHILE OPERATING
OR WHILE CONNECTED TO A POWER SOURCE
© 2018, Pinnacle Climate Technologies, Inc. High Velocity Fan User’s Manual
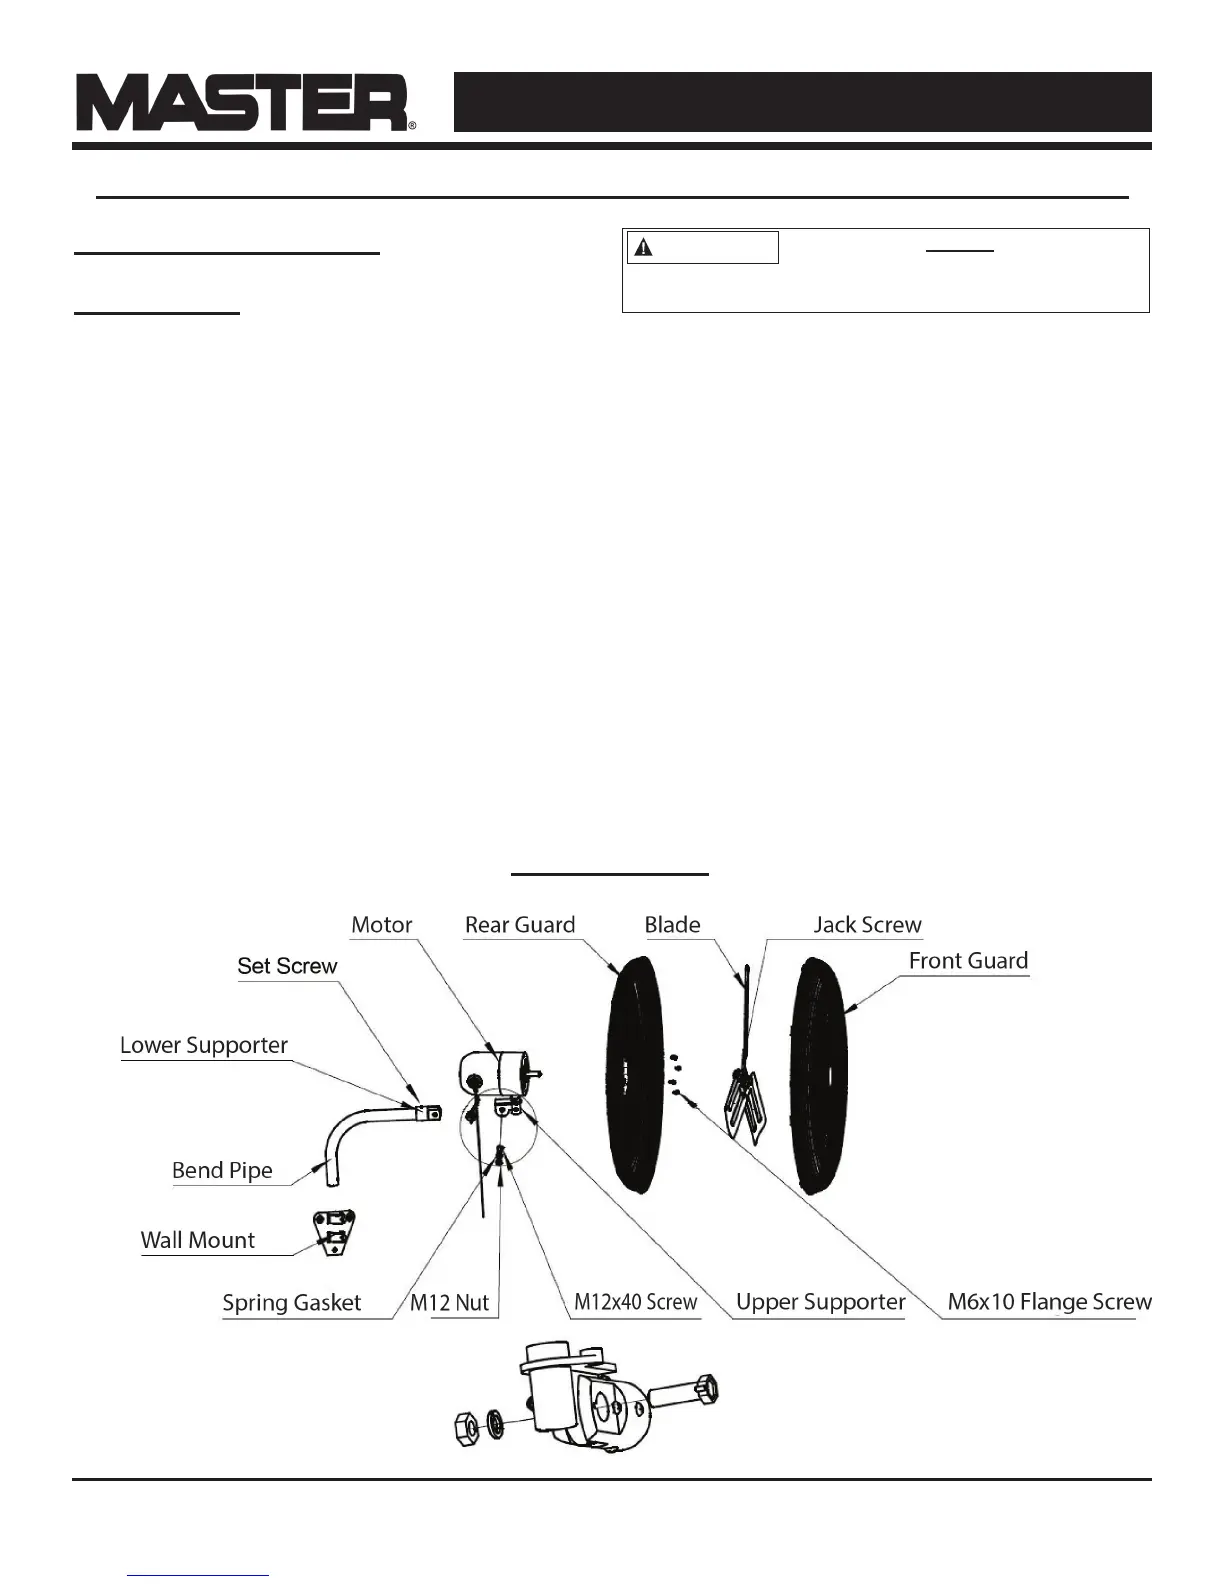
Wall Mount Installation
Tools Needed:
Phillips screwdriver
Hex wrench (included in accessory bag)
1. Fix the wall mount to the desired location.
2. Attach the bend pipe to the wall mount with
the provided screws. Ensure the screws are
tight.
3. Loosen the Phillips head set screw on the
lower supporter. Attach the motor to the bend
pipe by using the M12x40 screw, nut, and
washer to connect the lower supporter to the
upper supporter. Tighten the M12x50 screw
and the Phillips head set screw. Ensure the
screws are tight.
4. Remove the four (4) M6x10 Phillips head
ange screws from the motor.
5. Attach the rear guard to the motor with the
four (4) M6x10 Phillips head ange screws.
6. Attach the blade to the motor shaft by using
the hex wrench (in accessory bag). Make sure
the hex set screw is facing toward the motor
(hub down) when attaching.
7. Attach the front guard to the rear guard, using
the snap joint to tighten.
24" and 30" Wall Fans: MAC-24W / MAC-24WOSC / MAC-30W / MAC-30WOSC
3
The installer MUST be
certain that the support bracket is
mounted to a minimum of a 2x4" stud, and that it
is able to support 50 pounds continuously.
NOTE: The bolts and screws
are mix of metric and standard.
Exploded View