14. RESET
14.1 USING A TRANSMITTER
ARCO
FLUTE, KUADRO, KORT
VISIO Other transmitters...
01. If possible, bring the motor to the intermediate position.
02. Disconnect the power supply.
03. Connect as on the diagram.
04. Connect the power supply. Wait 30 seconds, the motor makes a signal: « ».Reset done
05. Disconnect the power supply.
06. Restore the connections (see diagram on section 5).
07. Reinstall the motor (see section 7).
14.2 USING COMMAND BUTTONS
01. Bring the motor in an intermediate position.
02. Press MENU for about 5 sec, until «rS»
appears on display
03. Press 2 time PREV / 9 times NEXT.
«29» appears on display
04. Press STOP. The display flashes, the
motor performs some movement
05. Press together PREV and NEXT for about
2 seconds until the motor indicates that the
reset was performed (1 moving up / down).
06. Reinstall the motor (see section 7).
01. Bring the motor in an intermediate position.
02. Holding down STOP, press PROG for
about 1 sec, until LEDs light
03. Press 2 time UP / 9 times DOWN.
04. Press STOP. The LEDs flash, the motor
performs some movement
05. Press together UP and DOWN for about 2
seconds until the motor indicates that the
reset was performed (1 moving up /
down).
06. Reinstall the motor (see section 7).
01. Bring the motor in an intermediate position.
02. Press MENU, «Menu rx» appears on
display
03. Press 2 time PREV / 9 times NEXT.
«29» appears on display
04. Press STOP. The display flashes, the
motor performs some movement
05. Press together PREV and NEXT for about
2 seconds until the motor indicates that
the reset was performed (1 moving up /
down).
06. Reinstall the motor (see section 7).
See the User manual of
the transmitter at
section:
«RECEIVER MENU -
Function 29 -
Receiver reset»
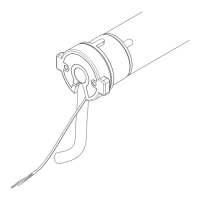
5 poles
cable
gray
brown
blue
yellow/green
black
WARNING: This procedure restores the factory settings of the device. This procedure must be carried out by qualified technical personnel. Once the "reset" is
performed, the technician must install this device again (following the procedure on section 07) and verify proper operation.
L
N
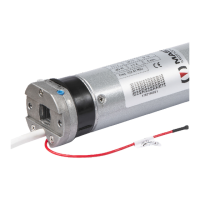
The control outputs of the Home Automation Control Unit (following H.A.C.U.) must be connected to the command inputs of the motor (GRAY and BLACK wires), replacing the manual
buttons. Consequently, the H.A.C.U. must comply with the rules of operation of the command buttons, depending on whether the command buttons work in PULSE mode (factory
setting) or in HOLD TO RUN mode (see section 14 " Operating logic of command buttons").
Rules that the H.A.C.U. must comply to control the device operating with buttons in PULSE mode.
a) The H.A.C.U. must not measure the current drawn by the command inputs of the device (which absorb less than 1 mA).
b) The H.A.C.U. must be connected to the device as shown, substituting the command buttons with the outputs of the H.A.C.U..
c) To operate the motor, the H.A.C.U. must close contact (up or down) for more than 0.5 seconds (typically using a pulse duration of 1 second).
d) To stop the motor, the H.A.C.U. must close contact (up or down) for 0.5 seconds or less (typically using a pulse duration of 0.2 seconds).
At the time of this document printing, specific issues related to the connection between MASTER products and H.A.C.U. are not known (if you follow the rules above). However
MASTER disclaims any responsibility concerning the non-compatibility (even partial) with any H.A.C.U.. If the H.A.C.U. uses KNX protocols or similar, contact the vendors of home
automation controller informing them of the rules above. Probably the manufacturer of H.A.C.U. can provide appropriate interfaces to connect the device to the H.A.C.U..
16. INTERFACING WITH HOME AUTOMATION CONTROL UNIT
15. DISTANCE FROM MECHANICAL STOP
This function is available only if the upper limit switch has been learned by contact with a mechanical stop (using the
stoppers).
In this case, the motor will stop a few centimeters from the mechanical stop (only occasionally it will look for the stop to
automatically recalibrate the stroke). This parameter allows you to set the distance between the stop point and the
mechanical stop.
The factory sets the parameter at level 5.
N° of movements
Setting
1
2 - 3 - 4 - 5 - 6 - 7- 8
*
9
Minimum distance
Intermediate distances
Maximum distance
*factory setting
Other transmitters...
See the User manual of
the transmitter at
section:
«RECEIVER MENU -
Function 08»
10.1 UTILIZZANDO IL TRASMETTITORE (solo Atom e Leg)
ARCO
FLUTE, KUADRO, KORT
VISIO
01. Bring the motor in an intermediate position
02. Press MENU for about 5 sec, until «rS»
appears on display
03. Press 8 times NEXT.
«08» appears on display
04. Press STOP. The motor signals the current
value (1 to 9 movements)
05. Press NEXT the number of times equal to
the desired setting (1 to 9)
06. Press STOP. The motor signals the new
value (1 to 9 movements)
01. Bring the motor in an intermediate position
02. Holding down STOP, press PROG for about
1 sec, until LEDs light
03. Press 8 times DOWN.
04. Press STOP. The motor signals the current
value (1 to 9 movements)
05. Press DOWN the number of times equal to
the desired setting (1 to 9)
06. Press STOP. The motor signals the newt
value (1 to 9 movements)
01. Bring the motor in an intermediate position
02. Press MENU, «Menu rx» appears on
display
03. Press 8 times NEXT.
«08» appears on display
04. Press STOP. The motor signals the current
value (1 to 9 movements)
05. Press UP the number of times equal to the
desired setting (1 to 9)
06. Press STOP. The motor signals the new
value (1 to 9 movements)
09
 Loading...