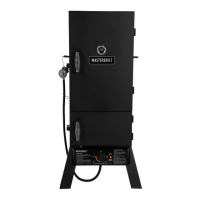
8
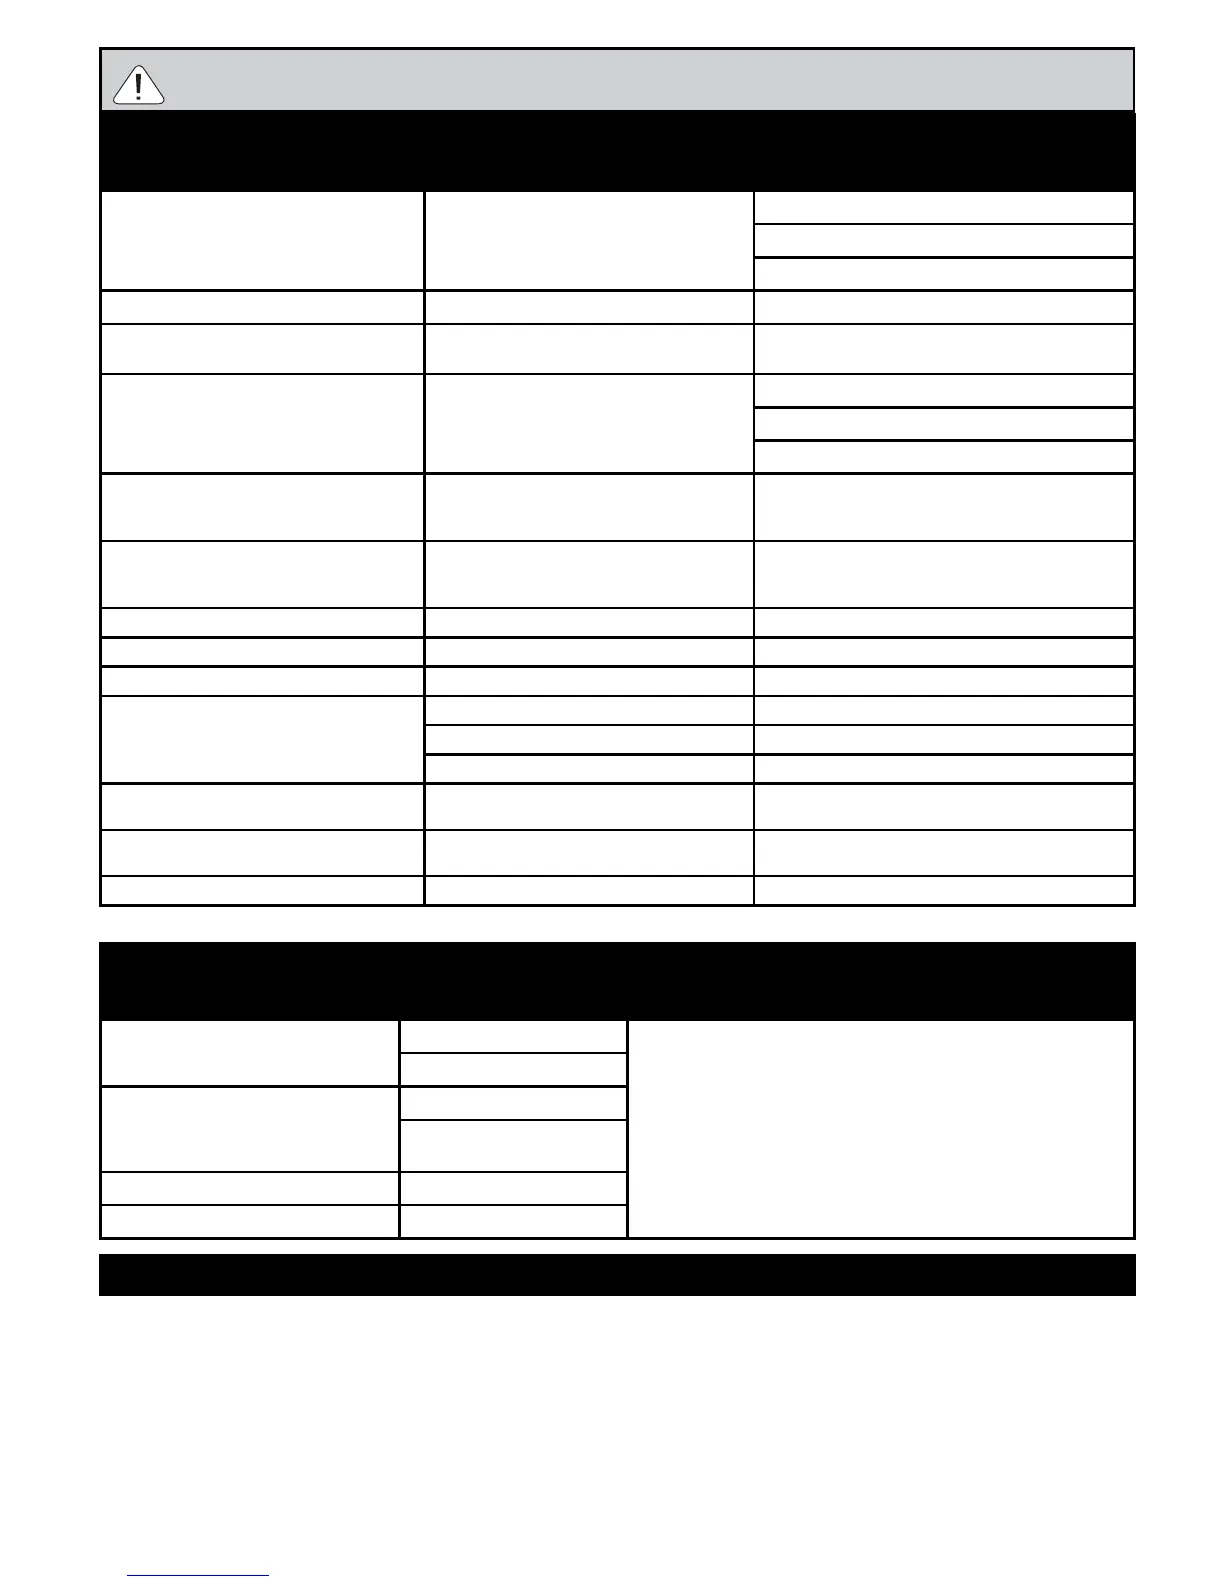
TROUBLESHOOTING GUIDE
Symptom Cause Possible Solution
Gas leaking from cracked, cut or burned hose Damaged hose Turn o gas at LP cylinder.
Replace hose.
Contact Masterbuilt at 1.800.489.1581.
Gas leaking from LP cylinder Failure due to rust or mishandled equipment Replace LP cylinder.
Gas leaking from gas cylinder valve Failure of valve due to rust, mechanical failure or mishandled
equipment
Turn o gas cylinder valve and return cylinder to gas provider/supplier.
Gas leaking between LP cylinder and regulator connection Improper installation, connection not tight enough, damaged
threads or bad rubber seal
Turn o gas cylinder valve, then re-attach regulator to cylinder.
Turn o gas cylinder valve and return cylinder to gas provider/supplier.
Visually inspect rubber seal for damage.
Fire under control panel Fire in tube of burner due to burner blockage Turn o both smoker control knob and gas cylinder valve. Once the re is
out and burner has cooled, remove and inspect burner for spiders, nests,
rust or other debris.
Grease re or excessive/continuous ame Grease build up on or around burner area Turn o both smoker control knob and gas cylinder valve. Allow ames
to extinguish and time for unit to cool down. Clean grease/food particles
from/around burner or burner area and surrounding surfaces.
Flame does not remain lit after igniting* Flame sensor wire is loose Turn o gas. Disconnect LP cylinder. Tighten ame sensor wire to valve.
Low ame output* Out of fuel Rell or replace with full LP cylinder.
Flames blow out* Low on LP gas Rell LP cylinder.
Flare-up Excessive grease buildup Clean burner and inside unit.
Excessive fat on meat Trim fat o of meat.
Cooking temperature too high Adjust or lower temperature accordingly.
Persistent grease re Grease trapped by food buildup around burner system Turn smoker control knob and gas cylinder valve o. Allow re to
extinguish and the unit to cool down. Once cool, remove and clean parts.
Flashback (re in burner tube) Burner and/or burner tube has blockage Turn smoker control knob and gas cylinder valve o. Clean burner and/
or burner tube.
Slower than expected cooking times* Valve not properly aligned to burner Check to see if valve is centered in burner tube.
WARNING
In the event of a gas leak that cannot be stopped, or if a
re occurs due to a gas leak, contact the re department.
TROUBLESHOOTING SOLUTIONS: “CAUSES” LOW OR NO FLOW/VAPOR LOCK/EXCESS FLOW
Symptom Cause Possible Solution
Burner doesn’t light after pressing ignitor button Low/no gas ow 1. Turn smoker control knob to “O” position.
2. Turn gas cylinder valve knob to OFF.
3. Disconnect regulator from cylinder to relieve vapor lock.
4. Reconnect regulator to cylinder by hand turning until tight.
5. Slightly open the gas cylinder valve slowly and then open further by turning 1 full
turn.
6. You are now ready to light the smoker.
7. Turn the smoker control knob to high and light with ignitor.
Vapor lock at coupling nut to LP cylinder
Low ame output Excess ow valve tripped
Vapor lock at coupling nut/LP cylinder
connection
Flames blow out Excess ow valve tripped
Slower than expected cooking times Vapor lock
*
Also seeTroubleshooting solutions: “Causes” Low or No Flow/Vapor lock/Excess ow below.
FAQ
• Was the temperature setting of the unit adjusted from a higher setting to a lower setting? For example, was the unit at 275 and changed to 225?
If yes, was the unit allowed to stabilize for 5 minutes at the new temperature setting before opening/closing the door(s)? If no, allow the unit to stabilize between set point changes for 5 minutes before opening
and closing the door(s). During this transition period the ame is vulnurable to potential blow outs, under certain conditions, because the pressure inside the burner is reduced while the temperature sensor is
adjusting to the lower set point.
• Is the vent open?
If no, open the vent to allow more heat to exit the unit. This will cause the unit to require more heat input to maintain its set point which will cause the unit to increase the ame height creating a stronger ame.
• Is the water bowl lled?
If no, ll the water bowl. This will cause the unit to require more heat input to maintain its set point which will cause the unit to increase the ame height creating a stronger ame.
• Is outside wind greater than 5mph?
If yes, and all the above solutions did not improve the performance, raise the set point of the unit in order to cook in those conditions.
 Loading...