headline bars
continuation tabs
notes
warnings
headline bars
continuation tabs
notes
warnings
18
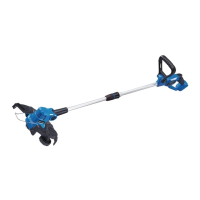
model no. 060-1349-2 | contact us 1-800-689-9928
1.
Press the two release tabs on the spool base and remove the spool retainer by pulling it straight out
(fig 11).
2.
Remove the spool. Use a clean cloth to clean the inner surfaces of the spool retainer and spool base.
3.
Check the spool retainer, spool, and spool base for worn parts.
4.
Take approximately 15’ (4.5 m) of 0.08” (2.0 mm) diameter cutting line. Fold the line in half and then adjust it so
that one end is 4 1/2” (11 cm) longer than the other
(fig 12)
.
5.
Hook the folded end of the cutting line onto either of the slots in the spool.
6.
Wind the line, in two even and tight layers, onto the spool. Wind the line in the direction indicated on the spool.
7.
Place the ends of the line in the two opposite notches in the spool, with approximately 5” (12.5 cm) protruding from
each side
(fig 13).
8.
Align the notches of the spool from which the lines protrude with the eyelets in the spool retainer and position the
spool in the retainer
(fig 14).
9.
Holding the spool and spool retainer, grasp one end of the line and pull it to release the line from the notch in the
eyelet
(fig 15).
Repeat with the other end.
10.
With the spool base facing downward, align the slots in the spool retainer with the tabs on the spool base and
press the retainer evenly down until it snaps into place
(fig 16).
OPERATING INSTRUCTIONS
NOTICE:
• Always clean the spool retainer and spool base before reassembling the trimmer head.
• Failure to wind the line in the direction indicated will cause the trimmer head to operate incorrectly.
• Make sure that the tabs on the spool base snap into place or the spool will come out during operation.
• After each line replacement, tap the bump knob on the ground several times to check whether the cutting line can be released
normally before trimming grass.
 Loading...